DIY Induction Bolt Heater: Unlock Precision Heating
Imagine transforming a challenging, time-consuming task into a simple, efficient process. With a DIY induction bolt heater, you can do just that.
If you’ve ever struggled with loosening stubborn bolts or spent hours applying heat manually, this innovative tool could be your new best friend. By harnessing the power of electromagnetic induction, you can heat bolts quickly and evenly, making removal a breeze.
You’ll not only save time but also reduce the risk of damaging the surrounding materials. You’ll discover how to build your own induction bolt heater, step-by-step, using affordable materials. Get ready to revolutionize your DIY toolkit and tackle those tough projects with ease. Your path to becoming a more efficient DIY enthusiast starts here. Curious to know more? Keep reading to unleash the full potential of this game-changing device.
What Is An Induction Bolt Heater?
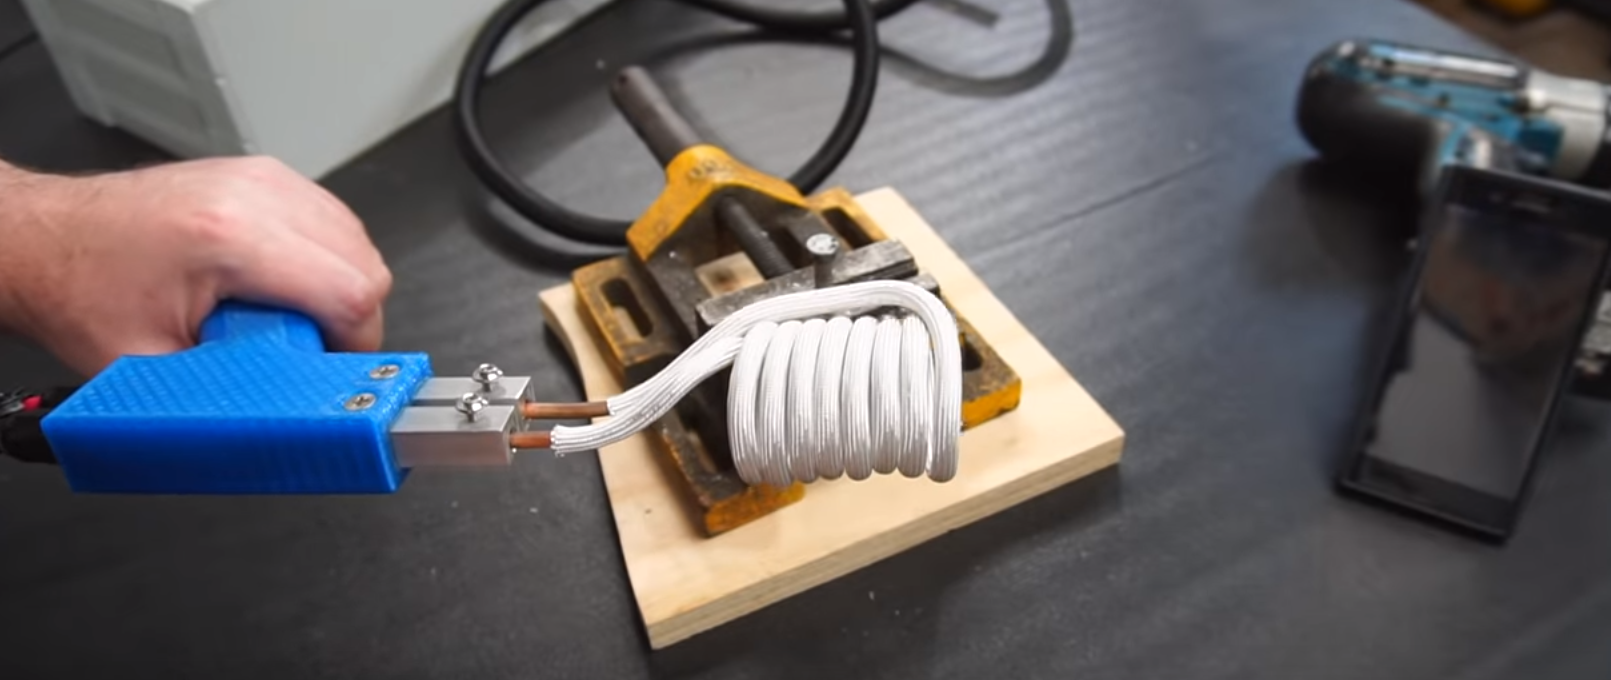
An induction bolt heateris a tool. It uses heat to loosen bolts. This tool is very useful. It works by creating a magnetic field. This field heats the bolt. The bolt gets hot and expands. When bolts are tight, they need heating. This makes them easy to remove.
The process is safe and quick. Unlike other methods, it doesn’t harm the bolt. People use it for big machines. It is also used in car repairs. The heater uses electricity. So, it is clean. The tool is easy to use. Even beginners can use it.

Credit: www.popularmechanics.com
Benefits Of Precision Heating
Precision heating is very important for bolts. It makes them easier to remove. Heat helps expand the bolt. This reduces the grip of the bolt. Induction heating is a safe way to heat. It does not use open flames. This reduces fire risks. Controlled heating is possible with induction. This means less damage to surrounding parts. Energy efficiency is another benefit. Induction heating uses less power. This makes it cheaper. Speed is also a benefit. Induction heaters work fast. This saves time.
Precision heating helps in many ways. It makes work safer. It saves money. It saves time. DIY induction heaters are easy to use. They help in precision heating tasks. They are a smart choice.
Choosing The Right Materials
Building a DIY induction bolt heater needs specific materials. A coil is crucial for creating heat. Copper wire is often used for the coil. It conducts electricity well. A power source is necessary. It supplies energy to the coil. Safety gear is also vital. Gloves and goggles protect you. Heat-resistant materials ensure durability. Choose carefully. This makes your heater work well.
Safety is very important. Electricity can be dangerous. Always wear protective gear. This includes gloves and goggles. Heat can cause burns. Keep a safe distance from the coil. Proper ventilation is needed. This prevents inhaling fumes. Insulate wires properly. This avoids electric shocks. Check equipment regularly. Make sure everything is working. Follow instructions strictly. This keeps you safe.
Step-by-step Construction
The coil is the heart of the heater. You need copper wire. Bend the wire into a spiral shape. The spiral should be tight. Ensure each loop is evenly spaced. A small gap is important. This allows for heat flow. A plastic or wooden frame can help. It keeps the coil in place. Don’t forget to secure the ends.
Choose a suitable power source. A 12-volt battery works well. Connect the battery to the coil. Use thick wires for safety. Make sure the connections are tight. This prevents sparks. A fuse is a good idea. It protects the circuit from overload. Always check connections twice.
Controls help manage the heater. A simple switch can turn it on or off. Add a knob to adjust heat levels. An LED can show when it’s on. All controls should be easy to reach. Insulate the wiring for safety. Use a plastic box to hold everything. Make sure it’s ventilated.
Testing And Calibration
Testing the induction bolt heater is very important. It ensures accuracy in its operation. Use a thermometer to check the heat. Make sure the heater reaches the correct temperature. Calibrate the heater regularly. This keeps it working well. Follow the steps in the manual. If you skip steps, the heater might not work right. Keep the heater clean for best results.
If the heater is not working, check connections. Loose wires can be a problem. Inspect the power source. Sometimes, the power is not enough. Make sure the heater is on a flat surface. This helps with heat distribution. If the heater still fails, refer to the manual. It may have specific instructions. Always be careful when checking the heater. Safety is very important.

Credit: www.youtube.com
Applications In Various Industries
Induction bolt heaters help in fixing car parts. They heat bolts quickly. This makes it easy to remove old bolts. This tool is helpful in car repair shops. Workers save time and effort. It is safe and does not harm other car parts. Using these heaters means fewer broken bolts. This tool is a good choice for car repair jobs. It helps in keeping cars safe and running well.
Induction heaters are useful in factories. They heat bolts fast without flames. This makes the workspace safe. Workers use them to tighten or loosen bolts. This process is quick and saves time. Factories make more products with these heaters. They also use less energy. This is good for the environment. Factories benefit from having these tools.
Maintenance And Upkeep
Maintaining a DIY induction bolt heater involves regular checks for wear and tear. Clean the device after every use. Ensure connections are tight to avoid overheating. Regular inspection extends its life and keeps it efficient. Proper upkeep guarantees reliable performance, saving time and effort during repairs.
Routine Checks
Regular checks keep your induction bolt heater working well. First, always inspect the power cord for any signs of wear or damage. A broken cord can be dangerous. Next, make sure the control panel is clean and dust-free. Dust can cause problems. Check the heating elements for dirt or rust. Clean them gently if needed. Finally, listen for unusual noises during operation. Strange sounds can mean trouble.
Prolonging Equipment Life
Taking care of your heater helps it last longer. Always store it in a dry place. Moisture can cause damage. Use a cover to protect it from dust and dirt. Don’t overload the heater with too many tasks. Let it cool down between uses. Proper care keeps it working for years.
Credit: hackaday.com
Frequently Asked Questions
How Does An Induction Bolt Heater Work?
An induction bolt heater uses electromagnetic fields to heat bolts. It generates heat quickly and evenly, minimizing damage risk. This method is efficient for loosening stubborn bolts during maintenance or repairs.
Is DIY Induction Bolt Heater Safe?
DIY induction bolt heaters are generally safe when used correctly. Follow instructions carefully and ensure proper safety gear. Avoid using near flammable materials and maintain a safe distance while operating.
What Materials Are Needed For A DIY Induction Bolt Heater?
You’ll need an induction coil, power supply, and heating elements. Basic tools like pliers and soldering iron are useful. Ensure quality materials to enhance efficiency and safety in your DIY project.
Can An Induction Bolt Heater Save Time?
Yes, induction bolt heaters save time by heating bolts quickly. This reduces labor time in loosening stubborn bolts. Faster heating means quicker maintenance and repairs, enhancing overall productivity.
Conclusion
Building your own induction bolt heater can be rewarding. It saves money. You learn new skills. Plus, it makes bolt removal easier. Remember to follow safety guidelines carefully. Always wear protective gear. Use quality materials for best results. This project suits enthusiasts and beginners alike.
With patience, success is within reach. Experiment with different designs. Share your experiences with others. Inspire them to try it too. A DIY induction bolt heater offers practical benefits. Tackle tough bolts with confidence. Enjoy the satisfaction of your handiwork.
Keep learning and improving your DIY skills.