

Have you ever found yourself needing to heat metal quickly and efficiently, but traditional methods just aren’t cutting it? Imagine having the power to create intense heat in the palm of your hand, all with a device you build yourself.
That’s the magic of a DIY induction heater. This isn’t just another project; it’s a gateway to unlocking a new level of creativity and innovation in your workshop. Picture yourself effortlessly brazing, soldering, or even hardening metals, all without the mess and fuss of open flames.
With a DIY induction heater, you have the potential to revolutionize the way you approach metalworking. The best part? You don’t need to be an expert electrician or a seasoned engineer to make it happen. This guide will walk you through the simple steps, making it easy for anyone to get started. Curious about how this intriguing device works and how you can build one yourself? Stick around, and you’ll discover not only the step-by-step process but also tips and tricks to ensure your project is a smashing success. Get ready to transform your toolkit and take your projects to the next level.

Credit: www.youtube.com
Understanding Induction Heating
Induction heating is a way to heat metal without touching it. It works by using magnetic fields. These fields make metal heat up. The metal gets hot because of electric currents inside it. These currents are called eddy currents. Eddy currents move fast in the metal. This movement makes the metal hot. Induction heating is clean and safe. No flames or smoke. It heats metal fast and evenly. It’s very useful for many things.
Induction heating helps in many places. It is used in factories. Metal parts are heated quickly. This saves time and energy. It also helps in cooking. Induction stoves are fast and safe. Less energy is used. Money is saved. Induction heating is great for making metal tools. They become strong and last long. It’s also used in welding and melting metal. Benefits include speed, safety, and energy saving. Many people use induction heating today.
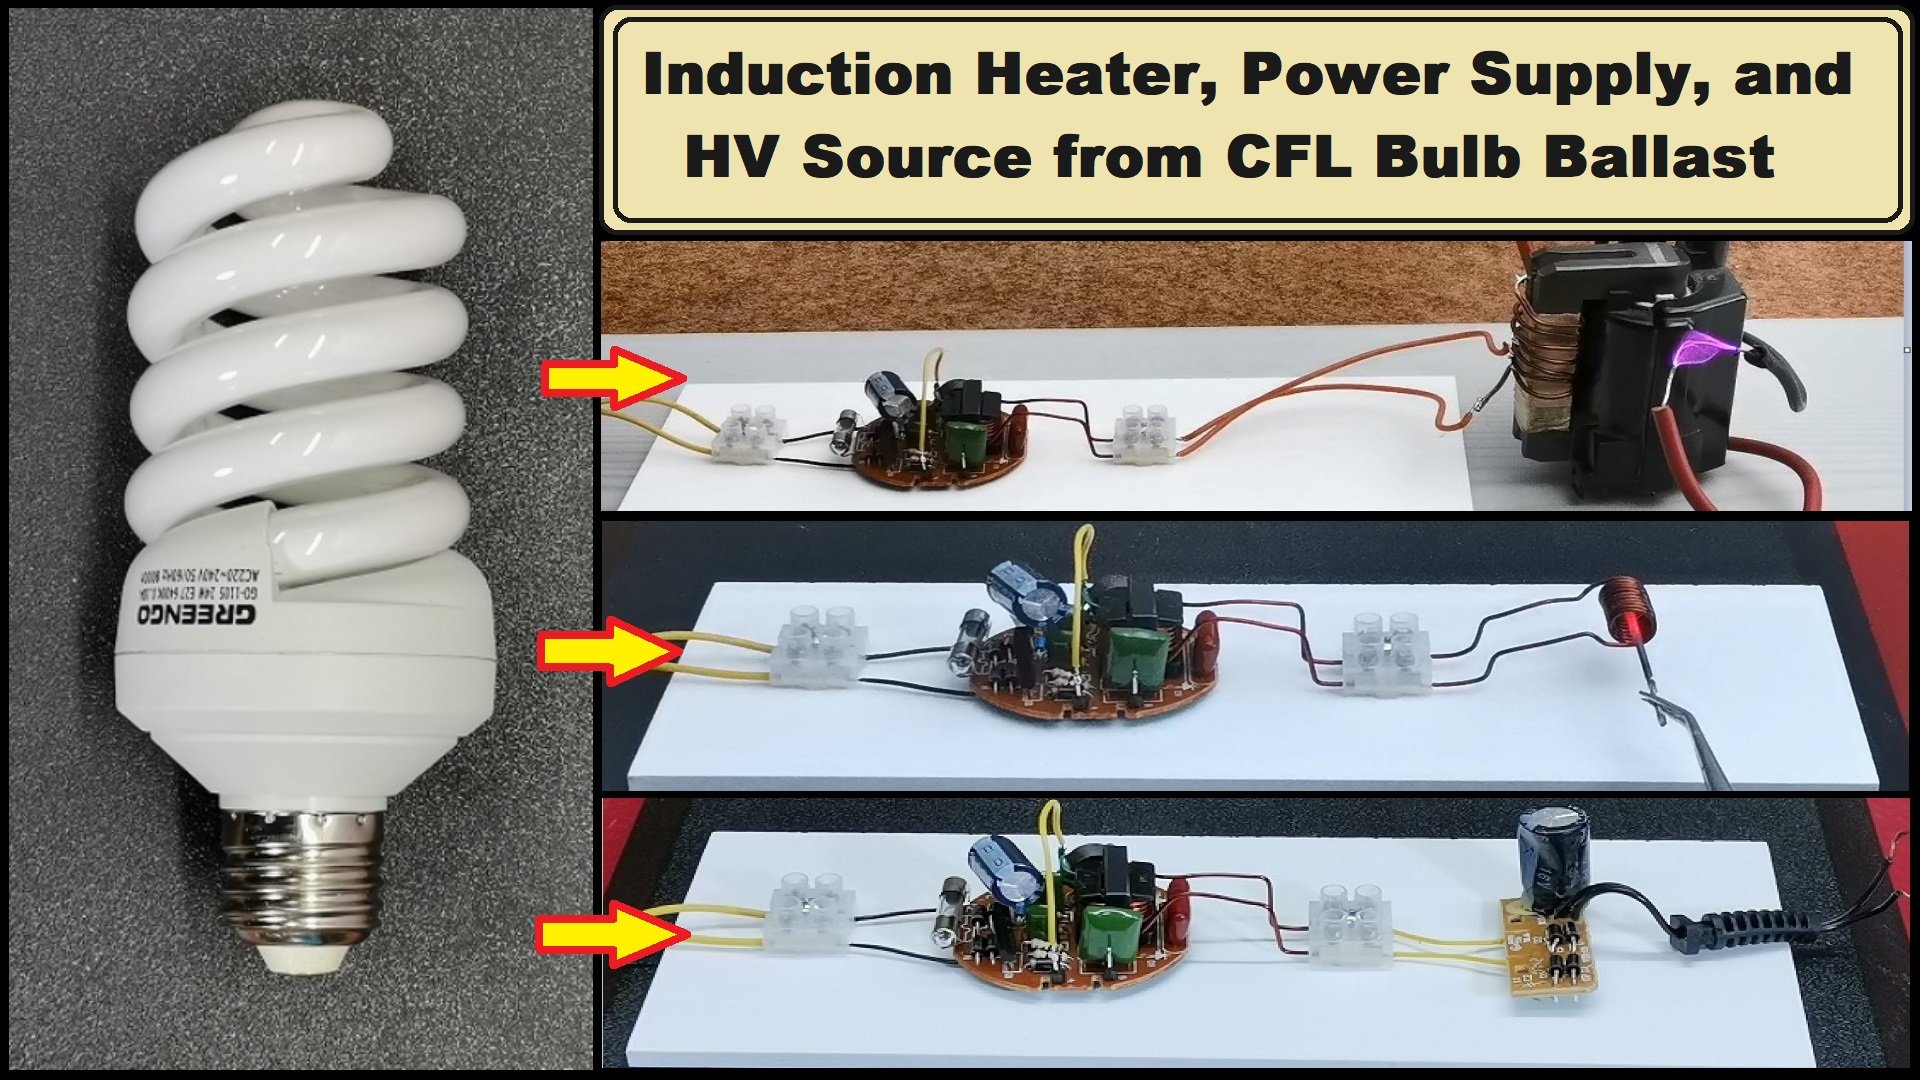
Components Required
Building a DIY induction heater needs some key parts. First, you need a power supply. This gives electricity to the heater. Next, get a copper coil. This coil helps to create heat. A capacitor is also needed. It stores energy for the heater. You will need transistors. They help control the electricity flow. A resistor is important too. It helps in controlling the current.
You might want some extra parts. A fan can cool down the device. It keeps the heater safe from overheating. Adding a temperature sensor is a good idea. It checks the heat level. A case can protect the heater. It holds all parts together. Consider using a switch. It makes turning the heater on and off easy. These add-ons help improve your heater’s safety and usability.
Building The Induction Heater
The circuit design is the heart of the induction heater. Safety is key. Use proper tools to make connections. Choose the right components. Capacitors are important. They help in controlling the flow of electricity. Coil is another key component. It produces the heat. Connect it carefully. Transistors control the power. They need to be connected properly. Diodes protect the circuit. Place them correctly. Follow the design closely. Mistakes can cause problems. Double-check connections.
Begin with the base structure. Secure all parts. Attach the coil first. Ensure it is firm. Connect the circuit parts. Use wires neatly. Check each connection twice. Power source is last. Attach it carefully. Test the setup. Make sure it works. Safety checks are important. Avoid loose wires. Inspect the heater. Ensure it is stable. Adjust parts if needed. Keep it safe. Enjoy your new heater!
Safety Precautions
High voltage can be very dangerous. Always keep your hands dry. Make sure not to touch any exposed wires. Use insulated tools for safety. Keep your work area clean and dry.
Wearing the right gear is important. Use rubber glovesto protect your hands. Wear safety goggles to protect your eyes. A rubber mat can keep you safe from electric shocks.
Testing And Calibration
Begin by checking all parts of the induction heater. Make sure wires are connected properly. Check the power source. Turn the heater on. Observe if it heats up quickly. Watch for signs of overheating. Listen for strange noises. Check the temperature with a thermometer. Ensure it is safe to touch. Make adjustments if needed. Repeat the process until satisfied. Safety first!
Adjust settings for better heating. Try different power levels. Test with various materials. Find the best setup. Measure efficiency with a timer. Keep track of changes. Note the best results. Make small tweaks. Test again. Optimize for speed and safety. Balance is key!

Credit: www.instructables.com
Troubleshooting Tips
Induction heaters can face several common problems. Sometimes, the heater does not turn on. Check if the power supply is working. Look for any loose wires. Inspect the connections. The heater may also overheat. This can happen if the coil is faulty. Ensure the coil is in good condition.
Fixing these issues is usually simple. Tighten loose wires. Replace the coil if necessary. If the heater still does not work, check the control circuit. Sometimes, the circuit may be damaged. Replacing damaged parts can solve the problem. Always follow safety guidelines. Wear protective gear when fixing the heater.
Enhancing Efficiency
Boosting power output can be simple. Use thicker wires. They carry more current. Improve coil design. A better design heats faster. Reduce resistance. Lower resistance means more power. Select proper materials. Some materials heat better. Optimize frequency. Adjusting frequency improves efficiency. Check connections. Loose connections lose power. Test components regularly. Faulty parts reduce output.
Save energy by using efficient coils. Coil design matters. Maintain proper temperature. Overheating wastes energy. Insulate the heater. Insulation keeps heat inside. Use timers to control usage. This saves energy. Monitor power levels. High power uses more energy. Regular checks ensure efficiency. Clean parts work better. Adjust settings for minimal energy use. Less energy means lower costs.
DIY Projects Using Your Heater
An induction heater helps in melting metal. It can also be used for bending metal parts. This makes it great for making small tools. You can also use it to harden steel. This is helpful for making knives or blades. Always remember to wear safety gear while working.
The heater can be used for art projects. Melt metal to make sculptures or jewelry. It can heat glass to create unique art pieces. You can also remove rustfrom tools. This makes old tools look new again. Just be careful with the hot parts.
Credit: maker.pro
Frequently Asked Questions
How To Make An Electric Induction Heater?
To make an electric induction heater, gather a power supply, work coil, and induction circuit. Connect components properly, ensuring safety precautions. Test the setup with a metal object to verify heating efficiency. Always prioritize safety and follow detailed guides for assembly.
Do Induction Heaters Use A Lot Of Electricity?
Induction heaters are energy-efficient, using less electricity than traditional stoves. They heat quickly and precisely, reducing energy waste. Opt for induction cooking to save on electricity bills and enjoy faster cooking times. Proper usage and high-quality cookware enhance efficiency further.
What Happens If You Put Your Finger In An Induction Heater?
Placing a finger in an induction heater can result in burns or injury. The heater generates heat using electromagnetic fields. It’s crucial to keep body parts away from the device while it’s operational. Always follow safety instructions to avoid accidents and ensure proper usage.
Why Don’t More Blacksmiths Use Induction Heaters?
Induction heaters are costly and require significant power. Traditional blacksmithing techniques are more affordable and accessible. Many blacksmiths prefer the hands-on experience with traditional methods, valuing the skill and artistry involved. Induction heaters also require specific setups, which might not be feasible for small workshops.
Conclusion
Creating your own DIY induction heater can be rewarding. You gain practical knowledge and save costs. This project enhances your understanding of electronics. Remember, safety is crucial when working with electricity. Double-check connections and use protective gear. With patience, anyone can succeed in this DIY endeavor.
Enjoy the satisfaction of building something yourself. Share your experiences with friends. Inspire others to try their hand at this exciting project. Keep learning, keep experimenting, and embrace the world of DIY technology.