How to Replace a Water Heater Heating Element
To replace a water heater heating element, shut off power, drain the tank below the element, test the element with a multimeter, and install the exact voltage, wattage, and thread-size match only if it’s failed. Skip diagnosis and you can buy the wrong part, waste hours, or leave the heater still broken. This guide shows how to test the element first, choose the correct replacement, and swap it safely.
What a heating element does


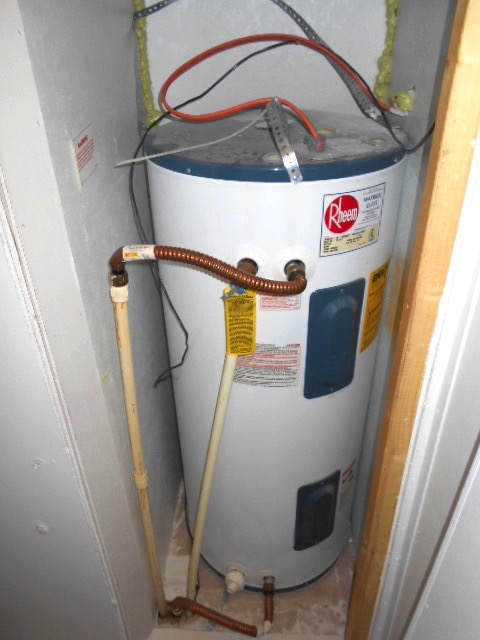
An electric tank water heater usually has two screw-in elements: an upper one and a lower one. The upper element gets priority, and the lower element does most of the recovery work after the top of the tank is hot. Common residential parts are threaded screw-in designs with wattage and voltage printed on the flange.
Diagnosis comes before replacement. A dead lower element often shows up as lukewarm water that runs out faster than usual, while a failed upper element can leave you with no hot water at all. Sediment, corrosion, a tripped high-limit switch, or a bad thermostat can look similar, so do not buy parts until the failed circuit is identified.
What you’ll need
- Multimeter with resistance and continuity settings
- Replacement heating element that matches voltage, wattage, length, shape, and thread style
- Water heater element wrench, 6-point socket, or socket-style removal tool that fits the element hex
- Screwdriver for the access panel and thermostat cover
- Bucket or hose for draining below the element
- Element gasket
- Towel or shallow pan for residual water
- Flashlight
Which element failed?
Start by deciding whether the upper or lower element is the likely fault. If the tank has no hot water at all, the upper element, thermostat, or high-limit switch is usually the better suspect. If the water starts hot and then turns cool sooner than normal, the lower element is more likely.
Say your shower water is hot for two minutes, then goes lukewarm while the tank still has power. That pattern points to the lower element or heavy sediment around it. If the water never gets hot after a reset, check the upper thermostat circuit and high-limit switch before replacing either element.
Can you replace it? Yes, if the tank is sound, the failed part is isolated to the element, and the opening is not badly damaged. Do not replace the element as the fix if the real problem is a bad thermostat, a tripped high-limit switch, heat-damaged wiring, or a tank that is already leaking at the shell or element opening. In those cases, the element swap may not restore hot water and can waste time or money.
Water heater heating element table
| Symptom | Likely failed part | Quick multimeter check | Replacement spec to match | When to stop DIY and call a pro |
|---|---|---|---|---|
| No hot water at all | Upper element, thermostat, or high-limit switch | Power off, wires removed, check element resistance and continuity; a good 4500 W, 240 V element often reads about 12.8 Ω | Match voltage, wattage, thread style, and physical length/shape | Breaker trips again, reset won’t hold, or thermostat wiring is heat-damaged |
| Hot water runs out quickly | Lower element | Power off and measure resistance; a good 4500 W, 240 V element should read about 12.8 Ω, while an open circuit usually indicates failure. | Match lower-element rating exactly, including screw-in style and gasket size | Tank is heavily scaled, or the element threads will not move without force |
| Lukewarm water and rumbling noise | Lower element with sediment buildup | Check for open circuit, then inspect for scale around the opening after draining | Match voltage and wattage; choose the same insertion length if the tank design requires it | Drain water is packed with scale, or the tank bottom is pitted |
| Only one element tests open | That element | Set the meter to ohms. Compare reading to R = V² / W; 240 V and 4500 W is about 12.8 Ω, while 240 V and 5500 W is about 10.5 Ω. Exact readings vary slightly by element tolerance. | Replace with the same wattage and voltage, and confirm the thread style | You cannot confirm the label on the old part or the tank plate is unreadable |
| Element will not loosen | Seized threads from corrosion or scale | Testing still shows failure, but removal torque is excessive | Match the physical size exactly if you replace it | The hex starts deforming, the tank wall flexes, or the flange begins to twist |
How to replace the heating element
-
Shut off power.
Switch off the dedicated breaker, then use lockout/tagout if available. Check the element terminals with a multimeter and confirm zero voltage before you touch any wire. -
Open a hot faucet.
Open a nearby hot-water tap so pressure can vent and the tank drains without fighting a vacuum. Leave it open until refill begins later. -
Drain below the element.
Attach a hose to the drain valve or use a bucket, and lower the water level to below the element you plan to remove. Expect hot water and sediment. -
Remove the access panel.
Take off the front cover with a screwdriver, then pull back the insulation blanket or pad. Remove the thermostat cover behind the panel so the element terminals are exposed. -
Test the old element.
Disconnect the two wires from the element and check resistance with the multimeter. A good element should read close to its labeled value; an open reading means failure. -
Match the replacement.
Compare voltage, wattage, length, shape, and screw-in thread style before buying. A 4500 W, 240 V element does not always swap with a 5500 W part, even if the hex shape looks similar. -
Install the new gasket.
Remove the old element with the wrench, seat the new gasket, thread in the replacement by hand, then tighten it with the 6-point tool until snug. Tighten only until the gasket seats, or the flange and gasket can distort. For gasket seating and replacement detail, use the new gasket guidance as your reference point. -
Refill and check leaks.
Close the drain valve, refill the tank fully, and watch the element area for leaks before restoring power. Open the hot faucet until a steady stream of water flows, then close it and recheck the element seal.
Water heater heating element checklist
- Confirm the tank is completely full before turning the breaker back on.
- Purge air from the hot side until the flow is steady, not spitting.
- Check the element opening and nearby fittings for leaks after refill.
- Restore power and confirm the heater completes a normal heat cycle.
- Verify the breaker stays set and the unit does not trip again.
- Confirm hot-water recovery returns to normal after the repair.
Common mistakes
Most failures come from replacing the wrong part or restoring power too early. A tripped high-limit switch, bad thermostat, or scaled lower element can look like a dead heater, so test first. Reinstalling power before the tank is full can burn out the new element in seconds.
Another common error is buying a part by wattage alone. A replacement heating element has to match voltage, wattage, physical length or shape, and thread style. If the label is unreadable, remove the old part and take it to the supply house for a side-by-side match.
- Do not skip the resistance check.
- Do not use pliers on the element hex if a proper tool fits.
- Do not forget the new gasket.
- Do not energize the heater until the tank is full and air has been purged.
- Do not ignore heavy sediment; it shortens element life and can lock threads in place.
Should you call a pro?
Call a pro if the breaker trips again, the tank leaks from the element opening, the threads are seized hard enough to threaten the tank, or the wiring looks heat-damaged. Replacement cost also shifts the decision: if the tank is old, scaled, or already leaking at the shell, a repair may not be worth it.
Say the lower element tests open, but the drain water carries heavy scale and the element hex begins to deform before it moves. That is a stop point. The labor to force a stuck part can turn a simple element swap into a tank replacement.
For cost, DIY usually means the price of the element, gasket, and hand tools if you do not already own them. Hiring a plumber or electrician varies by model, region, and access, so ask for a written estimate that separates parts from labor.
Frequently asked questions
How often to replace water heater heating element
There is no fixed interval. Replace it when a multimeter shows an open circuit, when resistance no longer matches the labeled spec, or when sediment and corrosion have damaged the element or threads. Heavy mineral buildup can shorten service life.
How much does it cost to replace heating element in water heater?
DIY cost usually includes the element, gasket, and a tool if you need one. A pro quote varies by region, access, and whether the thermostat or wiring also needs work. Ask for the part number and labor line items before approving the repair.
RV water heater heating element replacement
RV water heater elements follow the same basics: confirm the tank is full, shut off power, drain enough water to expose the element, and match the replacement by voltage, wattage, thread style, and physical fit. Many RV failures are misdiagnosed as an element problem when the thermostat, wiring, or a leaking tank is the real issue.
If the RV tank will not hold water, the element is not the correct fix. If the unit has an upper or lower fault pattern that points to a thermostat or high-limit issue, replace the failed control first rather than forcing an element swap that will not solve the problem.