How to Perform a Basic Water Heater Tune-Up at Home
A basic water heater tune-up may take around 30 minutes: shut off power or gas, inspect for leaks and corrosion, drain a small amount from the tank, test the temperature and pressure relief valve, and stop if anything leaks, sticks, or looks heavily rusted.
Skip a tune-up, or do it badly, and you can pay more for energy, lose hot water sooner, or miss a tank that is already failing before it floods the floor.
This guide shows the exact homeowner checks, pass/fail signs, and the point where the job stops being basic maintenance.
What you’ll need before you start

- Garden hose long enough to reach a drain or outdoors, with a tight connection at the tank’s drain valve.
- Wrench for hose fittings or a stubborn connection at the drain valve.
- Bucket for a small sample drain and sediment check.
- Heat-safe gloves if the area near the tank or piping is warm.
- Optional pump if gravity does not move water out fast enough.
- Towel or shallow pan for minor drips at the drain or relief valve.
| Checkpoint | Pass looks like | Fail means stop or escalate |
|---|---|---|
| Power or gas shutoff | Breaker off or gas control set to pilot/off before any drain work | Unit still energized or burner still active |
| Water cooled | Tank feels cool enough to touch near the jacket and piping | Hot shell, hot discharge, or steaming water |
| Pressure relieved | Relief action gives a short hiss and flow settles without spray | Violent discharge, leaking valve, or no pressure release |
| Drain flow rate | Steady stream or controlled discharge from the hose | Trickle only, clogging, or repeated stoppage |
| Sediment amount | Little cloudy water, light grit, or a thin layer in the sample | Heavy grit, repeated chunks, or thick scale |
| Refill and purge | Water runs clean from a hot faucet and air is gone | Spitting air, banging lines, or no hot recovery |
| Leak check | Dry drain valve, dry fittings, dry relief outlet, dry floor | Any drip, seep, or fresh rust stain after restart |
According to Water Heater Repair Help: Learn How to Fix It Yourself. — Conventional storage heaters typically hold 75 to 400 liters (20 to 100 U.S. gallons).
What a basic tune-up covers
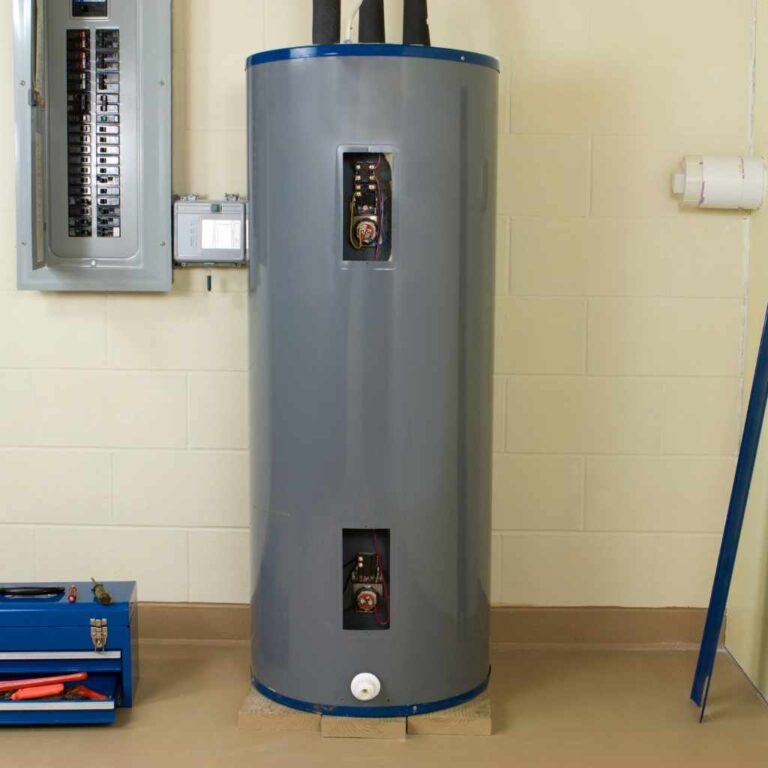
A tank water heater stores heated water in a steel tank, and sediment settles at the bottom over time. On electric units, sediment can bury the lower heating element and slow recovery; on gas units, it sits under the burner zone and acts like insulation. A basic tune-up removes a small amount of that buildup and confirms the tank still drains, refills, and holds pressure safely.
What this guide will and will not do
Basic maintenance usually means a short inspection, a partial drain, and a flush until the water runs clearer. It does not mean descaling a badly scaled tank, replacing a failed anode, or fixing a leaking relief valve. If the drain valve clogs, the tank barely drains, or the tank already shows heavy rust, the job is no longer basic.
How to tell basic maintenance from deeper service
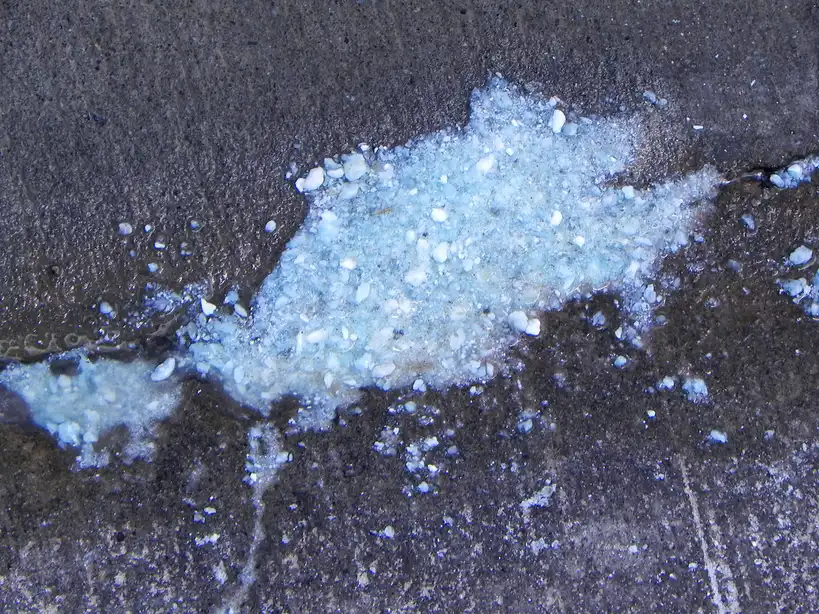
Use the discharge itself as the decision point. A little cloudiness and a small amount of fine grit usually fit a basic tune-up. Repeated chunks, thick flakes, or water that keeps staying cloudy can point to a deeper sediment problem, and the tank may need repeated flushing, mechanical cleaning, or replacement.
How do you shut the unit down safely?
Shut off power or gas first, close the cold water supply, and wait for the tank to cool before opening anything. That order matters because the tank can stay hot and pressurized even after the burner or elements are off. The temperature-pressure relief valve may hiss when opened during draining.
Turn off power or set gas to pilot
- Switch the breaker off for an electric unit.
- Set a gas control to pilot or off for a gas unit.
- Verify the heater is not actively heating before touching the tank.
Close the cold water shutoff
- Find the cold water shutoff at the tank or the main supply.
- Turn it fully closed.
- Open a nearby hot faucet to confirm the supply is isolated.
Wait for the water to cool
- Let the tank sit until the shell is cool enough to handle safely.
- Check the hot water at a faucet before starting the drain.
- Stop if the water is still too hot to drain without a burn risk.
How do you drain and flush sediment?
Attach a hose to the drain valve at the bottom of the tank, route it to a drain or outside, and open a hot faucet so air can enter the lines. Then open the drain valve and watch the first water out of the tank. Drain some water into a bucket if you want to judge sediment before committing to a longer flush.
Start with a short sample drain
- Secure the hose tightly to the drain valve.
- Route the hose downhill if possible.
- Open the drain valve a little and collect a sample in a bucket.
- Rate the sediment: clear, lightly cloudy, gritty, or chunky.
Flush until the water runs clearer
- Open the hot faucet fully to admit air.
- Let the tank drain until flow slows or the sample clears.
- Close and reopen the drain valve if the discharge surges or stalls.
- Repeat the flush if sediment still comes out.
If gravity will not drain it
- Attach a pump with a short hose on the tank side and a longer discharge hose out to the drain point.
- Keep the pump intake clear of loose scale.
- Stop if the pump cavitates, overheats, or only moves muddy slurries.
What should you check while the tank is empty or draining?
Watch the flow, the valve behavior, and the amount of sediment, because those three things tell you whether the tune-up is done or whether the tank needs more than basic service. A normal drain should move steadily once air is admitted, and the relief valve should not drip afterward.
Check the drain valve and hose connections
The drain valve sits at the bottom of the tank and can clog with scale or leak around the threads. A hose should be attached firmly, not cross-threaded, and the connection should stay dry during the drain. If the valve barely opens or the tank trickles out, stop before forcing it.
Use the temperature-pressure relief valve carefully
The temperature-pressure relief valve can be opened briefly to relieve pressure before or during draining, but it should be handled safely and closed as soon as the pressure is gone. A short hiss is normal during opening. A steady leak afterward is not.
Decide whether the drain is basic or needs more help
A basic tune-up is complete when the discharge is mostly clear, the tank refills fully, and no part leaks after restart. It needs more than basic service when sediment keeps coming, the valve sticks, the water recovery is poor, or the relief valve leaks after the tank is back online.
Tune-up checklist: pass/fail checkpoints
Use this as a one-page checkpoint sheet while you work. If any item fails, stop at that point and decide whether the repair is still basic maintenance.
- Power or gas shutoff verified. Pass if the breaker is off or the gas control is at pilot/off before any drain work.
- Water cooled before draining. Pass if the tank and discharge water are cool enough to handle safely.
- Pressure relieved before opening the drain. Pass if the relief action is controlled and the tank does not surge or spray.
- Drain flow rate observed. Pass if water moves steadily and the hose does not choke off or back up.
- Sediment amount rated. Pass if only light cloudiness or fine grit comes out; fail if chunks or heavy scale continue.
- Refill and purge completed. Pass if the tank refills fully and the hot faucet runs without spurting air.
- Post-service leak check recorded. Pass if the drain valve, relief outlet, and fittings stay dry after restart.
Common mistakes
Forcing a stuck drain valve can crack it or strip the threads. If it will not move with gentle pressure and a wrench on the fitting, stop and plan for replacement instead of brute force.
Skipping the air purge after refilling leaves trapped air in the lines. Open a hot faucet until the sputtering stops, or the heater can make noise and deliver uneven hot water.
Restarting with a leak still present is another common failure. Dry every fitting, then inspect the floor, the drain outlet, and the relief valve before turning the unit back on.
Heavy sediment is not a normal result to ignore. If the bucket fills with grit or the flush keeps pulling chunks, the tank likely needs deeper service.
If that didn’t work, try this next
- Stuck drain valve: Stop tightening. Close the cold supply, let the tank cool fully, and plan on valve replacement or professional service.
- Slow-draining tank: Reopen a hot faucet, confirm the hose runs downhill, and use a pump if gravity cannot keep the flow moving.
- Relief valve leaking after service: Close the valve, inspect the seat for debris, and stop if it still drips. A leaking relief valve is not a normal DIY finish.
- No hot-water recovery: Restore the correct power or gas setting, purge air again, and check whether the lower element or burner is operating.
How do I know if my water heater has too much sediment?
Too much sediment shows up as heavy grit, repeated chunks, or a drain that keeps throwing cloudy water long after the first flush. A small amount of cloudiness may be acceptable in a basic tune-up. If the sample stays muddy, the tank may need repeated flushing or professional descaling.
Sediment signs that matter
Look for slow recovery, rumbling or popping during heating, a drain that spits sludge, and hot water that turns cloudy before it clears. In a tank that still operates normally, a little sediment is manageable. In a tank with recurring chunks, the buildup is already beyond basic maintenance.
Maintenance cadence
Maintenance involves removing sediment and mineral scale biannually to prolong a water heater’s lifespan. Hard water, high usage, or a household that runs the tank heavily can justify more frequent checks. If the same tank repeatedly sheds a lot of scale, the problem is no longer just timing.
When should I call a professional instead of DIY?
Call a professional if the drain valve sticks, the tank barely drains, the relief valve leaks, the tank shell is heavily rusted, or hot water does not recover after the refill. Those are signs that the job has moved beyond a basic flush and into repair territory.
Another stop point is repeated sediment that never clears. A tankless heater heats water directly without a storage tank, so it follows a different maintenance path; a storage tank that keeps shedding scale may need deep descaling or replacement instead of another rinse.
How long should I wait for the water heater to cool before draining it?
Wait until the tank and discharge water are cool enough to avoid burns; there is no useful shortcut if the shell still feels hot. Check the first water at a faucet, then proceed only when the tank no longer sends out very hot water or steam.
What if the tank stays hot for a long time?
Leave it off and let it sit longer. Large storage tanks can hold heat for a while, and the water inside may stay scalding even after the controls are off. If you need to resume the job later, recheck the faucet water before restarting the drain.
Frequently asked questions
How do I perform a basic water heater tune-up at home?
Shut off power or gas, close the cold supply, wait for the tank to cool, drain a small amount through a hose, and watch the sediment. Finish by refilling, purging air at a hot faucet, restoring power or gas, and checking every fitting for leaks.
What should I check during a water heater tune-up?
Check the shutoff position, water temperature, drain flow, sediment amount, relief valve behavior, and all visible leaks. A basic tune-up is complete only when the refill is clean, the hot water runs without air, and the tank stays dry at the connections.
Do I need to turn off power before servicing a water heater?
Yes. Switch the breaker off on an electric unit or set the gas control to pilot or off on a gas unit before touching the tank. That prevents heating while the tank is open, drained, or pressurized.
How do I flush sediment out of a water heater tank?
Attach a hose to the drain valve, open a hot faucet for air, and drain until the water clears. If sediment keeps coming, repeat the flush or stop and reassess. Heavy chunks, persistent cloudiness, or a clogged valve mean the tank needs more than a basic rinse.
What tools do I need for a basic water heater tune-up?
Use a hose, a wrench, a bucket, and a safe drain path. An optional pump helps when gravity will not move water well. Keep towels or a shallow pan nearby for drips, because drain valves and hose fittings can leak during service.
When should I call a professional instead of DIY?
Call for help if the drain valve sticks, the relief valve leaks, the tank rusts heavily, or the heater will not recover hot water after restart. Those problems point to failed parts, internal scale, or tank damage that basic maintenance will not fix.