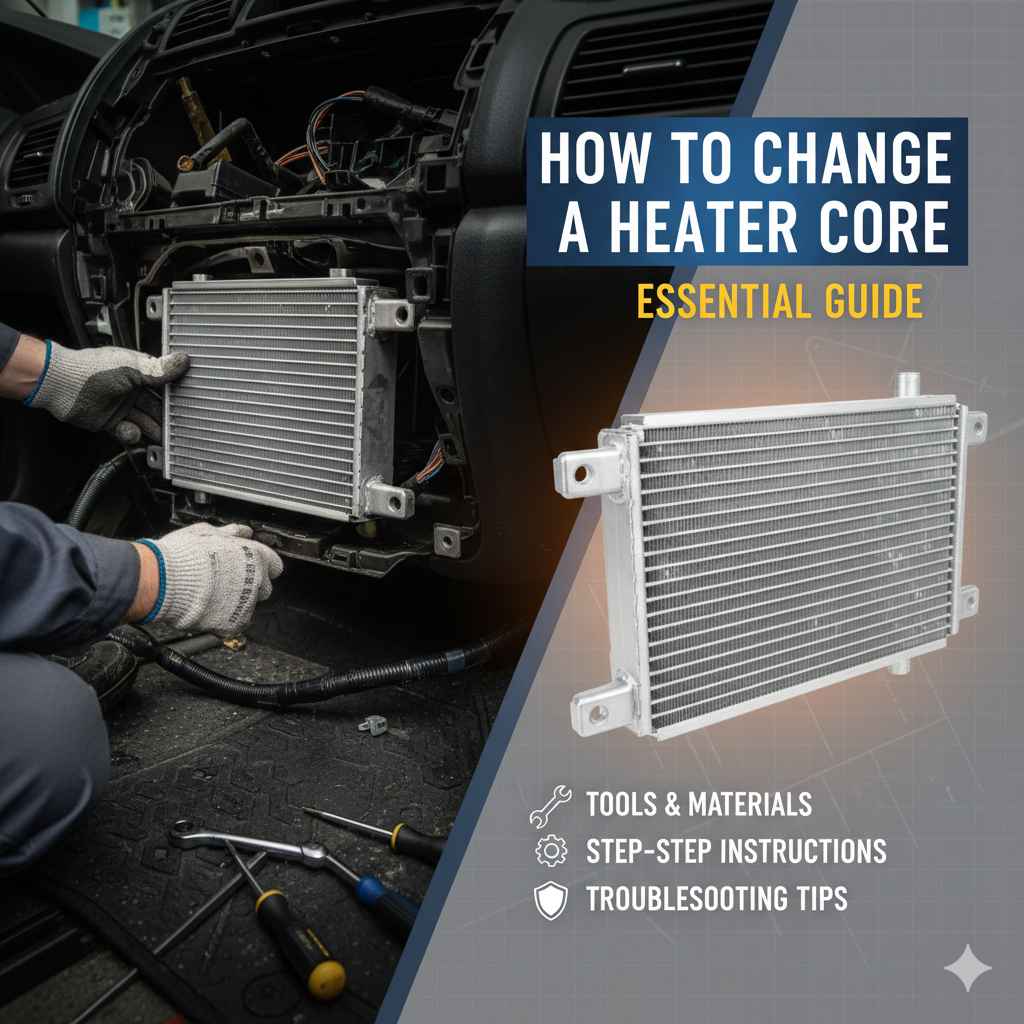
How To Change a Heater Core: Essential Guide
This guide explains how to change a heater core with simple steps. While it’s a moderately complex DIY job, understanding the process, gathering the right tools, and following safety precautions can help you tackle it confidently, saving on repair costs and restoring your car’s warmth.
Is your car’s heater blowing cold air, even when the engine is warm? That might mean your heater core needs attention. This little part acts like a mini-radiator for your cabin, warming up the air that comes through your vents. When it leaks or gets clogged, you lose that cozy warmth. It can sound like a big, scary job, but with a clear plan and a little patience, you can absolutely get your heater working again. Let’s walk through how to tackle this together, step by step, so you can enjoy a warm and comfortable ride, no matter the weather.
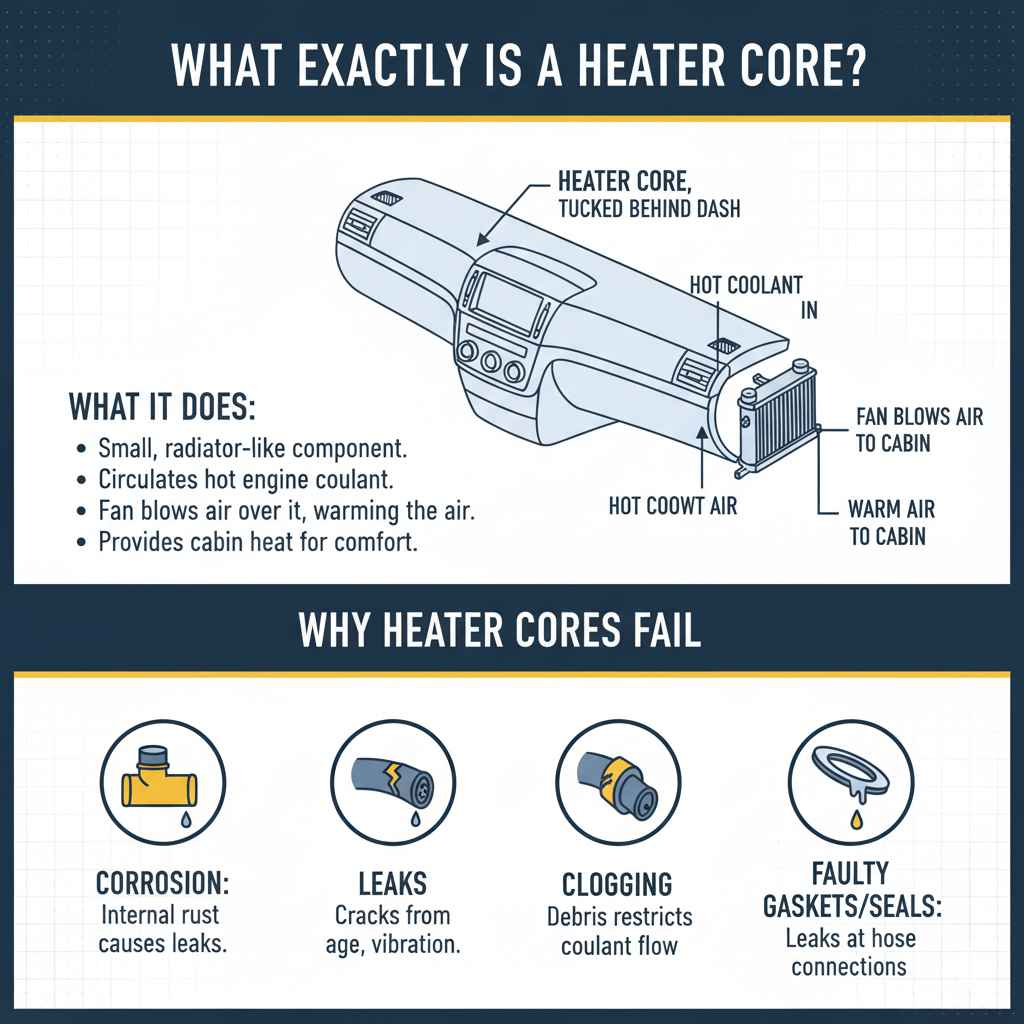
What Exactly Is a Heater Core?
Think of your heater core as the unsung hero of your car’s heating system. It’s a small, radiator-like component usually tucked away behind your dashboard. Hot coolant from your engine circulates through it. When you turn on your car’s heater, a fan blows air across the heater core, warming the air before it’s distributed into your car’s cabin. It’s essential for keeping you comfortable during chilly drives.
Why Heater Cores Fail
Heater cores are generally quite durable, but like any part, they can wear out over time. Here are the most common reasons they might need replacing:
- Corrosion: The constant flow of coolant and the metal construction can lead to internal corrosion over many years. This can cause leaks.
- Leaks: Cracks or pinholes can develop due to age, vibration, or physical damage. A leaking heater core is a major problem.
- Clogging: Debris or mineral buildup in your cooling system can clog the small passages within the heater core, restricting coolant flow and reducing heat output.
- Faulty Gaskets/Seals: The connections where the heater core hoses attach can develop leaks over time.
Signs You Might Need a New Heater Core
Before diving into the replacement process, it’s good to know if your heater core is actually the culprit. Here are some tell-tale signs:
- Cold Air Blowing: This is the most obvious sign. Even on the highest setting, the air from your vents remains cold or lukewarm.
- Sweet Smell Inside the Car: Leaking coolant has a distinct sweet smell. If you notice this inside your car, especially when the heater is on, it’s a strong indicator of a heater core leak.
- Foggy or Greasy Windshield: A leaking heater core can release coolant vapor that fogs up your windshield, often leaving a greasy film that’s hard to wipe away.
- Puddles Under the Dash: If you find small puddles of sweet-smelling liquid (coolant) under your dashboard or on the passenger side floor mat, it’s a clear sign of a leak, very likely from the heater core or its connections.
- Decreasing Coolant Level: If your coolant reservoir keeps dropping without any visible external leaks from hoses or the radiator, the coolant is likely leaking internally into your cabin via the heater core.
- Engine Overheating: While less common, a severely clogged heater core can sometimes affect the overall cooling system’s efficiency, leading to minor overheating.
Is Changing a Heater Core a DIY Job?
This is a common question, and the honest answer is: it depends on your comfort level with car repair and the specific make and model of your vehicle. For many cars, especially older ones, replacing a heater core can be a significant undertaking. It often involves removing a large portion of the dashboard, steering column, and other interior components to access the heater core housing. This can be time-consuming and requires careful organization to keep track of all the parts and screws.
However, if you are patient, meticulous, and enjoy hands-on problem-solving, it is achievable. Many homeowners successfully tackle this repair. If you’re new to car mechanics, it might be wise to start with simpler repairs or have a knowledgeable friend assist you.
Tools and Materials You’ll Need
Gathering everything before you start is key to a smooth repair. Here’s a comprehensive list of what you’ll likely need:
Essential Tools:
- Socket Set and Ratchet: With a variety of sizes, including deep sockets.
- Screwdrivers: Phillips and flathead in various sizes.
- Pliers: Including needle-nose pliers and hose clamp pliers.
- Wrench Set: For larger nuts and bolts.
- Torque Wrench: Important for reassembling certain components to manufacturer specifications.
- Drain Pan: To catch drained coolant.
- Shop Rags or Towels: Lots of them! For spills and cleaning.
- Gloves: To protect your hands.
- Safety Glasses: Always protect your eyes.
- Flashlight or Headlamp: For working in dark areas.
- Container for Small Parts: Small boxes, baggies, or a magnetic tray to keep screws and clips organized. Labeling them is crucial!
- Trim Removal Tools: Plastic tools designed to pry off interior trim pieces without damaging them.
- Service Manual for Your Vehicle: This is highly recommended! It provides specific details, torque specs, and diagrams for your car. You can often find these at auto parts stores or online.
Materials:
- New Heater Core: Make sure it’s the correct part for your specific year, make, and model.
- New Coolant: The correct type and amount as specified in your vehicle’s manual.
- Distilled Water: For mixing with coolant if necessary, or for flushing.
- New Heater Hose Clamps: It’s a good idea to replace old, rusty clamps.
- Optional: New Heater Hoses: If they show signs of cracking or degradation.
- Optional: Gasket Sealant: For reattaching certain components if recommended by your service manual.
Step-by-Step Guide to Changing a Heater Core
This process can vary significantly between vehicles. Always consult your car’s specific service manual for detailed instructions and diagrams. These steps are a general outline:
Step 1: Prepare Your Workspace and Vehicle
Park your car on a level surface. Engage the parking brake. Allow the engine to cool down completely before you start. Working with a hot cooling system is dangerous. You may want to disconnect the negative battery terminal to prevent any accidental electrical shorts while working in the dashboard area.
Step 2: Drain the Cooling System
Place your drain pan beneath the radiator drain plug. Open the radiator petcock (drain valve) and allow the coolant to drain completely. You can also open the radiator cap to help it drain faster. Important: Used coolant is toxic. Dispose of it responsibly according to your local regulations. Many auto parts stores have collection centers.
You can find helpful resources on coolant disposal from the Environmental Protection Agency (EPA): EPA Guide to Recycling Automotive Fluids.
Step 3: Access the Heater Core
This is often the most challenging part. Heater cores are typically located behind the dashboard on the passenger side of the vehicle, inside a plastic housing. You will likely need to:
- Remove the passenger side dashboard paneling.
- Remove trim pieces around the center console, glove box, and steering column.
- Disconnect any electrical connectors attached to the dashboard or components you’re removing. Take pictures as you go to help remember where everything connects.
- Remove the glove box assembly.
- You may need to remove or lower part of the steering column, or even the entire instrument cluster, depending on your car’s layout.
- Locate the heater core housing. It’s usually a rectangular plastic box.
Step 4: Disconnect Heater Hoses
Once the heater core housing is accessible, you’ll see two heater hoses connecting to it. These carry the hot coolant. They are usually held in place with spring clamps or screw clamps.
- Use hose clamp pliers to slide the clamps back away from the heater core fittings.
- Carefully twist and pull the hoses off the fittings. Be prepared for a small amount of residual coolant to spill out, so have rags ready.
- If the hoses are stuck, a gentle prying motion or a specialized hose removal tool can help. Avoid damaging the hose barbs.
Step 5: Remove the Heater Core Housing
The housing containing the heater core is typically secured by a few bolts or screws. Once these are removed, you can often pull the housing away from the firewall. In some cases, you might need to maneuver it out from under the dashboard.
Step 6: Replace the Heater Core
Inside the housing, you’ll find the old heater core. Note how it is installed, paying attention to any seals or mounting brackets.
- Carefully remove the old heater core from its housing.
- Clean any debris from inside the housing.
- Insert the new heater core, ensuring it is seated correctly and aligned with any mounting points. Make sure any gaskets or seals are properly in place.
- Reassemble the heater core housing.
Step 7: Reconnect Heater Hoses
Slide the heater hoses back onto the fittings of the new heater core. Ensure they are fully seated. Secure them with fresh, properly sized hose clamps. Ensure the clamps are positioned to provide a tight seal without deforming the hose or fitting.
Step 8: Refill and Bleed the Cooling System
This is a critical step to ensure proper operation and prevent air pockets.
- Close the radiator drain plug.
- Mix your new coolant with distilled water according to the manufacturer’s instructions (usually a 50/50 ratio).
- Slowly refill the cooling system through the radiator cap port until it’s full.
- Locate the bleed screws or bleed valves on your cooling system, often found on thermostat housings or heater hoses. Open these slowly.
- Continue filling the reservoir and radiator while the bleed screws are open until only coolant, not air, comes out.
- Securely close all bleed screws.
- Start the engine and let it run until it reaches its normal operating temperature. Keep an eye on the temperature gauge.
- With the engine running, continue to fill the coolant reservoir to the ‘COLD’ or ‘MAX’ line as needed.
- Turn your car’s heater on to the highest setting to help circulate coolant through the heater core and push out any remaining air.
- Let the engine run for 10-15 minutes, or until the thermostat opens and the engine reaches operating temperature.
- Turn off the engine and allow it to cool completely.
- Once cooled, re-check the coolant level in the reservoir and top it off if necessary.
Bleeding the system properly is essential. Air trapped in the system can cause overheating and reduced heater performance. For more detailed information on bleeding cooling systems, check out resources like Consumer Reports on bleeding cooling systems.
Step 9: Reassemble the Interior
Once you’ve confirmed there are no leaks and the heater is working correctly, you can begin reassembling the dashboard and interior trim pieces you removed.
- Work in reverse order of removal.
- Reconnect all electrical connectors.
- Ensure all screws and bolts are re-tightened, especially those holding structural dashboard components.
- Test all your dashboard functions (radio, AC, etc.) as you reassemble.
Step 10: Final Checks and Test Drive
After reassembly, start the car again. Let it idle for a while and check for any coolant leaks around the heater core hoses or fittings. Then, take it for a short test drive. Turn the heater on at different settings to ensure it’s blowing hot air effectively. Listen for any unusual noises and observe the temperature gauge.
Common Pitfalls and How to Avoid Them
Even with the best intentions, there are a few common mistakes people make when changing a heater core. Being aware of them can save you a lot of frustration:
1. Not Disconnecting the Battery
Problem: Accidental shorts can occur while working around dashboard wiring, potentially damaging electrical components.
Solution: Always disconnect the negative battery terminal before beginning any work on the dashboard or electrical systems.
2. Losing or Mixing Up Parts
Problem: Modern cars have dozens, if not hundreds, of small screws, bolts, clips, and connectors. Losing them or putting them in the wrong place makes reassembly extremely difficult and can lead to rattles or improper fitting.
Solution: Use labeled baggies or a magnetic tray. Take clear photos of disassembly. If possible, lay parts out in the order they are removed.
3. Damaging Plastic Trim
Problem: Using too much force or the wrong tools can easily crack or scratch plastic interior trim pieces.
Solution: Invest in a set of plastic trim removal tools. Use gentle leverage and pry carefully.
4. Not Properly Draining Coolant
Problem: Spilling hot coolant is dangerous and messy. Also, not draining enough coolant can make the job harder.
Solution: Ensure the engine is completely cool. Use an adequate drain pan and position it carefully.
5. Incomplete Cooling System Bleeding
Problem: Air pockets in the cooling system can lead to overheating, poor heater performance, and damage to the engine or new heater core.
Solution: Follow your service manual’s bleeding procedure meticulously. Bleed until no bubbles appear, and run the engine with the heater on. Repeat checks after cooling.
6. Using the Wrong Coolant
Problem: Different vehicles require different types of coolant. Using the wrong type can lead to corrosion, clogging, and system failure.
Solution: Always refer to your owner’s manual for the correct coolant type (e.g., HOAT, OAT) and color specifications.
Cost Savings and When to Call a Professional
Doing this repair yourself can be a significant money-saver. A professional mechanic might charge anywhere from $500 to $1,500 or more for a heater core replacement, depending on the vehicle and labor rates. The main costs for a DIYer are the part itself (typically $40-$150) and coolant.
However, it’s important to recognize when the job might be beyond your capabilities. Consider calling a professional if:
- Your car has a very complex dashboard design that seems overwhelming.
- You lack the necessary tools, especially specialized ones like trim removal tools or torque wrenches.
- You’re uncomfortable with automotive electrical systems.
- You’ve started the job and realized it’s more complex than you anticipated.
- You doubt your ability to reassemble everything correctly without issues.
Don’t hesitate to seek professional help if you feel unsure. Peace of mind and avoiding potential further damage are often worth the extra cost. You can find great local mechanics through resources like the Automotive Training Institute (ATI): Tips for Finding a Good Mechanic.

Heater Core Repair vs. Replacement: Is Repair Possible?
In most cases, replacing the heater core is the standard and most reliable solution. Heater cores are generally not designed to be repaired. If they fail due to corrosion or internal leaks, the damage is usually irreversible for practical purposes. Trying to patch a leaking heater core is typically a temporary fix at best, and often not feasible due to its location and the high pressure within the cooling system.
The closest thing to a “repair” might be addressing issues with the heater hoses or the seals where they connect. If the leaks are coming from the connections and not the core itself, replacing the hoses and clamps might solve the problem. However, if the core itself is compromised, replacement is almost always the necessary course of action.
Frequently Asked Questions (FAQs)
Q1: How long does it typically take to change a heater core?
A1: For DIYers, this can range from 4 to 10 hours, or even more, depending on your experience and your vehicle’s specific design. Some cars make access much easier than others. Professional shops often quote 3-6 hours of labor.