
Your portable heater keeps you warm and cozy, but when was the last time you cleaned it? A dirty heater can work less efficiently and even pose safety risks.
You might not realize how simple it is to give your heater a quick, effective clean. In this guide, you’ll learn easy steps to keep your portable heater running smoothly and safely. By the end, you’ll feel confident maintaining your heater yourself, saving money and extending its life.
Ready to make your heater as good as new? Let’s dive in.
Choosing The Right Time To Clean
Choosing the right time to clean a portable heater helps it work better and last longer. Cleaning at the best moment keeps dust and dirt from building up inside. This prevents damage and makes your heater safer to use.
Timing your cleaning is simple. It depends on how often you use the heater and the environment around it. Clean your heater regularly to keep it in good shape all winter.
Clean Before And After The Heating Season
Always clean your heater before storing it away for warmer months. Dust and dirt can settle inside when not in use. Cleaning after the season stops buildup and keeps the heater ready for next time.
Check For Dust Buildup Often
Look for dust on vents and grills every few weeks during use. Dust blocks airflow and makes the heater work harder. Clean when you see visible dust or feel less warm air.
Clean More Often In Dusty Areas
Heaters in dusty rooms or near pets need cleaning more often. Dust and pet hair clog the heater faster. Check and clean at least once a month in these places.
After Long Periods Of Use
Clean your heater after long, continuous use. Running it for many hours causes more dust to gather. Cleaning helps keep the heater safe and efficient.

Gathering Cleaning Supplies
Gathering the right cleaning supplies is the first step to clean your portable heater safely and well. Having everything ready makes the job easier and faster. It also helps protect the heater from damage during cleaning.
Use supplies that remove dust, dirt, and grime without harming the heater’s parts. Choose gentle and effective tools for the best results. Keep safety in mind and avoid harsh chemicals or rough materials.
Soft Cloths And Microfiber Towels
Soft cloths and microfiber towels wipe away dust and dirt gently. They do not scratch the heater’s surface. Use them dry or slightly damp for cleaning outer parts. These cloths trap dust well and leave a clean finish.
Small Brushes And Compressed Air
Small brushes, like paintbrushes or toothbrushes, reach tight spots inside the heater. They help remove dust from vents and grills. Compressed air cans blow dust out from hard-to-reach areas. Use short bursts to avoid damage.
Mild Cleaning Solutions
Use mild cleaning solutions like diluted dish soap and water. These solutions clean grime without causing harm. Avoid bleach or strong chemicals that can damage the heater. Test the solution on a small area first.
Protective Gloves And Safety Gear
Wear protective gloves to keep your hands safe from dirt and cleaning agents. Gloves also protect the heater from oils on your skin. Consider safety glasses if using compressed air. Safety gear keeps the cleaning process safe for you.
Unplugging And Cooling The Heater
Unplugging and cooling the heater is the first step in cleaning it safely. Always disconnect the heater from the power source before starting any cleaning. This prevents electric shocks and other accidents.
After unplugging, let the heater cool down completely. Heating elements stay hot for a while. Touching them too soon can cause burns. Cooling also helps avoid damage to the parts during cleaning.
Unplug The Heater Safely
Grab the plug firmly, not the cord. Pull it straight from the outlet. This avoids damaging the cord or socket. Make sure your hands are dry to stop electric shock risk.
Allow The Heater To Cool Down
Leave the heater in an open space. Avoid placing it near flammable materials. Cooling time varies by heater type. Wait at least 30 minutes for safety.
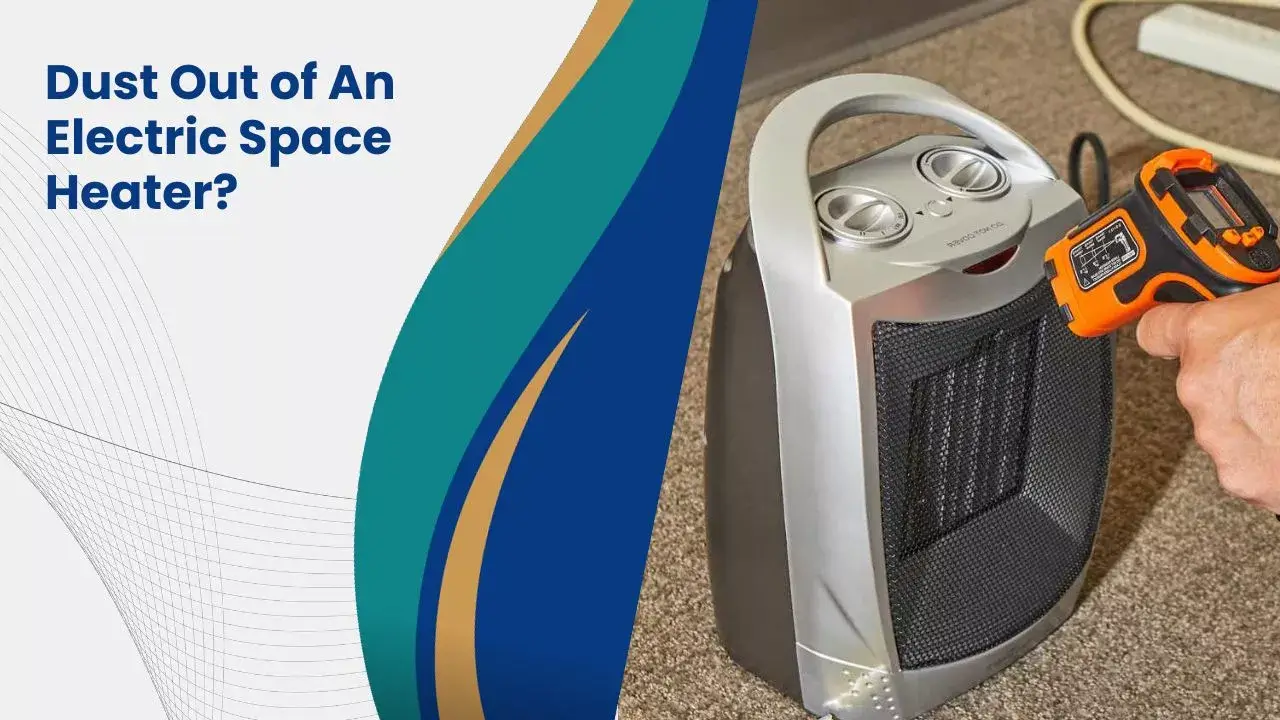
Check The Heater Temperature
Touch the heater’s surface gently. If it feels warm, wait longer. Use a non-contact thermometer if available. Only start cleaning when fully cool.
Removing Dust And Debris
Removing dust and debris from your portable heater helps it work better and last longer. Dust can block vents and make the heater less safe. Cleaning the outside and inside parts regularly keeps the heater running smoothly. Two easy ways to remove dust are using a vacuum cleaner and wiping with a damp cloth.
Using A Vacuum Cleaner
Start by unplugging the heater for safety. Use a vacuum cleaner with a brush attachment. Gently vacuum the vents and grills. This removes dust trapped inside the heater. Take care not to push dust deeper into the machine. Vacuum around buttons and switches too. This method cleans hard-to-reach spots well.
Wiping With A Damp Cloth
Unplug the heater before wiping it down. Use a soft, damp cloth. Avoid soaking the cloth; just damp is enough. Wipe the heater’s surface and vents carefully. This removes dust that the vacuum may miss. Dry the heater with a dry cloth after wiping. Never spray water directly on the heater. This keeps the heater safe and clean.
Cleaning The Filter
Cleaning the filter is an important step to keep your portable heater working well. A clean filter helps air flow freely and stops dust from building up inside. This keeps the heater safe and warm for longer.
Locating The Filter
First, find the filter on your heater. It is usually at the back or side. Look for a small panel or grill. Some heaters have a removable cover that hides the filter. Check the user manual if you are not sure.
Washing And Drying
Take out the filter carefully. Shake off loose dust outside. Use warm water and mild soap to wash the filter. Gently scrub with a soft brush if needed. Rinse the filter well to remove soap.
Let the filter dry completely before putting it back. Place it in a dry, open area. Avoid using heat or direct sunlight to dry the filter. A dry filter keeps the heater running safely.
Checking The Heater’s Interior
Checking the heater’s interior is important for safe and efficient use. Dust and debris can build up inside. This build-up can block airflow and cause overheating. Regular checks help keep your heater working well. It also reduces the risk of fire or damage.
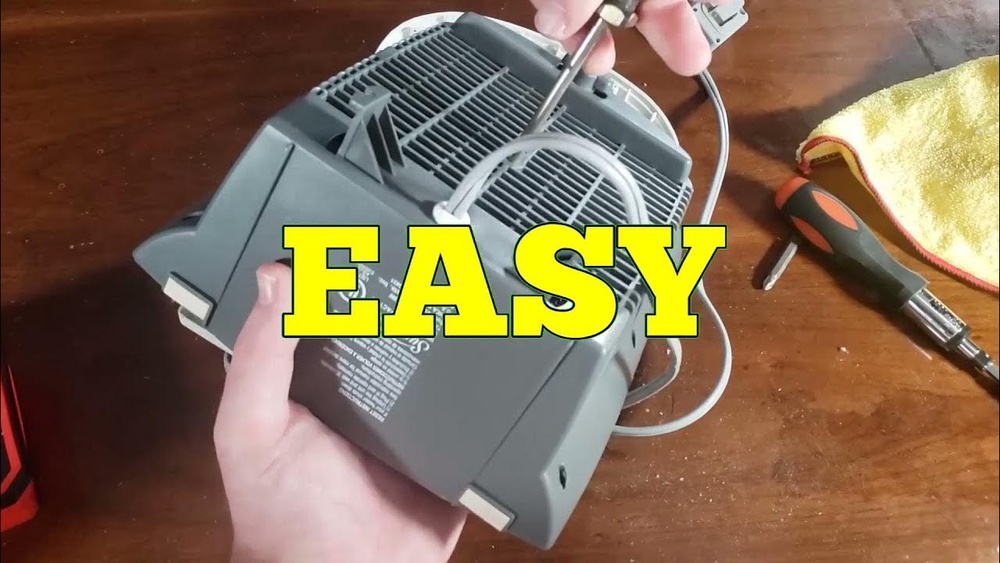
Accessing Internal Components
Unplug the heater before opening it. Use a screwdriver to remove the outer cover carefully. Keep screws safe to avoid losing them. Gently lift the cover to expose the inside parts. Avoid touching wiring or circuit boards directly. This prevents damage and keeps you safe.
Inspecting For Damage Or Blockages
Look closely at the fan, heating elements, and vents. Check for dust, dirt, or any blockages. Remove dust using a soft brush or compressed air. Look for broken parts or frayed wires. Any damage can cause the heater to fail or be unsafe. Replace or repair damaged parts before using the heater again.
Reassembling And Testing
After cleaning your portable heater, it’s time to put it back together and check if it works properly. This step is important to keep your heater safe and effective. Follow each part carefully to avoid mistakes.
Putting Parts Back Together
Start by fitting each cleaned part in its place. Use the manual as a guide. Tighten screws gently without forcing them. Make sure wires connect firmly. Check if the fan and heating element move freely. Avoid leaving any pieces loose or out of place. Take your time. A well-assembled heater lasts longer and works better.
Running A Safety Test
Plug in the heater in a safe spot. Keep it away from flammable items. Turn it on and watch for unusual sounds or smells. Check if the heater warms up steadily. If you see sparks or hear strange noises, turn it off immediately. Safety comes first. Test the controls to ensure they respond well. A smooth test means your heater is ready to use again.

Tips For Regular Maintenance
Regular maintenance keeps your portable heater working well and safe. It helps avoid breakdowns and extends the heater’s life. Simple steps can keep your heater clean and efficient.
Cleaning The Exterior
Turn off and unplug the heater before cleaning. Use a soft cloth to wipe dust and dirt from the outside. Avoid water or liquid cleaners on the heater’s surface. Dust buildup can block vents and reduce heat flow.
Checking The Air Vents
Look at the air vents regularly for dust or debris. Use a small brush or vacuum to clean the vents gently. Clear vents help the heater run smoothly and keep the air clean.
Inspecting The Power Cord
Check the power cord for cracks or damage each time before use. A damaged cord can cause safety issues or stop the heater from working. Replace the cord if you find any problems.
Replacing Or Cleaning The Filter
Some portable heaters have filters to catch dust. Check the filter every few weeks. Clean or replace the filter according to the heater’s instructions. A clean filter improves air quality and heater performance.
Storing The Heater Properly
Store the heater in a dry, cool place when not in use. Cover it to keep dust away during storage. Proper storage protects the heater and keeps it ready for next use.
Safety Precautions During Cleaning
Cleaning a portable heater needs care. Safety comes first to avoid accidents. Taking the right steps protects you and your heater.
Always prepare your space and tools before starting. This helps the cleaning go smoothly and safely. Follow these important safety tips.
Turn Off And Unplug The Heater
Switch off the heater before cleaning. Unplug it from the wall socket. This stops electricity flow and lowers the risk of shock.
Never clean a heater while it is hot. Wait for it to cool down completely. This prevents burns and damage to the heater parts.
Use Proper Cleaning Tools
Choose soft cloths or brushes for cleaning. Avoid water or liquid cleaners unless the manual says it is safe. Water can cause electric shock or damage.
Do not use sharp objects to remove dust or debris. They can break the heater or cause injury. Gentle tools keep the heater safe and clean.
Work In A Well-ventilated Area
Clean your heater in a room with fresh air. Good ventilation helps avoid breathing dust or fumes. It also keeps the space safe and comfortable.
Open windows or use a fan if needed. This reduces any dust or odor from cleaning products.
Check The Heater Manual
Read the user guide for specific cleaning advice. Each heater model may have different safety rules. Follow the manufacturer’s instructions carefully.
Manuals often include warnings about parts you should not touch. Stick to these guidelines to keep your heater working well.
Frequently Asked Questions
How Often Should I Clean My Portable Heater?
Clean your portable heater every 2-3 months to maintain efficiency. Regular cleaning prevents dust buildup and ensures safe operation. Always unplug the heater before cleaning to avoid electric shock.
What Tools Do I Need To Clean A Portable Heater?
Use a soft brush, vacuum cleaner with a brush attachment, and a damp cloth. These tools help remove dust and debris without damaging the heater components.
Can I Use Water To Clean My Portable Heater?
Avoid using water directly on electrical parts. Use a damp cloth for the outer surface only. Ensure the heater is unplugged and completely dry before use.
How Do I Clean The Heater’s Air Vents Safely?
Turn off and unplug the heater first. Use a vacuum with a brush attachment or a soft brush to gently clean the vents. This improves airflow and prevents overheating.
Conclusion
Cleaning your portable heater keeps it safe and working well. Regular care stops dust and dirt build-up. Always unplug the heater before you start cleaning. Use a soft cloth and gentle tools to remove grime. Clean filters help the heater warm your space better.
Take a few minutes each month to keep it neat. A clean heater lasts longer and saves energy too. Small steps make a big difference in heater performance. Stay warm and safe with simple cleaning habits.