
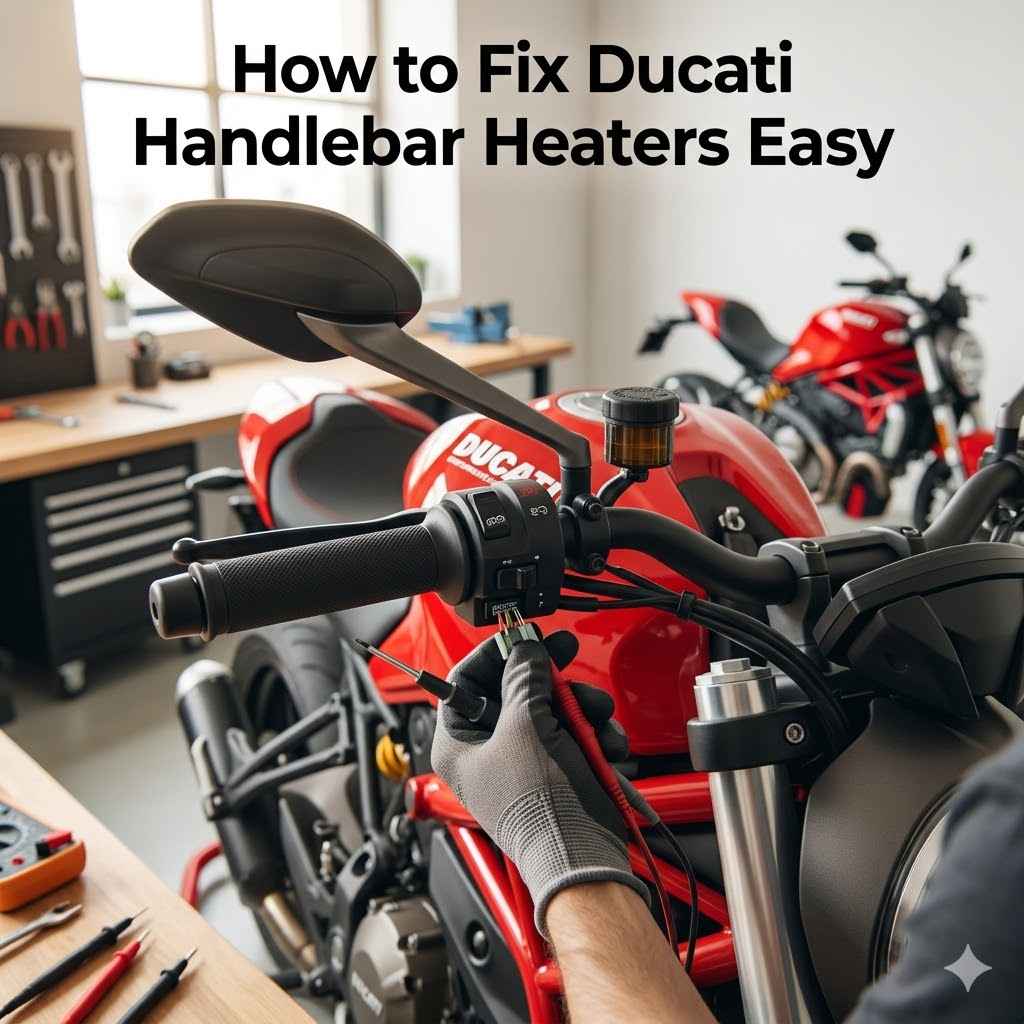
Sometimes, things on your motorcycle just stop working, and it can be a bit confusing, especially if you’re new to working on your bike. Your Ducati’s heated handlebars are a great feature for those chilly rides, but what happens when they stop heating up? Figuring out How to Fix Ducati Handlebar Heaters might seem tricky at first glance.
You might worry about wires and electrical stuff. But don’t you worry! We’re going to walk through this together with simple steps that anyone can follow.
Let’s get those warm hands back.
Troubleshooting Your Ducati Heated Grips
When your Ducati’s heated grips decide to take a break, it’s usually a sign that something in the electrical circuit isn’t quite right. This can happen for a few common reasons that are actually quite simple to check. Think of it like your home lights – sometimes a bulb just burns out, or a connection gets loose.
The same idea applies here, but on your motorcycle. We’ll look at where the problem might be hiding so you can get them working again.
Checking The Power Source And Fuses
The first thing to investigate when your heated grips aren’t working is to make sure they are getting power. Every electrical accessory on your Ducati has a fuse to protect it. If this fuse blows, the accessory stops working.
It’s like a safety switch that sacrifices itself to save the rest of the system.
Your motorcycle manual is the best place to find the exact location of the fuse box and which fuse is for the heated grips. They are usually small, colorful little things that you can easily pull out and inspect. You’ll be able to see if the metal wire inside the fuse is broken.
If it is, that’s your culprit!
Locate the fuse box. This is often found under the seat or near the battery. Your owner’s manual will show you exactly where it is for your specific Ducati model.
Don’t guess; find the right spot.
Identify the heated grip fuse. Each fuse is usually labeled, but sometimes you might need to consult your manual or online forums for your bike’s specific layout. Make sure you’re looking at the correct one so you don’t accidentally pull out a fuse for something important like your engine control unit.
Inspect the fuse. Carefully remove the fuse using a fuse puller or a small pair of pliers. Hold it up to the light and look for a break in the metal filament inside.
If the wire is snapped, the fuse needs replacing. If it looks intact, the problem lies elsewhere.
Replacing a blown fuse is a straightforward fix. You just need to get a new fuse of the exact same amperage. You can usually buy these at an auto parts store or motorcycle shop.
Make sure the new fuse is the same color and rating as the old one. Popping in a new fuse and seeing if the grips heat up is a quick test that often solves the problem.
Understanding Fuse Amperage
Fuse amperage is a really important detail. It’s a rating that tells you how much electrical current the fuse can handle before it blows. If you put in a fuse with too high an amperage, it won’t protect the system properly, and you could cause damage.
If you use one with too low an amperage, it might blow even when everything is working fine, which can be annoying.
The correct amperage is always listed on the fuse itself and in your motorcycle’s service manual. It’s a simple number, like 5A, 10A, or 15A. Always match the new fuse to the old one precisely.
This is a small step, but it’s super important for the safety of your bike’s electrical system.
For example, many Ducati heated grip systems use a 10A fuse. If you find your 10A fuse blown, and you only have a 15A fuse handy, resist the temptation to use it. Go get the correct 10A fuse.
It’s worth the small trip to ensure your bike is protected.
Checking The Handlebar Heater Switch
After checking the fuses, the next logical step is to look at the switch that controls your heated grips. This switch is your command center for warmth. If the switch itself is faulty, it won’t be sending the signal to the heating elements to turn on, even if everything else is working perfectly.
The switch can become damaged from vibration, moisture, or simply wear and tear over time. Sometimes the internal connections can become loose or corroded. This is why it’s a key component to inspect when troubleshooting.
Locate the heated grip switch. This is usually mounted on your handlebars. It might be a small button or a dial with different heat settings.
Inspect for visible damage. Look for any cracks, loose buttons, or signs of corrosion around the switch. If it looks physically damaged, that’s a strong clue.
Test the switch’s functionality. This is where things can get a little more technical. You might need a multimeter to check for continuity and voltage when the switch is operated.
If you’re not comfortable with electrical testing, this is a good time to consider professional help.
If you can access the wiring behind the switch, you can sometimes test the connections. With the ignition on, and assuming a good fuse is in place, you should be able to measure voltage at the switch’s output connector when it’s turned on. If there’s no voltage, the switch is likely bad.
If there is voltage, the problem might be further down the line, towards the grips themselves.
Consider how often you’ve used the switch. If you ride in wet conditions a lot, moisture could have seeped in. If it feels loose or sticky when you press it, it’s definitely a suspect.
Sometimes, a simple cleaning of the contacts can help, but often a faulty switch needs replacement.
Common Switch Issues
The most common issues with switches are internal failures. The small contacts inside can wear down or get dirty. Also, if the switch has multiple settings (like high, medium, low), one of those settings might fail while others still work.
This can be a confusing symptom, making you think it’s partly working when it’s actually a switch issue.
For a Ducati, especially a newer model, the switches are often integrated into the handlebar controls. This can make replacement a bit more involved than a simple standalone switch. However, the principle remains the same: the switch is the gatekeeper of power to the heaters.
If you determine the switch is bad, replacing it will involve disconnecting the battery, removing the handlebar controls, and carefully swapping out the old switch for a new one. Ensure you get the correct replacement part for your specific Ducati model. This is usually a task a mechanically inclined rider can handle, or a good reason to visit your Ducati dealer.
Investigating The Heating Elements In The Grips
If the fuses are good and the switch seems to be working, the next place to look is the actual heating elements embedded within the handlebar grips themselves. These are the parts that generate the heat. Over time, these can fail due to stress, damage, or simply reaching the end of their lifespan.
This is a more complex repair than a fuse or switch, but still manageable.
The heating elements are wires woven into or bonded to the grip material. They are designed to withstand vibrations and temperature changes, but they aren’t indestructible. Sometimes, a grip can get nicked or damaged, potentially affecting the element inside.
Or, the wires connecting the element to the main wiring harness can break.
How Heating Elements Work
Heating elements are essentially resistors. When electricity flows through them, they resist the flow, and this resistance creates heat. The amount of heat produced depends on the resistance value and the amount of current flowing through it.
The manufacturer designs the element with a specific resistance to produce a comfortable level of warmth.
Think of it like a toaster. Inside the toaster, you see glowing wires. These wires are heating elements.
When you turn on the toaster, electricity flows through them, they get hot, and toast your bread. Heated grips work on the same principle. The wires are much finer and are integrated into the grip material to provide even heating.
The resistance of these elements is usually quite low. For example, a typical heated grip element might have a resistance of only a few ohms. This is why you need a steady supply of power from the motorcycle’s battery, regulated through the fuse and switch.
Checking For Damage To Grips
Before you get too deep into testing the elements, a quick visual inspection of the grips themselves is a good idea. Look for any signs of physical damage. Have the grips been scraped on anything?
Is there any tearing or splitting in the rubber? Sometimes, a small puncture or cut can affect the wires inside.
Pay close attention to the ends of the grips, especially where the wiring might exit. Also, look at the throttle grip (the one that twists) and the clutch grip (the stationary one). If one heats up and the other doesn’t, and you’ve ruled out the common electrical issues, the problem is likely localized to the non-heating grip.
Consider how the grips were installed. If they were forced onto the handlebars, or if the clamps used to secure them were too tight, it could have damaged the elements. This is more common with aftermarket grips, but it’s worth considering if you’ve had them replaced recently.
Testing The Heating Elements
Testing the heating elements usually requires a multimeter. You’ll need to find where the wires from the heating elements connect to the bike’s wiring harness. This connection point can vary depending on your Ducati model.
Once you locate the wires going to the heating elements (there will typically be two wires per grip), you can test their resistance. Disconnect these wires from the bike’s main harness. Set your multimeter to measure resistance (ohms, Ω).
Touch the probes to the two wires for one grip.
A good heating element will have a measurable resistance, usually a few ohms. If the multimeter reads “open circuit” or shows an extremely high resistance, the element is broken. If it reads very low resistance, close to zero, there might be a short circuit.
Example Scenario:
On a Ducati Multistrada, the wiring for the heated grips often connects under the fuel tank. A rider notices their left grip isn’t heating. After checking the fuse and switch, they locate the connector under the tank.
They disconnect the left grip’s wires and test resistance. The multimeter shows “OL” (open line), indicating a break in the heating element wires. The right grip, when tested, shows a healthy 3.5 ohms.
This confirms the left grip’s heating element is faulty.
If you find that the heating element in one grip is bad, you have a couple of options. You can try to repair the wire, which can be very difficult and often temporary. More commonly, you’ll need to replace the entire grip assembly for that side.
Some grips are designed to be replaced individually, while others might require replacing the entire set.
Replacing The Grips
Replacing handlebar grips with integrated heating elements can be a bit more involved than standard grips. You need to carefully remove the old grip without damaging the handlebar itself or the throttle tube. Then, the new grip with its heating element needs to be installed correctly, ensuring the wires are routed properly and don’t get pinched.
For Ducatis, especially models with integrated electronics, it’s often best to use genuine Ducati parts. This ensures compatibility and quality. The process typically involves applying a special adhesive designed for grips, making sure the grip is straight and secure.
After installation, you’ll need to reconnect the wiring and test again.
Case Study: A Ducati Monster owner experienced a complete failure of both heated grips. After confirming the fuse was intact and the switch worked, they tested the resistance of each grip. Both showed open circuits.
They decided to
Wiring And Electrical Connections
The heart of any electrical system is its wiring. Loose connections, corroded wires, or damaged insulation can all lead to a lack of power for your heated grips. This section will focus on tracing the electrical path from the fuse to the grips and looking for any weak links.
Think of the wiring as the highways that electricity travels on. If there’s a traffic jam or a road closure, the electricity can’t get to its destination. On a motorcycle, these highways are made of wires, connectors, and grounds.
Keeping them clear and connected is vital for all your bike’s electrical functions, including those cozy heated grips.
Understanding Motorcycle Wiring Diagrams
Motorcycle wiring diagrams can look like a confusing maze of lines and symbols. However, they are essential tools for anyone serious about diagnosing electrical issues. Your Ducati’s service manual will contain the specific wiring diagram for your model.
The diagram shows how every wire is connected, what color the wires are, and where the various electrical components are located. Learning to read these diagrams is a skill that will serve you well for any electrical problem on your bike. You can trace the path of the power specifically to your heated grips.
The diagram will show the fuse, the switch, the relay (if applicable), and the connection points to the grips. It will also indicate the ground connection, which is just as important as the power connection. Electricity needs a complete circuit to flow, and the ground wire provides that return path.
Common Connection Problems
Connectors are a frequent source of electrical problems. Over time, they can become loose due to vibration, or the metal pins inside can corrode, especially if exposed to moisture. This corrosion creates resistance, preventing a good electrical connection.
You’ll find connectors in various places: where the grip wiring joins the main bike harness, at the switch, and even within the handlebar controls themselves. Inspecting these connectors is a crucial step. Look for any signs of green or white powdery corrosion.
If you see any, you’ll need to clean them thoroughly.
Corrosion: This is the greenish or whitish powdery stuff that forms on metal contacts. It significantly increases electrical resistance, hindering current flow. You can often clean it with a contact cleaner spray and a small brush.
Sometimes, you might need to gently scrape the contacts to remove stubborn corrosion.
Loose Connections: Wires can sometimes pull out of their connectors, or the metal terminals inside can lose their tension. Gently tugging on each wire within a connector can reveal if any are loose. If a wire pulls out easily, the terminal needs to be crimped or replaced.
Damaged Insulation: Wires are covered in plastic insulation to prevent them from touching each other or the frame, which could cause short circuits. If this insulation is rubbed through, exposing the bare wire, it can lead to all sorts of electrical gremlins. You can repair minor damage with electrical tape, but significant damage may require splicing in a new section of wire.
When testing connections, you’ll often use a multimeter. You can measure voltage at different points in the circuit to see if power is being delivered. For example, if you have power at the fuse but not at the switch, the problem is between those two points, likely a connector or wire issue.
If you have power at the switch but not at the grips, the problem is from the switch onward.
Grounding Issues
A proper ground connection is essential for any electrical circuit. The ground wire provides the return path for electricity to flow back to the battery, completing the circuit. If the ground connection is poor or broken, the circuit won’t function correctly, or at all.
On a motorcycle, grounds are often made by bolting a wire to the bike’s frame or a designated grounding point. These points can also suffer from corrosion or become loose. A common symptom of a bad ground is flickering lights or intermittent operation of electrical components.
To check the ground for your heated grips, locate the ground wire associated with their circuit. This will usually be a black wire. Ensure it’s securely bolted to a clean metal surface.
If there’s any rust or paint on the connection point, it needs to be cleaned off for a good electrical contact. You can test the ground by measuring the resistance between the ground wire terminal and the negative battery terminal. It should be very low, ideally close to zero ohms.
Real-life Example: A Ducati Panigale rider found their heated grips were only working on the lowest setting. After checking fuses and switches, they investigated the wiring. They discovered that the ground wire for the heated grips was attached to a painted frame bolt.
When they scraped away the paint and re-tightened the bolt, the grips began functioning on all settings. This highlights how even a seemingly small detail like paint can interrupt a ground connection.
When To Seek Professional Help
While many motorcycle repairs are accessible to the home mechanic, some issues are best left to the professionals. If you’ve gone through the basic checks and are still unable to diagnose the problem, or if the repair involves components you’re not comfortable with, it’s time to call in the experts.
Ducati motorcycles are sophisticated machines, and their electrical systems can be complex. Trying to force a repair when you’re out of your depth can sometimes lead to more damage and more expensive repairs down the line. Knowing your limits is a key part of being a smart and safe rider.
Identifying Complex Electrical Issues
Some electrical problems are simply not straightforward. For instance, intermittent faults that only happen sometimes can be incredibly hard to track down, even for experienced technicians. If your grips work one day and not the next, with no clear reason, this can be a sign of a deeper issue.
Issues with the bike’s main computer (ECU) or its complex wiring harnesses can also be beyond the scope of basic DIY repair. These systems are interconnected, and a fault in one area can manifest in unexpected ways. If you suspect a problem with these sophisticated systems, it’s definitely time to consult a professional.
Also, if you’ve performed all the checks and the problem persists, it might indicate a fault with a component that is difficult to access or requires specialized tools. For example, some heating elements might be bonded in a way that makes
The Benefits Of A Ducati Dealer Or Specialist
Ducati dealers and authorized specialists have several advantages when it comes to diagnosing and repairing your bike’s electrical systems.
Expertise: They have technicians who are specifically trained on Ducati systems. They know the common issues and have access to specialized diagnostic equipment.
Tools: They possess advanced diagnostic tools, such as Ducati-specific software and hardware, that can read error codes and provide detailed system analysis. These tools are usually not available to the general public.
Parts: They have direct access to genuine Ducati parts, ensuring compatibility and quality. This is especially important for integrated electronic components and complex wiring harnesses.
Warranty: If your bike is still under warranty, any repairs performed by an authorized dealer will likely be covered, saving you money. Even for out-of-warranty repairs, their work often comes with its own labor warranty.
Consider the cost-benefit. While dealer labor rates can seem high, the time saved and the certainty of a correct repair can often outweigh the perceived savings of trying to fix a complex problem yourself and potentially making it worse. For many riders, especially those with newer or more complex Ducati models, this is a worthwhile investment.
Cost Considerations For Repairs
The cost of repairing heated grips can vary significantly. Replacing a blown fuse is very cheap, usually just a few dollars. Replacing a switch might cost anywhere from $50 to $150 for the part, plus labor.
However, replacing the entire grip assembly, especially if it requires specialized Ducati parts and intricate labor, can run into several hundred dollars.
If you are outside of warranty, it is wise to get an estimate from your mechanic or dealer before authorizing any work. They can usually give you a good idea of the total cost involved, including parts and labor. This allows you to make an informed decision about whether to proceed with the repair.
Sometimes, the cost of repairing older heated grips might approach the cost of buying a new aftermarket heated grip kit. While aftermarket kits might not have the same integrated look or feel as OEM Ducati grips, they can be a more budget-friendly option if your original grips are beyond repair and your budget is tight.
Frequently Asked Questions
Question: My Ducati heated grips turn on but don’t get warm
Answer: This usually means the fuse and switch are working, but the heating elements inside the grips themselves are not functioning. You’ll need to test the resistance of the elements to confirm if they are broken. If they are, the grips may need to be replaced.
Question: Can I use a higher amperage fuse if the current one keeps blowing
Answer: No, never use a higher amperage fuse than what is specified for your Ducati. A blown fuse indicates a problem in the circuit that is drawing too much current. Using a higher amperage fuse can damage the wiring and other electrical components, leading to more serious and costly repairs.
Question: How often should I check my heated grip fuses
Answer: You don’t need to check your fuses regularly unless you suspect a problem. Fuses are designed to blow only when there’s an electrical fault. If a fuse blows, it’s a sign that something needs to be investigated, rather than just
Question: Are aftermarket heated grips compatible with my Ducati
Answer: Many aftermarket heated grips are universal and can be installed on most motorcycles, including Ducatis. However, you’ll need to ensure they have a compatible power draw and that you can route the wiring cleanly and safely. Always check the product specifications and installation instructions carefully.
Question: My heated grips sometimes work and sometimes don’t
Answer: This is often a sign of a loose connection or a partially failing component. Check all wiring connections, especially at the switch and where the grips connect to the main harness. It could also be an issue with the switch itself or a worn heating element that is about to fail completely.
Summary
Fixing your Ducati’s heated grips involves checking the fuse, switch, and heating elements. Simple steps like fuse replacement can often solve the problem. For more complex issues, understanding wiring diagrams and connections is key.
If you’re uncomfortable, professional help is a smart choice for safe and effective repairs.