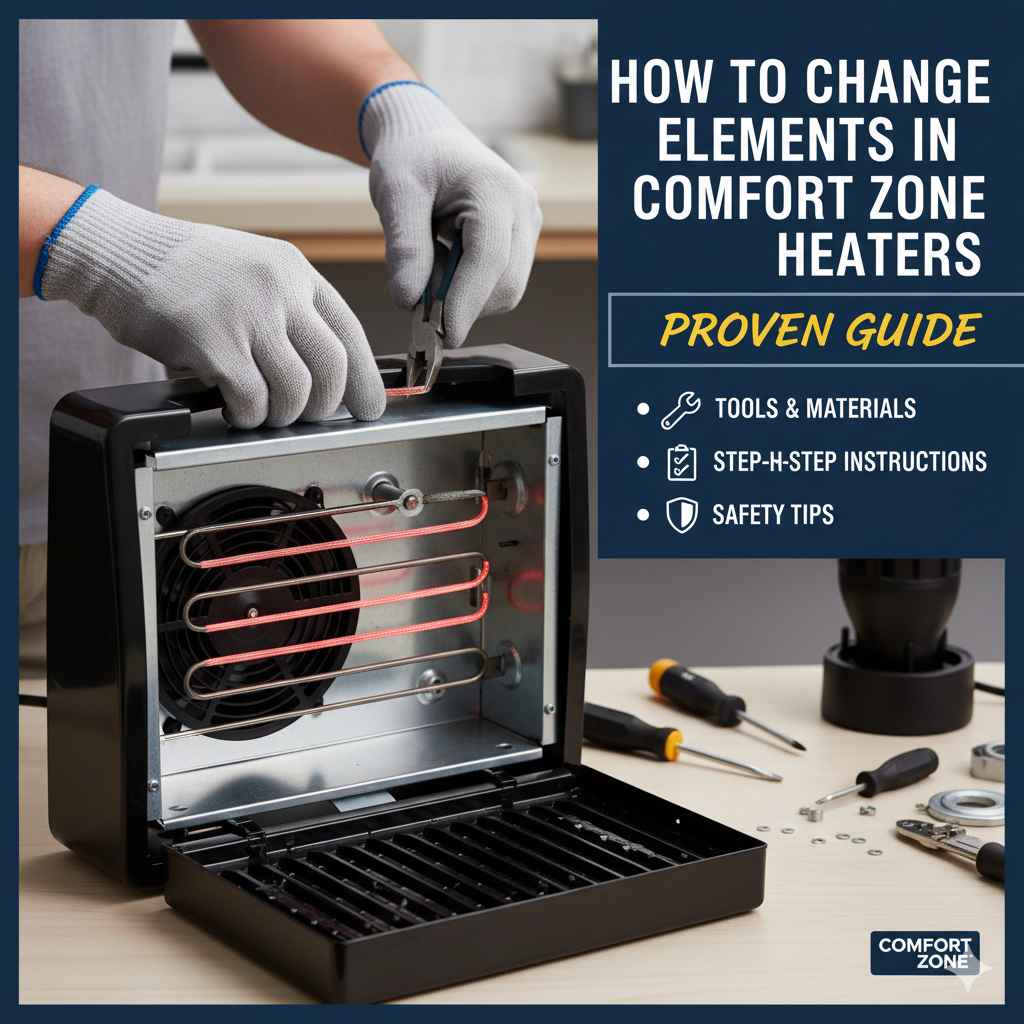
How to Change Elements in Comfort Zone Heaters: Proven Guide
For those wondering how to change elements in Comfort Zone heaters, the process is straightforward. It involves identifying the correct replacement, safely unplugging the unit, accessing the heater element, replacing it with the new one, and reassembling. This guide provides simple steps to ensure you can maintain your heater’s warmth effectively and safely.
Keeping your home cozy during the colder months is a top priority. When your Comfort Zone heater isn’t performing as it should, it can be a real bummer. Often, the culprit is a worn-out heating element. Not to worry! As your friendly home heating guide, Tanim, I’m here to show you that changing a Comfort Zone heater element is something you absolutely can do yourself.
Many homeowners feel a little hesitant to tackle heater repairs, thinking it’s too complicated. But with clear instructions and a bit of confidence, you’ll find it’s much simpler than you might imagine. We’ll break down the process into easy-to-follow steps, making sure you understand each part without any confusing jargon.
This guide is designed for you, the homeowner who wants to keep their space warm, safe, and comfortable without a fuss. We’ll cover what you need to know, from identifying the right part to safely getting your heater back in working order. Let’s get your Comfort Zone heater back to its best!
Understanding Your Comfort Zone Heater and Its Elements
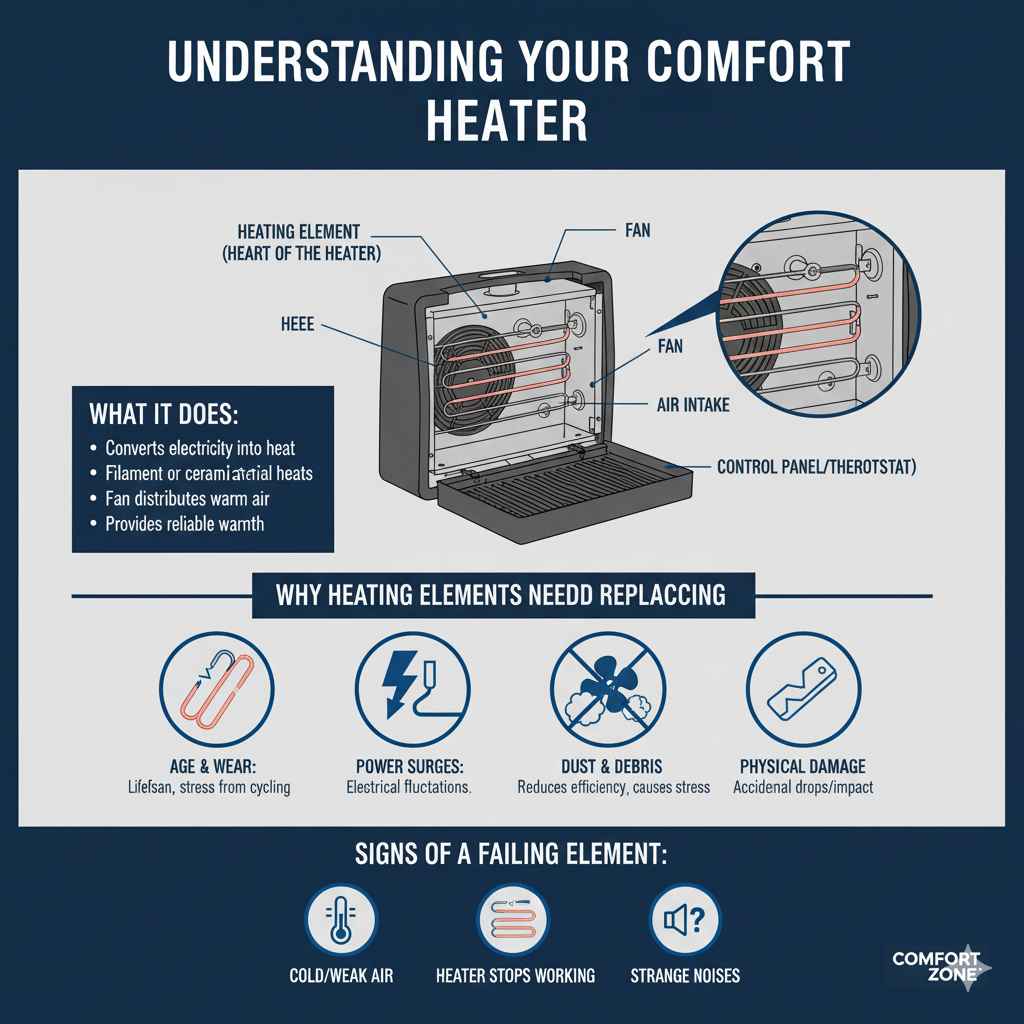
Comfort Zone heaters are popular for their reliability and ease of use. They come in various types, including ceramic, infrared, and fan-forced models. Each type has a heating element that converts electrical energy into heat. Over time, these elements can degrade, leading to reduced heating performance or a complete failure to heat.
The heating element is the heart of your heater. Think of it like the filament in an old-fashioned light bulb – it gets hot when electricity passes through it. In ceramic heaters, this is often a ceramic PTC (Positive Temperature Coefficient) material that heats up. In other types, it might be a nichrome wire coil. When this component starts to fail, it’s like a bulb burning out; it can’t produce the heat you need.
Knowing what type of heater you have is the first step to understanding its components. Most Comfort Zone models are designed with user-friendly access to internal parts for common maintenance tasks like element replacement. This makes it a repair that many can handle, saving you the cost of a service call.
Why Heating Elements Need Replacing
Several factors can lead to a heating element needing replacement:
- Age and Wear: Like any component that generates heat through electrical resistance, elements have a lifespan. Constant cycling on and off, and the stress of heating and cooling, can cause them to break down.
- Power Surges: Electrical fluctuations can sometimes damage sensitive components like heating elements.
- Dust and Debris Buildup: While not directly damaging the element itself, excessive dust can clog air intakes and vents. This forces the heater to work harder, potentially overheating and stressing the element. It also reduces the heater’s efficiency. A good practice is to clean your heater regularly. For more insights on maintaining your heater, check out Energy Star’s tips on energy-efficient heating.
- Physical Damage: Though less common if the heater is handled carefully, accidental drops or impacts could potentially damage the delicate element.
Identifying the signs that your heating element might be failing is crucial. You might notice that the heater takes much longer to warm up a room, or it may not get as hot as it used to. In some cases, you might hear strange clicking noises, or the heater may turn on but produce no heat at all. These are clear indicators that it’s time to consider replacing the heating element.
Signs Your Comfort Zone Heater Needs a New Element
Before you start thinking about replacement, it’s good to be sure that the heating element is indeed the issue. Here are some common signs to look out for:
- No Heat Output: The most obvious sign is when the heater powers on (the fan might run), but no warm air comes out. This often points to a burnt-out element.
- Reduced Heating Power: The room takes significantly longer to heat up, or it never reaches your desired temperature, even when the heater is set to high.
- Strange Smells or Sounds: While some new heaters have a slight initial odor, a persistent burning smell or unusual clicking, buzzing, or popping sounds when trying to heat could indicate a problem with the element or its connections.
- Heater Turns Off Prematurely: If the heater cycles on and then quickly shuts off without reaching temperature, it could be an overheating issue caused by a struggling element or blocked vents.
- Visible Damage (Rare): In rare cases, if you’ve already opened up the heater for cleaning, you might see visible breaks or damage to the element itself.
It’s also worth noting that sometimes, a heater stops working due to an issue with the thermostat or a tripped safety mechanism rather than the element. However, if the fan is running and you suspect a heating problem, the element is a prime suspect.
Tools and Materials Needed
Gathering the right tools beforehand makes the process much smoother. You won’t need a whole workshop, just a few common household items.
Essential Tools:
- Screwdrivers: You’ll likely need a Phillips head screwdriver and potentially a flathead screwdriver. The size might vary depending on the screws on your Comfort Zone heater model.
- Pliers (Needle-nose recommended): Useful for gripping and maneuvering wires or small parts.
- Work Gloves: To protect your hands from sharp edges or any residual heat (even after unplugging, wait a good while).
- Clean Cloth or Microfiber Towel: For wiping down components and ensuring a clean work area.
- Owner’s Manual: Crucial for identifying your specific model and understanding its internal layout. If you don’t have it, you can usually find a PDF version on the Comfort Zone website by searching for your model number.
Replacement Part:
- Correct Replacement Heating Element: This is the most important item! Ensure you purchase the exact element specified for your Comfort Zone heater model. Ordering the wrong part will prevent the repair from being successful. You can usually find these on the manufacturer’s website, authorized parts dealers, or sometimes even on large online marketplaces if you have the exact part number.
It’s always a good idea to have a small container or magnetic tray to keep screws organized. This prevents them from getting lost and ensures you put them back in the right places.
Step-by-Step Guide: How to Change Elements in Comfort Zone Heaters
Let’s walk through changing the heating element in your Comfort Zone heater. Remember, safety first! Always ensure the unit is completely unplugged from the power source.
Step 1: Safety First – Unplug the Heater
This is the most critical step. Locate the power cord for your Comfort Zone heater and unplug it from the wall socket. Do not skip this step. Wait at least 10-15 minutes after it was last running to ensure any residual heat has dissipated. Even though it’s unplugged, giving it time to cool is important for safety.
Step 2: Identify Your Heater Model and Locate the Heating Element
Find the model number on your Comfort Zone heater. It’s usually on a label on the back or bottom of the unit. This is vital for ordering the correct replacement part. Consult your owner’s manual or the Comfort Zone website model lookup to confirm the part number for the heating element specific to your model.
Once you have the new element, you’ll need to figure out where the old one is. Typically, the heating element is located within the main body of the heater, often near where the air is drawn in and expelled.
Step 3: Access the Heating Element – Opening the Heater
Turn the heater so you have easy access to the rear or the side panels that need to be removed. You’ll likely see screws holding the casing together. Use the appropriate screwdriver to remove these screws. Keep them in a safe place, like your magnetic tray or a small bowl, so they don’t get lost or rolled away.
Gently pull the panel away from the main body of the heater. Take note of how the panel is attached and where any internal wires might be routed. Some panels might also have clips that need to be carefully released.
Step 4: Locate and Disconnect the Old Heating Element
With the casing open, you should be able to clearly see the old heating element. It might be mounted on a ceramic block or nestled within a metal framework. There will be wires connected to the terminals of the heating element.
Carefully observe how the wires are connected. It’s a good idea to take a picture with your phone of the wiring setup before you disconnect anything. This will be a lifesaver when it comes time to connect the new element. Use your pliers or a screwdriver to gently disconnect the wires. They are usually attached with spade connectors that pull off, or sometimes they are secured with small screws.
Step 5: Remove the Old Heating Element
The heating element itself will be secured by mounting screws, clips, or a bracket. Carefully remove these fasteners. Once the element is free, gently lift it out of its housing. Be careful not to disturb any other internal components or wires.
Inspect the area where the element was. Clean away any dust or debris you find using your clean cloth. This helps ensure good contact for the new element and improves airflow.
Step 6: Install the New Heating Element
Take your new, correct replacement heating element and carefully position it in the same place as the old one. Ensure it sits securely in its mountings. Reinstall any screws or clips that held the old element in place.
Now, reconnect the wires to the new heating element. Refer to the picture you took or your knowledge of the original setup. Ensure the connectors are snug and secure on the terminals. If you encounter any resistance or difficulty, double-check that you have the right element and that you’re connecting it correctly.
Step 7: Reassemble the Heater Casing
Carefully place the removed panel back onto the heater body. Make sure any internal wires are not pinched. Align the panel with the chassis of the heater and reinsert all the screws you removed earlier. Tighten them until they are snug, but don’t overtighten, as this could strip the threads or crack the plastic.
Step 8: Test the Heater
Once the heater is fully reassembled, plug it back into the power outlet. Turn the heater on and set it to a warm setting. Listen for the fan and feel for warm air being expelled. It might take a minute or two to fully heat up. If it’s working correctly, it should now be providing comfortable heat again!
If the heater doesn’t work, double-check all connections, ensure the element is correctly seated, and that all screws are in place. If it still doesn’t work, you might need to consult an electrician or consider replacing the unit.
Common Comfort Zone Heater Model Types and Element Considerations
Comfort Zone offers a range of heaters, and while the general principle of changing an element is similar, specific designs can present minor differences. Knowing your heater type helps immensely.
Ceramic Heaters
These are very common. They use a ceramic component (often a PTC ceramic element) that heats up. The element is usually integrated into a ceramic block. Accessing it typically involves removing a side or rear panel. Be gentle with ceramic components, as they can be brittle.
Infrared Heaters
Infrared heaters often use quartz tubes or metal elements to emit radiant heat. The elements themselves are usually quite long and thin. The casing for these heaters might need to be opened to access the ends of these elements where they connect.
Fan-Forced Heaters (Convection Heaters)
These use a coil of resistance wire (often nichrome) that’s heated by electricity, with a fan blowing air over it. These coils are housed within a metal casing, and you’ll typically need to remove a side or back panel to get to the coil assembly and its connection points.
Table: Common Heater Types and Element Access
| Heater Type | Typical Element Material | General Access Point for Element | Points to Note |
|---|---|---|---|
| Ceramic Heater | PTC Ceramic Block | Side or Rear Panel | Handle ceramic parts gently; they can be brittle. |
| Infrared Heater | Quartz Tube or Metal Element | Often from the front or back, exposing the tube/element ends. | Quartz tubes can be fragile. |
| Fan-Forced Heater | Nichrome Wire Coil | Side or Rear Panel | Ensure no dust buildup on the coil; check fan stability. |
Always refer to your specific Comfort Zone model’s manual to understand its unique construction. Trying to find a part number for “Comfort Zone heater replacement element 2000W” is less effective than looking up the part number for your specific model, like “Comfort Zone CZ500 heater element replacement.
Troubleshooting Common Issues After Replacement
Even after a successful-looking replacement, sometimes things don’t immediately work as expected. Here are a few things to check if your Comfort Zone heater isn’t heating properly:
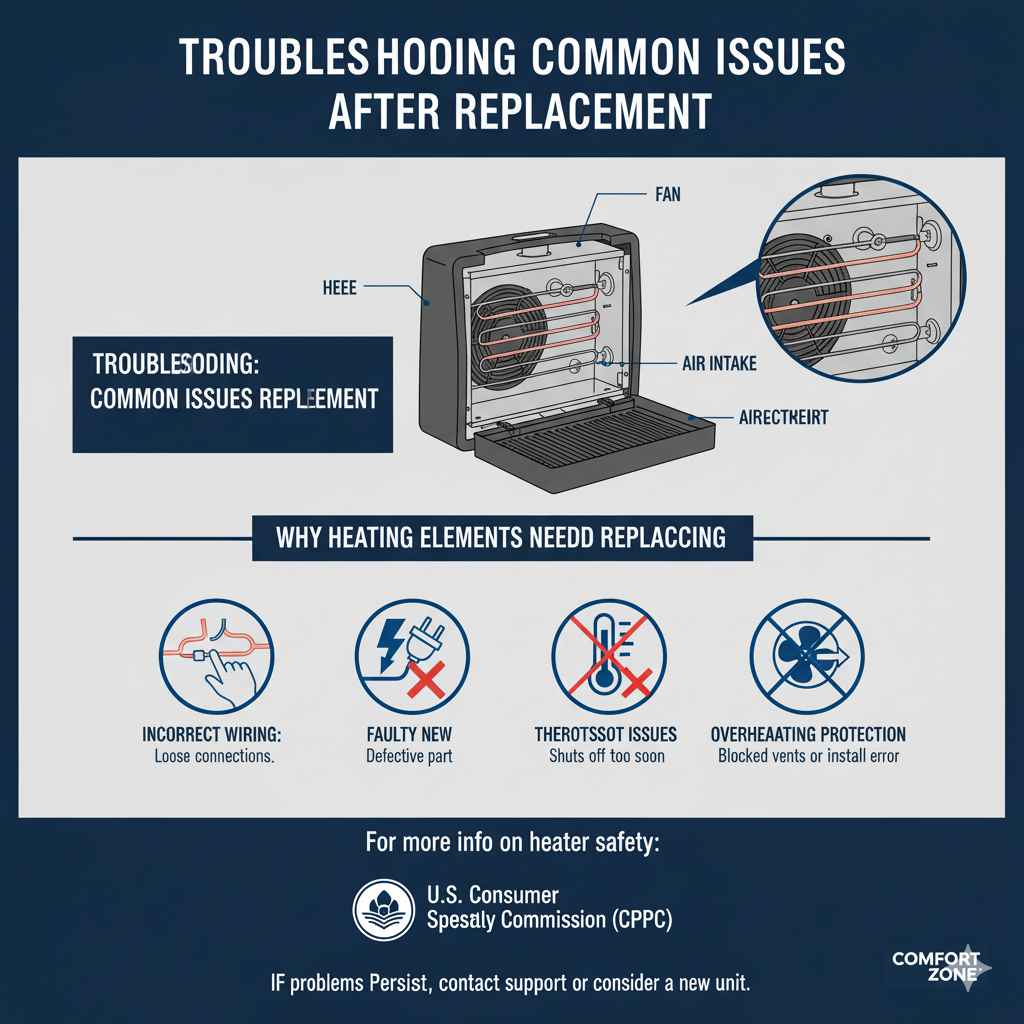
- Incorrect Wiring: Double-check that all wires are connected securely and to the correct terminals. Refer back to your photos or the manual. A loose connection is a common cause of failure.
- Faulty New Element: While rare, the new element itself could be defective. Test the heater on a different circuit if possible, or check continuity with a multimeter if you’re comfortable using one.
- Thermostat Issues: The problem might not be the element, but the thermostat that regulates the temperature. If the heater turns on but then immediately shuts off, the thermostat might be faulty or miscalibrated.
- Overheating Protection: Most heaters have a thermal cutoff switch to prevent overheating. If the element is installed incorrectly or there’s a blockage, this switch might engage. Ensure vents are clear and the element is seated correctly.
- Internal Wiring Damage: It’s possible that other internal wires or components were damaged during the process or were already failing.
If you’ve gone through these checks and your heater still isn’t working, it might be time to contact Comfort Zone customer support or consider purchasing a new unit. For more general guidance on heater safety and maintenance, resources like the U.S. Consumer Product Safety Commission (CPSC) offer valuable information.
Frequently Asked Questions (FAQ)
Q1: Can I use a generic heating element if I can’t find the exact Comfort Zone part?
A1: It’s strongly recommended to use the exact replacement part specified for your Comfort Zone model. Generic elements may have different wattage, resistance, or physical dimensions, which can lead to improper function, damage to the heater, or even a fire hazard.
Q2: How often should I replace the heating element in my Comfort Zone heater?
A2: Heating elements don’t have a fixed replacement schedule. They typically last for many years. Replacement is only necessary when you notice symptoms of failure, such as reduced heating or no heat output, and you’ve ruled out other issues.
Q3: My Comfort Zone heater smells like burning plastic after replacing the element. What should I do?
A3: This can be normal for the first few minutes of operation as any manufacturing residue burns off. However, if the smell is strong, persistent, or accompanied by smoke, immediately unplug the heater. Double-check your wiring, ensure no plastic parts melted or touched the new element (which could indicate incorrect installation or a faulty element), and ensure all covers are properly secured.
Q4: Is it safe to open up my Comfort Zone heater?
A4: Yes, it is generally safe to open your Comfort Zone heater for maintenance like element replacement, provided you follow strict safety procedures. Always ensure the unit is completely unplugged from the power source and has cooled down. If at any point you feel uncomfortable or unsure, it’s best to seek professional help.
Q5: What if I can’t find my Comfort Zone heater’s model number?
A5: Check all sides of the unit, including the bottom and the rear panel. The label containing the model number and serial number is usually located there. If it’s faded or missing, try to recall the approximate age and type of heater, and search online for common Comfort Zone models from that era or description. Contacting Comfort Zone customer support with a description of your heater might also help.