
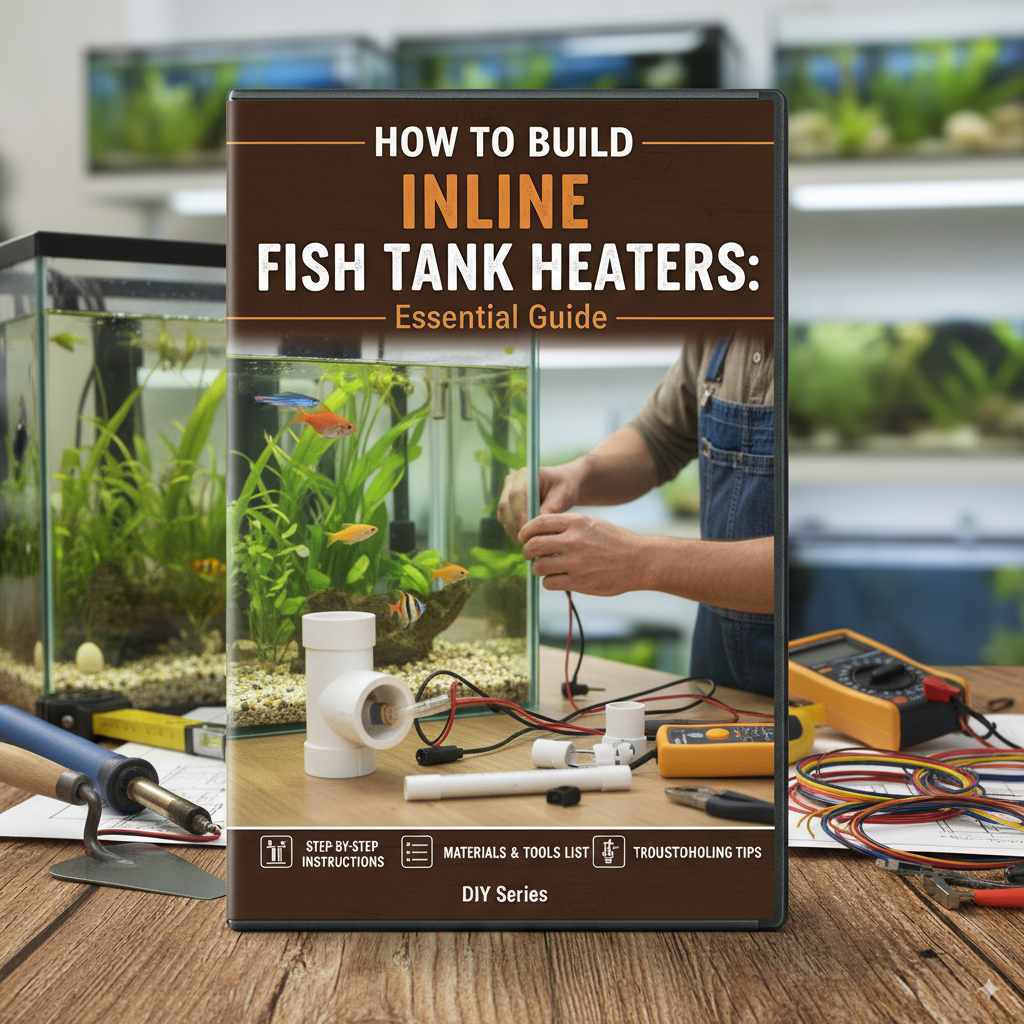
To build inline fish tank heaters, you’ll need specific materials like submersible heaters, PVC pipes, and waterproof sealant. This DIY guide offers step-by-step instructions for creating a safe, custom-sized heating solution for your aquarium, ensuring optimal water temperature for your aquatic life.
Keeping your fish happy and healthy often means keeping their water at the perfect temperature. Sometimes, standard aquarium heaters just don’t fit your setup or provide the even warmth you crave. If you’ve found yourself wishing for a more integrated heating solution, you’re in the right place! Building your own inline fish tank heater might sound complex, but with a little guidance, it’s totally achievable. We’ll walk you through everything you need, step-by-step, to create a safe and effective heating system that works seamlessly with your filter.
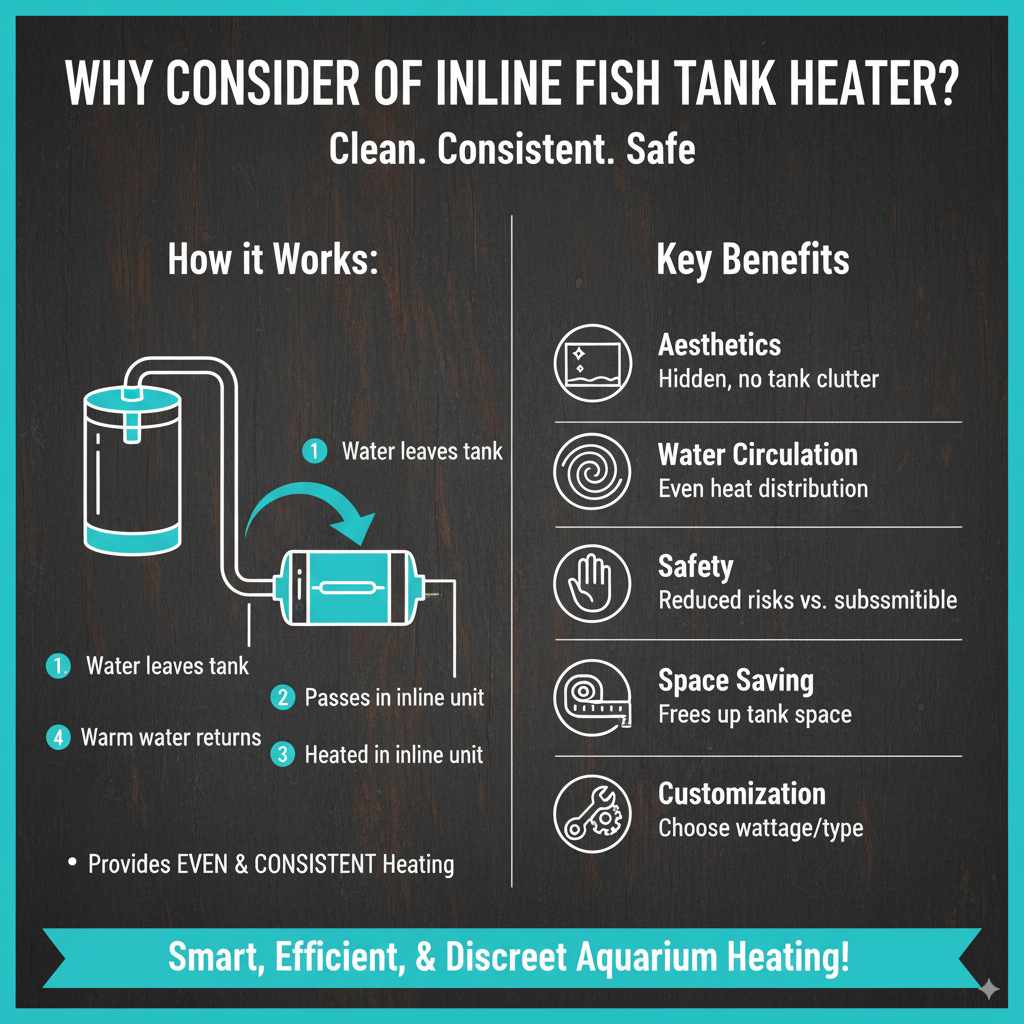
Why Consider an Inline Fish Tank Heater?
You might be wondering why you’d need an inline heater when there are so many submersible ones available. Well, inline heaters offer some fantastic advantages that make them a popular choice for serious aquarists and beginners alike.
Here are a few key reasons:
- Aesthetics: They are hidden, meaning no unsightly heater cluttering up your beautiful aquarium. All the equipment is neatly tucked away.
- Water Circulation: Inline heaters are designed to work with your existing filter and canister, meaning they heat the water as it flows through the system. This provides very even and consistent heating throughout the tank.
- Safety: Submersible heaters, if malfunctioning or not fully submerged, can pose a risk to both fish and humans. An inline heater, being external, reduces some of these risks.
- Space Saving: For smaller tanks or aquariums with limited space for equipment, hiding the heater in the filtration line frees up valuable internal real estate.
- Customization: You can often choose the wattage and type of heater that best suits your tank size and needs, something not always possible with basic submersible models.
Understanding How Inline Heaters Work
What You’ll Need: Tools and Materials
Before we dive into the building process, let’s gather everything you’ll need. Having all your supplies ready will make the process smooth and enjoyable!
Essential Tools:
- PVC Pipe Cutter or Hacksaw
- Measuring Tape
- Drill withappropriate bits (for creating holes if needed)
- Screwdriver (if your chosen heater requires mounting)
- Deburring tool or sandpaper (to smooth edges)
- Safety Glasses – always protect your eyes!
Key Materials:
- Submersible Aquarium Heater: This will be the core component. Choose a wattage appropriate for your aquarium size. It’s wise to select a heater with a reliable external thermostat dial. Check out reviews for durability. For instance, Eheim Jager heaters are often praised for their build quality.
- PVC Pipe and Fittings: You’ll need straight PVC pipe sections and potentially elbows or connectors. The diameter should match your filter tubing. Use Schedule 40 PVC for durability.
- PVC Cement and Primer: To create a strong, waterproof bond between PVC pieces.
- Bulkhead Fittings: These are crucial for creating a watertight seal where tubing enters and exits your custom heater housing.
- Waterproof Sealant: A aquarium-safe silicone sealant or similar product to ensure no leaks exist around any connections or the heater itself.
- Hose Clamps: To secure filter tubing to the bulkhead fittings.
- Filter Tubing: The same size tubing used by your external filter.
- Optional: A small, food-safe plastic container or acrylic tube of sufficient diameter to house the submersible heater if you’re not directly integrating it into a PVC pipe loop.
Step-by-Step Guide to Building Your Inline Heater
Let’s get building! We’ll break this down into simple, manageable steps. Since there are a couple of common approaches, we’ll cover a general method that adapts to most needs.
Step 1: Plan Your Setup and Measure
First, decide where your inline heater will fit into your filtration setup. The most common spot is between the filter output and the aquarium return. Measure the length of tubing you’ll need to replace and the space available for your custom housing. Ensure there’s enough room for the heater itself and any necessary PVC fittings.
Consider the heater’s power cord. You’ll need access to an outlet and a way to route the cord safely out of the tank area.
Step 2: Prepare the PVC Housing
You can use a section of PVC pipe to create a housing for your submersible heater. The key is allowing water to flow through it while protecting the heater and making connections easy.
Option A: Direct Integration into PVC Pipe
This method involves creating a chamber within the PVC line where the heater can sit submersible. This requires more advanced PVC work. You’ll need to:
- Cut a length of PVC pipe to accommodate your submersible heater. You may need a wider diameter pipe for this section.
- Consider installing threaded bulkheads that allow easy removal of the heater or the section for cleaning.
- Drill holes of the correct size in the PVC pipe for the heater’s control knob and power cord to pass through, if necessary. Ensure these are sealed perfectly.
Option B: Using a Custom Chamber/Container
A simpler approach often involves housing the submersible heater inside a custom chamber connected to the PVC flow.
- Acquire a food-safe plastic container or a short length of wider PVC pipe.
- Drill two holes into this container or PVC section, sized perfectly for your bulkhead fittings.
- Install the bulkhead fittings. Ensure the rubber grommets create a tight seal.
Step 3: Install Bulkhead Fittings
Bulkhead fittings are your best friend for watertight connections. They have threaded parts and rubber gaskets that create a seal when tightened.
- Drill holes into your chosen PVC housing or container. The size of the hole should correspond to the bulkhead fitting’s specifications.
- Insert the bulkhead fittings through the holes. Ensure the rubber gaskets are on both sides of the material for maximum sealing.
- Tighten the fittings securely. Don’t overtighten, which can crack PVC, but make sure they are snug.
Step 4: Connect Tubing and Seal
Now it’s time to connect everything.
- Attach your filter tubing to the inlet bulkhead fitting using a hose clamp.
- Attach the outlet tubing to the other bulkhead fitting, also securing it with a hose clamp.
- If you chose Option B, carefully place your submersible heater inside the container. Ensure the heater’s thermostat is accessible, and its power cord can exit cleanly. You might need to seal around the cord if it passes through the container lid, using waterproof aquarium sealant.
- Use aquarium-safe silicone sealant around any areas where you feel a leak might occur, especially around the bulkhead fittings if they feel less than perfectly sealed. Let the sealant cure fully according to the manufacturer’s instructions before proceeding. This typically takes 24-48 hours.
Step 5: Integrate into Filter System
This is where your DIY heater becomes part of your aquarium’s circulation.
- Disconnect a section of your filter tubing. Usually, this is the output line from the filter, but it can also be the intake line depending on your setup and preference.
- Connect your newly built inline heater housing between these two points. If housing the heater inside a PVC pipe, ensure the water flow will pass over or around it effectively.
- Ensure all hose clamps are tight to prevent leaks.
Step 6: Test for Leaks
This is arguably the MOST important step. Before powering anything on, run your filter for a while with plain water (no fish yet!) to check for any leaks.
- Place towels or a shallow tray beneath your setup.
- Turn on your filter and let water run through the entire system for at least an hour.
- Carefully inspect every connection, fitting, and sealant point. Tighten any leaky clamps or apply more sealant if necessary.
- Once you are confident there are no leaks, you can move on.
Step 7: Thermostat Calibration and Final Setup
Once leak-free, it’s time to set the temperature.
- Plug in your modular heater. If your heater has an external thermostat, set your desired temperature.
- Monitor your aquarium thermometer for at least 24 hours, checking that the temperature remains stable and consistent where you want it. Adjust the heater’s thermostat as needed.
- Ensure the heater’s power cord is safely routed and connected to a drip loop.
Inline Heater Types and Wattage Considerations
When building or choosing components for your inline heater, understanding the types of heaters and proper wattage is key. This ensures your fish have a stable, comfortable environment.
Common Heater Types for Inline Setups:
While you can technically adapt many submersible heaters, some are better suited for this DIY integration.
- Standard Submersible Heaters: These are the most common and affordable. You’ll house them within your custom PVC chamber or container. Look for models known for reliable thermostats.
- External/In-Line Heaters (Commercial): These are purpose-built aquarium devices designed to sit outside the tank connected to filter tubing. While you aren’t building these from scratch, understanding them can inform your DIY approach. They often have robust heating elements and advanced controls.
- Titanium Heaters: These are more durable and often used in larger setups. Their materials make them suitable for integration but are typically more expensive.
Choosing the Right Wattage:
Wattage determines how quickly and effectively your heater can raise and maintain water temperature. Too low, and it won’t keep up; too high, and it can overheat the water.
A general guideline is 3-5 watts per gallon of freshwater. For saltwater, you might lean towards the higher end (4-6 watts per gallon), as saltwater tanks can sometimes be harder to regulate.
Here’s a quick guide:
| Aquarium Size (Gallons) | Recommended Wattage Range |
|---|---|
| 10-20 | 50 – 100 watts |
| 20-40 | 100 – 150 watts |
| 40-75 | 150 – 250 watts |
| 75-125 | 200 – 300+ watts |
Important Note: These are just guidelines. Factors like room ambient temperature, the number of tank openings, and the number of gallons also affect heating needs. If your room is very cold, you may need a higher wattage. If you live in a warmer climate, a lower wattage might suffice.
Safety Precautions and Best Practices
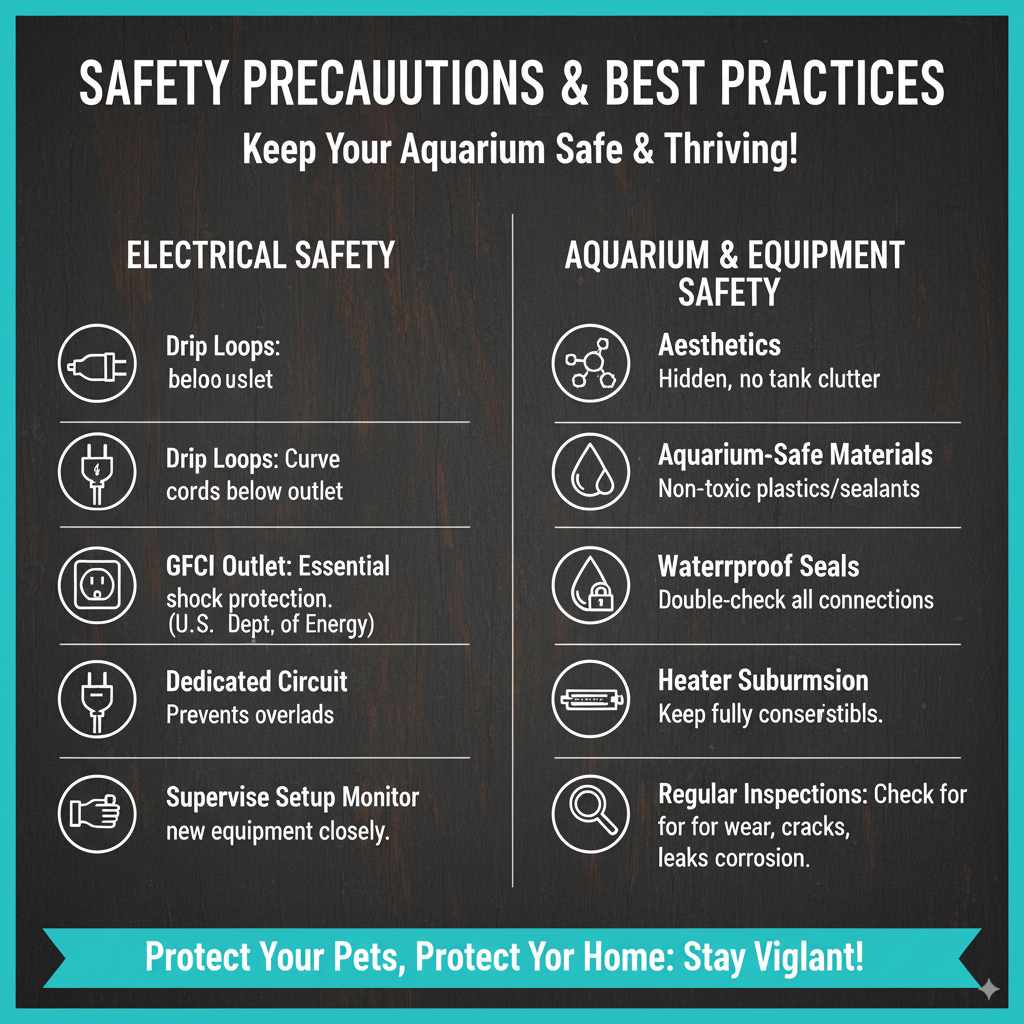
Safety is paramount when dealing with water and electricity. Let’s go over some essential precautions to keep both you and your aquatic pets safe.
Always remember:
- Use Aquarium-Safe Materials: Ensure all plastics, sealants, and adhesives are non-toxic and safe for aquarium use. Many products are labeled as such.
- Waterproof Seals are Critical: Leaks can damage your equipment, flooring, and electrical components. Double-check all seals and connections.
- Drip Loops: Always create a “drip loop” for all electrical cords connected to aquarium equipment. This is where the cord hangs down in a curve below the outlet before going up to it. Water will drip off the lowest point of the loop, away from the electrical connection.
- Ground Fault Circuit Interrupter (GFCI) Outlet: Plug all aquarium equipment into a GFCI-protected outlet. These outlets are designed to quickly cut power if they detect a ground fault (like water getting into electrical components), preventing electrocution. Learn more about GFCI outlets from the U.S. Department of Energy.
- Proper Heater Submersion: If using a submersible heater within your DIY housing, ensure it is designed for submersion and that the water level will always keep it fully covered. Check the heater’s manual for minimum submersion requirements.
- Regular Inspections: Periodically check your inline heater setup for any signs of wear, cracks, leaks, or corrosion.
- Dedicated Circuit: If possible, run aquarium equipment on a dedicated circuit to prevent overloads.
- Supervise Initial Setup: Stay near your aquarium for the first few hours after setting up any new heating equipment to catch any potential issues immediately.
Maintenance and Troubleshooting
Like any piece of equipment, your DIY inline heater will require some care and attention to keep it running smoothly.
Routine Maintenance:
- Leak Checks: Perform visual inspections weekly to ensure no leaks have developed.
- Cleaning: Periodically, you’ll want to disconnect the heater housing from your filter line for a thorough cleaning. Buildup of algae or sediment can occur. Disassemble carefully, clean the components with aquarium-safe cleaner or a diluted vinegar solution, rinse thoroughly, and reassemble.
- Thermostat Check: Ensure the thermostat on your submersible heater is still functioning correctly by monitoring your aquarium thermometer.
- Tubing Inspection: Check filter tubing for any signs of cracking, kinking, or blockage.
Common Troubleshooting Tips:
Encountering a problem? Don’t worry, most issues are fixable.
| Problem | Possible Cause | Solution |
|---|---|---|
| Water Leaks | Loose bulkhead fittings, damaged gaskets, insufficient sealant, cracked PVC | Tighten fittings, replace gaskets, reapply sealant, inspect PVC for cracks. If a PVC pipe is cracked, it is best to replace the section. |
| Water Not Heating | Heater not plugged in, thermostat set too low, heater failure, insufficient wattage | Check power, set thermostat higher, test heater separately (if possible), confirm wattage is adequate for tank size. |
| Overheating | Thermostat failure, wattage too high, poor water flow | Check thermostat accuracy, consider lowering wattage if drastically oversized, ensure filter is running effectively and not causing flow restriction. |
| Tubing Comes Loose | Hose clamp not tight, tubing is old/brittle | Retighten hose clamp, replace tubing if it shows signs of wear. |
Remember to always disconnect power before performing any maintenance or troubleshooting! For more information on aquarium setup and maintenance, resources like Aquarium Science offer valuable insights into water chemistry and equipment best practices.
Frequently Asked Questions (FAQ)
Here are answers to some common questions beginners have about building inline fish tank heaters.
Q1: Is it safe to build my own fish tank heater?
Yes, it can be safe if you use aquarium-safe materials, ensure all connections are watertight, and follow electrical safety guidelines like using GFCI outlets and drip loops. The key is careful construction and regular inspection.
Q2: Can I use any submersible heater for an inline setup?
Most standard submersible heaters can be housed within a custom inline setup. However, ensure the heater’s maximum water level is respected, and its thermostat is accessible. Heaters with external adjustment knobs are easier to manage.
Q3: How do I ensure my inline heater doesn’t leak?
Use high-quality bulkhead fittings with good gaskets, ensure the drilled holes for the fittings are the correct size, and use aquarium-safe silicone sealant to reinforce all connections. Always test the system thoroughly with plain water before introducing fish.
Q4: What if my filter tubing doesn’t fit the bulkhead fittings?
Bulkhead fittings come in various standard sizes (e.g., 1/2 inch, 3/4 inch, 1 inch). Measure the outer diameter of your filter tubing and purchase bulkhead fittings that are designed to accommodate that size tubing, often by using adapters or appropriately sized barbed ends.
Q5: How often should I clean my inline heater setup?
It’s recommended to perform a visual check for leaks weekly. For cleaning, aim to disconnect and clean the housing unit every 2-3 months, or more often if you notice sediment buildup or reduced water flow.