

Changing your heater blower motor is achievable for most homeowners. Following safety steps and this guide will get your furnace blowing warm air again efficiently.
Is your home feeling a bit chilly when the thermostat says it should be warm? One common reason is a faulty heater blower motor. This little guy is crucial – it’s the heart of your heating system that circulates warm air throughout your home. When it stops working, no heat gets where it needs to go!
Don’t worry if you’re not a seasoned DIYer. This guide is designed to make the process of changing your heater blower motor straightforward and safe. We’ll walk through each step, so you can feel confident tackling this home repair and get your cozy comfort back.
Why Your Heater Blower Motor Might Need Replacing
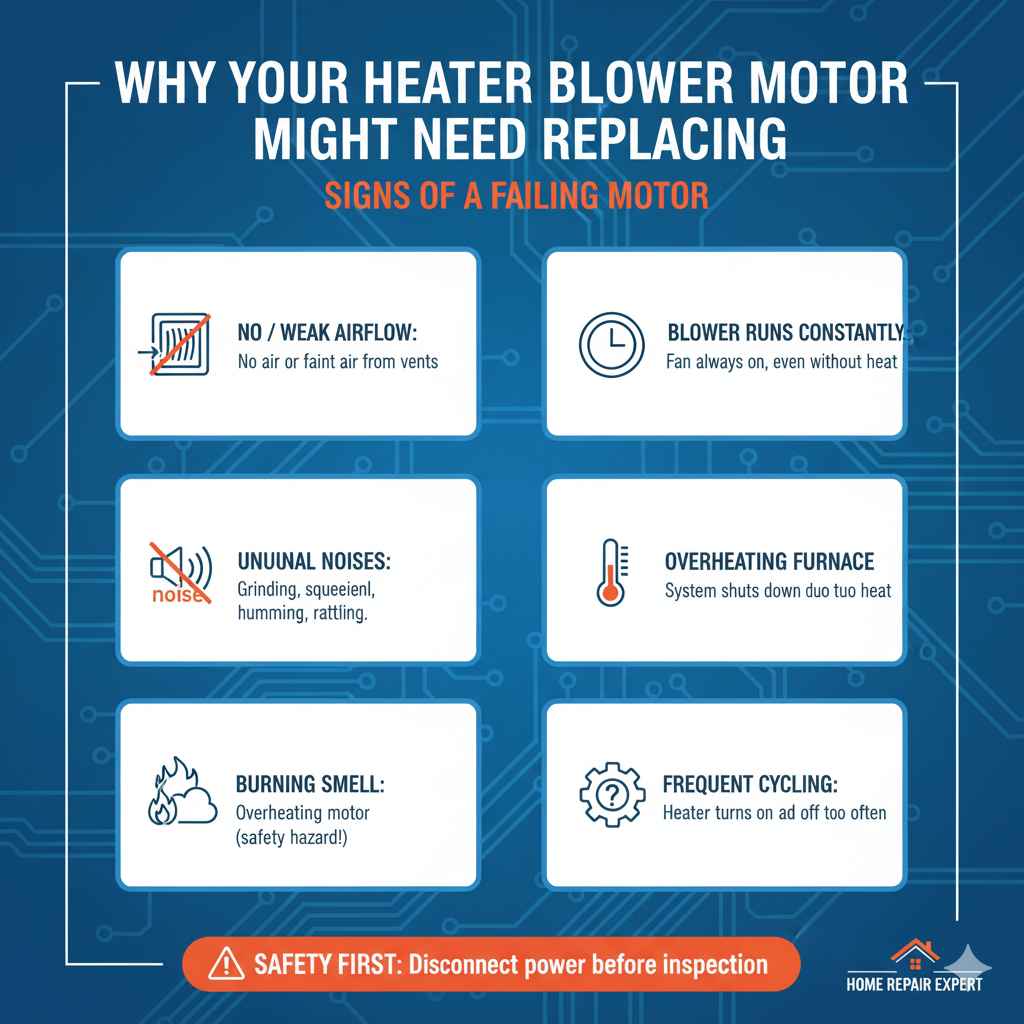
Several signs can point to a failing blower motor. Recognizing these early can save you from a completely cold house and potentially prevent further damage to your heating system.
- No Airflow or Weak Airflow: This is the most obvious symptom. If you turn on your heat and nothing happens, or just a faint puff of air comes out, your blower motor might be struggling or completely dead.
- Unusual Noises: A healthy blower motor is usually pretty quiet. If you start hearing grinding, squealing, humming, or rattling noises coming from your furnace or air handler, it’s a strong indicator that the motor’s bearings or other components are wearing out.
- Burning Smell: While not always the blower motor, a burning smell can sometimes be linked to an overheating motor before it fails completely. Address this immediately as it could be a safety hazard.
- Blower Runs Constantly: If your fan seems to be running all the time, even when the heat isn’t on, it could be an issue with the motor’s control or an indication it’s working overtime before failure.
- Overheating Furnace: The blower motor also helps cool certain components of your furnace. If it’s not working, other parts can overheat, potentially causing your system to shut down as a safety measure.
Gathering Your Tools and Supplies
Before you start, having the right tools and a new blower motor ready will make the job much smoother. Safety first! Always ensure the power to your furnace is completely shut off at the breaker box before you begin any work.
Essential Tools You’ll Need:
- New Blower Motor: Make sure you have the exact replacement part for your furnace model.
- Screwdriver Set: You’ll likely need Phillips head and possibly flathead screwdrivers.
- Nut Drivers or Socket Set: For removing nuts and bolts securing the motor or housing.
- Pliers: Needle-nose and standard pliers can be helpful for disconnecting wires and maneuvering parts.
- Wire Strippers/Crimpers: If you need to reconnect any wiring.
- Voltage Tester (Non-contact): Crucial for double-checking that the power is off.
- Work Gloves: To protect your hands from sharp edges.
- Safety Glasses: To protect your eyes from dust and debris.
- Shop Vacuum: For cleaning up dust and debris during and after the replacement.
- Camera or Smartphone: To take pictures of wire connections and component placement before you disconnect anything. This is a lifesaver for reassembly!
Where to Find Your New Blower Motor:
Finding the correct replacement is key. Your best bet is to consult your furnace’s owner’s manual or look for a
label on the existing blower motor itself. This label usually contains the model number and specifications you’ll need. You can then purchase the motor from:
- HVAC Supply Stores: Often have a wide selection and knowledgeable staff.
- Appliance Parts Retailers: Both online and physical stores.
- Online Retailers: Websites like Amazon, RepairClinic, or Parts Select. Always verify the part number to ensure compatibility.
Step-by-Step Guide to Changing Your Heater Blower Motor
Let’s get your heater blowing warm air again! Remember to work slowly and methodically. If at any point you feel unsure, it’s always best to call a qualified HVAC technician.
Step 1: Turn Off the Power!
This cannot be stressed enough. Locate your home’s electrical panel (breaker box). Find the breaker that controls your furnace or heating system and flip it to the “OFF” position. It’s a good idea to also turn off the thermostat to ensure no accidental power surges.
Safety Tip: Use your non-contact voltage tester to confirm there is no power at the furnace’s control panel. Touch the tester to the wires going into the motor assembly. If it beeps or lights up, the power is still on. Go back to the breaker.
Step 2: Access the Blower Motor
Your blower motor is typically located inside the furnace unit or the air handler, often in a compartment called the blower housing. You’ll usually need to remove an access panel to get to it. This panel is often held in place by screws or clips.
Gently remove the screws and set them aside in a safe place. Carefully lift or slide off the access panel. You may find insulation within the panel; handle it carefully and avoid disturbing it too much.
Step 3: Locate and Photograph the Motor
Once the panel is off, you should see the blower motor. It’s usually a cylindrical component attached to a squirrel cage fan (the fan with many blades resembling a squirrel’s tail). Before disconnecting anything, take clear photos of how everything is connected, especially the electrical wiring and how the motor mounts.
Pay close attention to how the motor is secured – it might be held by screws, clamps, or a mounting bracket. Note the orientation of the motor and fan assembly.
Step 4: Disconnect Electrical Wiring
This is a critical step. The blower motor will have electrical wires connected to it. It’s important to identify each wire and its corresponding terminal. Many motors have color-coded wires, but it’s safest to identify them positively.
If your motor has a wiring harness, you might be able to disconnect the entire harness. If wires are individually connected, use your smartphone camera to document which wire goes to which terminal. Most motors have wire nuts or spade connectors. Gently twist off the wire nuts or pull off the spade connectors. Be careful not to damage the wires.
Crucial Note: Some furnaces have a condensate pump or other accessories wired through the motor compartment. Ensure you identify all connections before disconnecting anything.
For more information on understanding electrical components in your home, the U.S. Department of Energy provides excellent resources on home energy systems:
U.S. Department of Energy – Energy Efficiency
Step 5: Remove the Old Blower Motor
With the electrical connections made, you can now remove the motor itself. It’s usually attached to the blower housing by screws or bolts. You might also need to disconnect the squirrel cage fan from the motor shaft. Sometimes, the entire fan and motor assembly can be slid out together.
If the fan is attached, it might be held by a set screw on the shaft. You’ll need the right size Allen wrench or screwdriver for this. Loosen the set screw and carefully slide the fan off the motor shaft. Note its alignment on the shaft.
Once the motor is free from its mountings, carefully lift it out of the blower housing. It can be heavy, so be prepared.
Step 6: Install the New Blower Motor
Now it’s time to put the new motor in place. If you removed the fan separately, reattach it to the new motor shaft. Make sure it’s positioned correctly and tighten the set screw securely.
Carefully guide the new motor (with the fan attached, if applicable) back into the blower housing. Align it with the mounting holes and secure it with the screws or bolts you removed earlier. Make sure it’s snug and doesn’t wobble.
Step 7: Reconnect Electrical Wiring
This is where your photos come in handy! Refer to your pictures and reconnect the electrical wires to the new motor’s terminals in the exact same configuration as the old one. Ensure all connections are secure – use wire nuts or crimp connectors firmly.
Double-check every connection to make sure no wires are loose or touching metal parts they shouldn’t be.
Step 8: Reassemble and Test
Once all wiring is connected and the motor is securely mounted, replace the blower housing access panel. Secure it with its screws. Make sure no wires are pinched and that the panel seals properly.
Now, go back to your electrical panel and flip the breaker for your furnace back to the “ON” position. Turn on your thermostat and set it to heat. Listen for the familiar hum of the blower motor engaging. You should feel warm air circulating from your vents within a few minutes.
Troubleshooting Common Issues
Even with careful work, sometimes things don’t go perfectly. Here are a few common hiccups and how to address them:
- No Power to the Motor: Double-check the breaker and thermostat settings. Ensure all wire connections are tight and correct.
- Motor Runs, but No Air: The squirrel cage fan might be loose on the shaft or installed backward. Or, there might be a blockage in your ductwork.
- Strange Noises from New Motor: Ensure the fan is properly seated and balanced on the motor shaft. Check that nothing is obstructing the fan’s rotation. Loose mounting screws can also cause vibration.
- System Shuts Off Quickly: This could indicate an overheating issue or a problem with your furnace’s control board, possibly related to the motor’s starting capacitor if it has one.
Maintenance Tips for Your New Blower Motor
To ensure your new motor lasts as long as possible:
- Regular Filter Changes: A dirty air filter restricts airflow, making your blower motor work harder. Change your furnace filter regularly, typically every 1-3 months.
- Annual HVAC Inspections: Have a professional HVAC technician inspect your system annually. They can spot potential problems early and perform necessary maintenance.
- Keep the Area Around Your Furnace Clear: Ensure good airflow to and from the furnace.
When to Call a Professional
While this guide aims to empower you, some situations are best left to the experts:
- Uncertainty About Electrical Work: If you’re not comfortable with wiring, it’s safer to hire an electrician or HVAC technician.
- Complex Furnace Models: Newer, high-efficiency furnaces can have integrated control boards and sensors that make DIY repairs more challenging.
- Persistent Problems: If you follow these steps and your system still isn’t working correctly, it’s time for professional diagnosis.
- Burned Wires or Components: If you see signs of burning or melting, shut off the power immediately and call for service.
Pros and Cons of DIY Blower Motor Replacement
Deciding whether to tackle this yourself involves weighing the benefits and potential drawbacks.
| Pros | Cons |
|---|---|
| Significant cost savings on labor. | Requires specific tools and mechanical aptitude. |
| Sense of accomplishment and increased DIY confidence. | Risk of incorrect installation or electrical hazards if not done properly. |
| Faster repair time if you have parts on hand. | Potential to void warranties if not performed to manufacturer standards. |
| Deepens understanding of your home’s heating system. | Can be physically demanding; requires working in tight spaces. |
The choice depends on your comfort level, available resources, and the complexity of your specific heating system. For many homeowners comfortable with basic repairs, this is a very manageable project.
Understanding Blower Motor Types
Not all blower motors are created equal. Knowing the type in your system can help you ensure you purchase the correct replacement. The two main types are:
- Shaded Pole Motors: These are older, less efficient, and typically found in very basic, older furnace models. They are usually single-speed.
- Permanent Split Capacitor (PSC) Motors: These are common in many residential furnaces. They offer better efficiency than shaded pole motors and can be single-speed or multi-speed.
- Electronically Commutated Motors (ECM): These are the most advanced and energy-efficient motors. They are variable-speed and can significantly reduce energy consumption. Replacing an ECM motor often requires a direct, identical replacement as they are electronically controlled by the furnace’s main board.
You’ll find the specifications for your motor on its label. If you have an ECM model, it’s highly recommended to consult a professional to ensure you get the right, compatible replacement.

Conclusion
You’ve got this! Changing your heater blower motor is a rewarding DIY project that can restore warmth and comfort to your home. By following these detailed steps, using the right tools, and prioritizing safety, you can successfully replace your failing motor and avoid expensive service calls. Remember to always disconnect power and, if you ever feel unsure, don’t hesitate to call in an HVAC professional. Enjoy your cozy, warm home!
Frequently Asked Questions (FAQ)
Q1: How long does a heater blower motor typically last?
A: With proper maintenance, a typical furnace blower motor can last between 10 to 20 years. However, factors like usage, motor quality, and environmental conditions can influence its lifespan.
Q2: Can I just replace the fan (squirrel cage) without replacing the motor?
A: You can often replace the squirrel cage fan separately if the motor itself is still functional but the fan is damaged or unbalanced. However, if the motor is making noise or not spinning freely, it’s usually best to replace the entire motor assembly.
Q3: What if my new motor is a different brand or model but has the same specifications?
A: For PSC motors, a compatible replacement from a different brand with identical electrical and physical specifications should work. However, for ECM motors, it is strongly advised to use an exact replacement model from the original manufacturer, as they are programmed to work with specific furnace control boards.
Q4: Is it dangerous to change the blower motor if I’m not experienced?
A: Working with electricity always carries some risk. If you are not comfortable with electrical wiring or feel unsure about any step, it is safest to contact a qualified HVAC technician to perform the replacement. Always ensure power is completely cut off at the breaker box before beginning.
Q5: How much does it typically cost to have a professional replace a blower motor?
A: The cost of professional replacement can range from $400 to $1,000 or more, depending on the motor type, your location, and the HVAC company’s labor rates. DIY replacement can save you a significant portion of this cost in labor fees.
Q6: What’s the difference between a blower motor and a furnace fan?
A: The terms are often used interchangeably, but the blower motor is the component that powers the fan. The fan itself is the physical part (the squirrel cage) that moves the air. So, you are replacing the motor that makes the fan spin.
Q7: What is a capacitor, and do I need to replace it?
A: Many blower motors, especially PSC types, use a capacitor to help start the motor and regulate its speed. If your old motor had a capacitor that looks damaged or if the new motor comes with a new one, it’s generally advisable to replace the capacitor as well. Be cautious when handling capacitors, as they can store a residual electrical charge even when power is off; discharge them safely before removal or consult a professional.