
You can check for common household radiation sources like radon, microwaves, and building materials using simple testing kits and by being aware of your surroundings. This guide offers easy steps to identify and manage potential radiation in your home for peace of mind.
We all want our homes to be safe, cozy havens. Sometimes, though, we might wonder if there’s anything invisible lurking that could affect our well-being. Radiation is one of those things that can cause concern. You might have heard about it, maybe from news reports or just general curiosity. It’s easy to feel a bit unsure about what it means for your home. But don’t worry! Checking for common types of radiation isn’t as complicated as it sounds. I’m here to walk you through it, step by step. We’ll explore what to look for and how to easily check for it. Let’s make your home as secure and comfortable as possible!
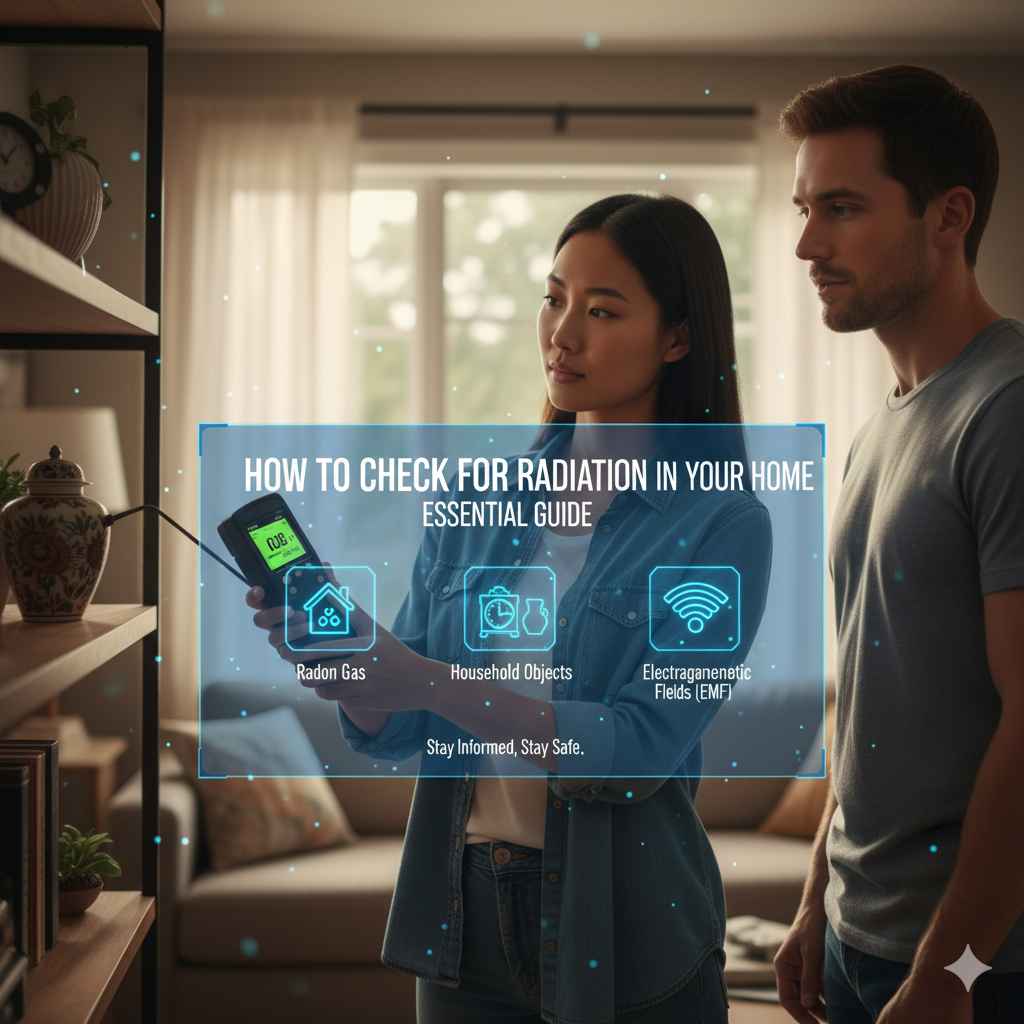
Understanding Radiation in Your Home
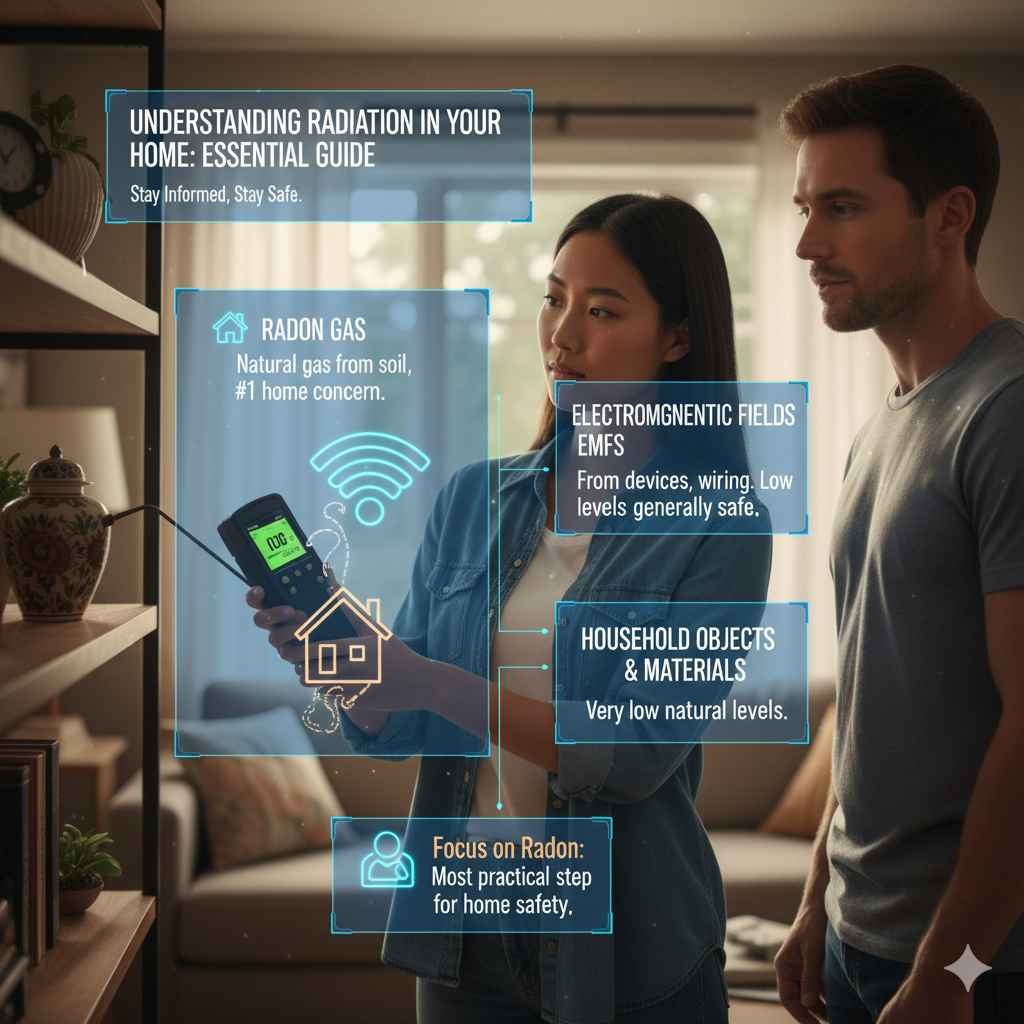
When we talk about “radiation” in a home setting, it’s important to know that we’re usually referring to low levels of naturally occurring or man-made sources. Most of these are not harmful in the amounts typically found. However, understanding potential sources can help you feel more informed and in control of your home environment. The most common concerns usually revolve around:
- Radon: A natural gas that can seep into homes from the soil.
- Electromagnetic Fields (EMFs): Produced by electrical devices and wiring.
- Building Materials: Some older or natural materials might emit very low levels of radiation.
- Household Appliances: Microwaves, Wi-Fi routers, and other electronics.
The good news is that for most homeowners, focusing on radon is the most practical and impactful step for checking potential risks. Other sources are generally considered to be at levels that do not pose a significant health concern according to health organizations.
The Main Concern: Radon
Radon is a colorless, odorless, radioactive gas that comes from the natural breakdown of uranium in soil, rock, and water. It can seep into homes through cracks and openings in the foundation. Because it’s undetectable by our senses, testing is the only way to know if you have a radon problem. High levels of radon are linked to an increased risk of lung cancer. Thankfully, it’s a problem that can be managed once identified.
The United States Environmental Protection Agency (EPA) provides extensive information and guidelines on radon. You can find detailed resources on their EPA Radon page.
Why is Radon a Focus?
Radon is the second-leading cause of lung cancer in the United States, and the leading cause among non-smokers, according to the EPA. It’s a concern because it can accumulate in the indoor air of buildings. The concentration can vary greatly from one home to another, even if they are next to each other. This is why home testing is so important.
How Radon Enters Your Home
Radon can enter your home through:
- Cracks in foundation walls.
- Gaps in concrete floors.
- Cracks in walls.
- Joints where walls meet the floor.
- Service lines (water and plumbing).
- Sump pits.
- Gaps around pipes and wires.
It’s the air pressure difference between the inside of your home and the outside air that draws radon gas from the soil into your home.
How to Test for Radon in Your Home
Testing for radon is straightforward and can be done by you, the homeowner, or by a certified professional. For most people, a DIY test kit is a great starting point.
DIY Radon Test Kits
These kits are widely available online and at many hardware stores. They are relatively inexpensive and easy to use. There are a few common types:
- Charcoal Canister Kits: You place the open canister in a lower level of your home (like a basement) for a specified period (usually 2-7 days). After exposure, you seal the canister and mail it to a laboratory for analysis. This is a common and effective method for short-term testing.
- Alpha Track Kits: These detectors have a special surface that captures radon decay products. You place them in your home for a longer period (often 3-12 months). Once removed, you send the detector to a lab. These are good for long-term monitoring to get an average reading.
- Electret Ion Chamber Kits: These use an electrically charged disk that collects ions produced by radon. They also require mailing to a lab for analysis.
Steps for Using a DIY Radon Test Kit:
Follow these general steps for most DIY kits. Always read and follow the specific instructions that come with your chosen kit.
- Choose the Right Location: Place the test kit in the lowest occupied level of your home. If you spend time in the basement regularly, test there. If not, test the first floor. Avoid testing in bathrooms, kitchens, or laundry rooms where there’s high humidity or air flow.
- Maintain “Closed House Conditions”: For short-term tests (like charcoal canisters), keep all windows and doors closed for at least 12 hours before and during the testing period. This ensures an accurate measurement of radon that would normally enter the living space. Normal living conditions (heating, air conditioning, fans) should be maintained.
- Place the Detector: Take the detector out of its packaging. If it’s a canister, open it. Place it on a level surface, away from drafts, direct sunlight, or heat sources.
- Start the Test: Note the start date and time. For passive detectors, this starts the testing period.
- Wait for the Required Time: Follow the kit’s instructions for the minimum testing duration (e.g., 2 days for some short-term tests, several months for long-term tests).
- Seal and Send: At the end of the testing period, seal the canister or package the detector as instructed. Record the end date and time. Use the prepaid mailer provided to send your sample to the laboratory.
- Receive Results: The lab will analyze your sample and typically mail or email you the results. This usually takes a couple of weeks.
What Do the Results Mean?
Radon levels are measured in picocuries per liter of air (pCi/L). The EPA recommends taking action if your home’s radon level is 4 pCi/L or higher. Levels between 2 and 4 pCi/L are also a concern, and you should consider taking action to lower them.
Here’s a quick look at what the numbers might suggest:
| Radon Level (pCi/L) | Recommendation |
|---|---|
| Below 2 | No immediate action needed. Continue to test every few years. |
| 2 to 4 | Consider radon mitigation if you are concerned or planning mitigation for other reasons. |
| 4 or higher | Action is recommended. Contact a qualified radon mitigation professional to discuss remediation options. |
When to Consider Professional Testing
While DIY kits are effective, you might consider hiring a professional radon testing service if:
- You are buying or selling a home. A professional measurement is often required for real estate transactions.
- Your DIY test result is high, and you want a second, more definitive measurement.
- You want a more advanced testing method, such as continuous radon monitors (CRMs), which provide hourly readings over a short period and can help diagnose the cause of high levels.
Certified radon professionals use specialized equipment and follow strict protocols to ensure accurate testing and can also advise on mitigation systems if necessary.
Checking for Other Potential Radiation Sources
While radon is the primary indoor air pollutant that requires active testing, it’s good to have awareness of other potential, though generally less concerning, sources of radiation in a home.
Electromagnetic Fields (EMFs)
All electrical devices emit EMFs. This includes wiring in your walls, appliances, computers, and mobile phones. The concern about EMFs and health is an ongoing area of research, with major health organizations like the World Health Organization (WHO) stating that current evidence does not confirm that exposure to low-level EMFs affects health.
What you can do:
- General Awareness: Simply understand that electrical devices emit EMFs.
- Distance is Key: EMF strength decreases significantly with distance. Avoid prolonged close contact with high-draw appliances. For example, don’t spend hours sitting directly next to a microwave while it’s running, or sleep with your head right next to a Wi-Fi router.
- Limit Exposure: You can choose to move your bed or workspace away from major electrical sources if it gives you peace of mind. Turning off devices when not in use reduces ambient EMFs.
- Professional Measurement (Optional): If you are extremely concerned, specialized EMF meters are available, but most health authorities consider household levels unlikely to be harmful.
For more information on EMFs, the World Health Organization provides a comprehensive overview. You can visit their WHO EMFs and Public Health page.
Microwave Ovens
Microwave ovens use electromagnetic radiation to heat food. Modern microwave ovens are designed with safety features, including shielding, to contain the radiation. The U.S. Food and Drug Administration (FDA) states that if a microwave oven is operating correctly and not damaged, the amount of microwave energy leakage is very small.
What you can do:
- Inspect Regularly: Check your microwave door and seals for any damage. If the door doesn’t close properly or the seals are broken, it’s best to have it repaired or replaced.
- Maintain Distance: Stand at least a few feet away from a microwave oven while it is operating.
- Don’t Stand in Front: Avoid lingering directly in front of the microwave door while it’s on.
Building Materials and Older Homes
Certain natural building materials, like granite or some types of brick, can contain very small amounts of naturally occurring radioactive elements. Historically, some materials (like radium-based paint on old clocks or watches) were more radioactive. The levels of radiation from modern building materials are generally considered negligible and pose no risk.
What you can do:
- Be Aware of Age: If you live in a very old home (pre-1970s), there might be older materials used. However, the levels are typically very low.
- Ventilation: Good ventilation in your home helps to reduce the concentration of any airborne particles, including those that might be trace elements from materials.
- No Specific Testing Needed: For the vast majority of homes, there is no need for specific testing of building materials. The risk is extremely low.
What to Do if You Find High Radon Levels
Discovering high radon levels can be alarming, but it’s important to remember that there are effective solutions. The goal of mitigation is to reduce the radon concentration in your home to safe levels.
Radon Mitigation Systems
The most common and effective radon mitigation technique is called “sub-slab depressurization” (SSD). This involves installing a system that actively vents radon from beneath your home’s foundation to the outside.
Here’s a simplified overview of how it works:
- Installation of a vent pipe: A hole is typically drilled through the foundation slab. A PVC pipe is inserted into this hole.
- Placement of a fan: A quiet, low-energy radon fan is connected to the pipe. This fan continuously draws air and radon gas from beneath the slab.
- Venting outdoors: The fan exhausts the radon gas away from and above your home’s roofline, so it safely disperses into the atmosphere.
- Sealing cracks: While the fan is running, it creates a vacuum that draws soil gas from under the slab, preventing it from entering the home. Any cracks or openings in the foundation are also sealed to improve the system’s effectiveness.
These systems are highly effective, often reducing radon levels by 90% or more. They are designed to run continuously and require very little maintenance. You can learn more about radon mitigation techniques on the EPA’s website on radon mitigation.
Choosing a Qualified Professional
If your testing reveals high radon levels, it’s crucial to hire a qualified and certified radon mitigation contractor. Look for professionals who are:
- Certified: They should hold certifications from recognized organizations like the National Radon Proficiency Program (NRPP) or the Conference of Radiation Control Program Directors (CRCPD).
- Experienced: The contractor should have a proven track record in installing radon mitigation systems in homes similar to yours.
- Licensed/Registered: Check if your state requires radon professionals to be licensed or registered.
- Insured: Ensure they have adequate liability insurance.
A good contractor will provide a detailed plan, a written estimate, and a warranty on their work. They should also retest your home after the system is installed to confirm effectiveness.
Preventative Measures and Best Practices
While active testing is key for radon, some general practices can contribute to a healthier home environment regarding radiation awareness.
For Radon
- Test Regularly: Test your home for radon every 2-5 years, especially if you have a mitigation system or if significant renovations have been done.
- Maintain Ventilation: When it’s not necessary to keep the house sealed for a radon test, good general ventilation is always beneficial for indoor air quality. Opening windows periodically when weather permits can help circulate fresh air.
- Be Proactive if You Have a Mitigation System: Ensure the system is functioning properly. Many systems have indicator lights or gauges; check them periodically.
For EMFs and Appliances
- Follow Manufacturer Guidelines: Always use appliances like microwaves as directed by the manufacturer.
- Upgrade Old Appliances: Older appliances may not meet current safety standards for radiation leakage.
- Consider Placement: Think about where you place high-usage electronic devices. Keeping routers, computers, and entertainment systems in well-ventilated areas, and not directly against living spaces (like bedrooms or main gathering areas), can be a practical approach for peace of mind.

Frequently Asked Questions About Home Radiation
Q1: Is all radiation dangerous?
No, not all radiation is dangerous. We are all exposed to natural background radiation from the sun, earth, and even our own bodies. The concern arises from excessive exposure to certain types of radiation, like high levels of radon gas, or prolonged exposure to specific artificial sources.
Q2: How often should I test my home for radon?
The EPA recommends testing homes that have never been tested. If readings are below 4 pCi/L, retest every 2-5 years. If you have a radon mitigation system, you should test it every 2-5 years, or if you notice any changes in your home’s ventilation or structural integrity.
Q3: Do I need to test for EMFs?
Most health organizations believe that the levels of EMFs from typical household electronics do not pose a health risk. Testing is generally not recommended for EMFs unless you have specific concerns related to unusual equipment or occupational exposure. Limiting distance from sources is the simplest approach.
Q4: Can I test for radon myself, or do I need a professional?
You can absolutely test for radon yourself using readily available DIY test kits. These are cost-effective and reliable for initial screening. A professional is recommended for real estate transactions or if you get high results and need confirmation or mitigation advice.
Q5: What is a safe level of radon?
There is no completely “safe” level of radon, as any exposure carries some risk. However, the U.S. EPA action level is 4 pCi/L. Nivels between 2 and 4 pCi/L are also a concern, and it’s recommended to consider mitigation. The goal of mitigation is to reduce radon levels to as low as reasonably achievable, ideally below 2 pCi/L.