
Checking your storage heaters is simple! Look for visible damage, test controls, ensure proper heat output, and listen for unusual noises. This guide breaks down how to do it step-by-step, helping you keep your home warm and efficient.
Welcome to Your Storage Heater Check-Up!
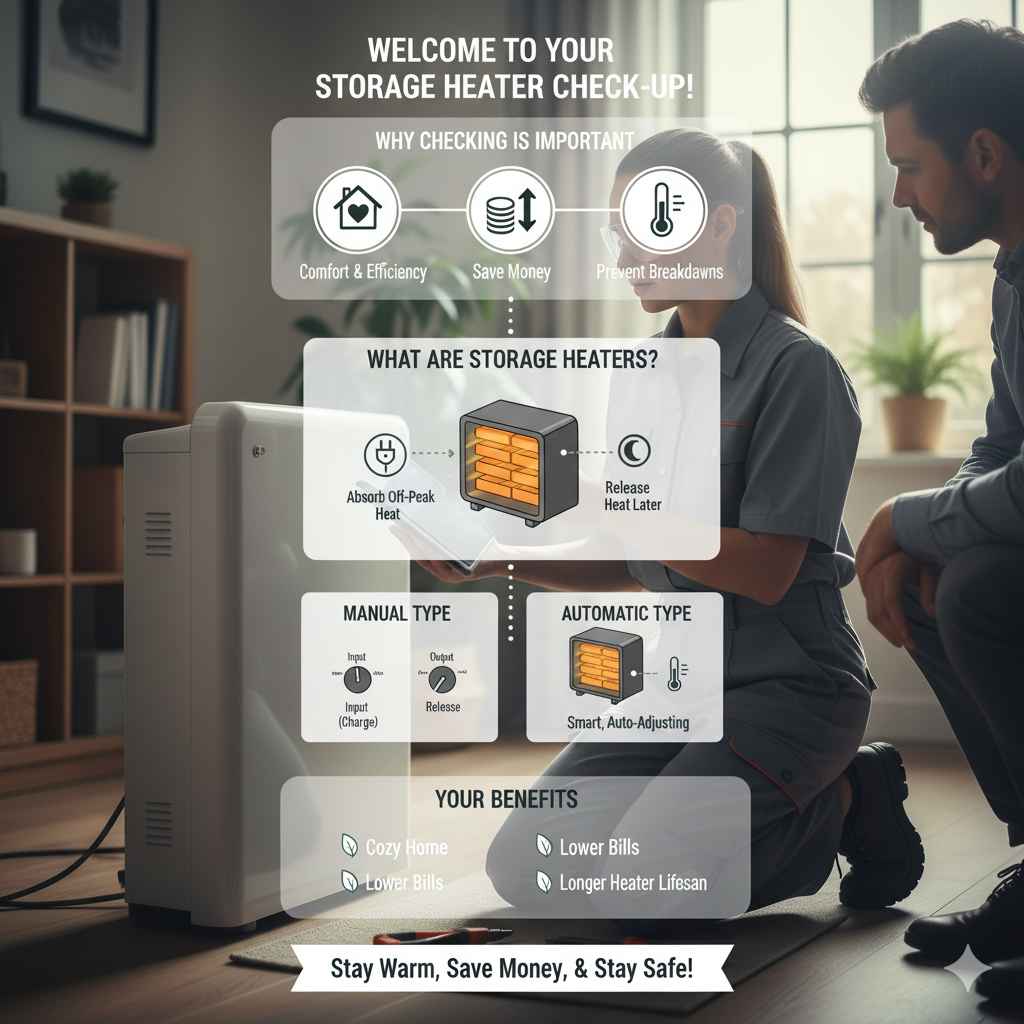
Welcome! If you’re new to storage heaters or just want to make sure yours are working their best, you’re in the right place. These clever heaters use electricity off-peak, storing heat for use when you need it. But like any home appliance, they sometimes need a little attention. Don’t worry, checking them isn’t complicated. This guide will walk you through everything you need to know, simply and safely. We’ll cover what to look for, how to test them, and when it’s time to call in a professional. Let’s get your home cozy and your heaters running efficiently!
Why Checking Your Storage Heaters is Important
Understanding your storage heaters helps keep your home comfortable and your energy bills in check. Regularly checking them ensures they operate safely and efficiently. It can prevent unexpected breakdowns, especially during colder months, and highlight any minor issues before they become bigger problems. This simple maintenance can also extend the lifespan of your heaters, saving you money in the long run.
What Are Storage Heaters, Anyway?
Storage heaters work by absorbing electricity, usually during cheaper overnight hours. Inside, they contain special bricks that get very hot. As your room cools down, the heat stored in these bricks is gradually released, keeping your home warm. They’re a popular choice in many homes because they can take advantage of lower electricity tariffs.
There are generally two main types of storage heaters you might encounter:
Manual Storage Heaters: These often have two or three controls. One control adjusts how much electricity the heater stores (the “charge” level). The other(s) regulate how quickly the heat is released throughout the day (the “output” control).
Automatic Storage Heaters: These are smarter! They automatically sense the room temperature and adjust their heat output accordingly, often with less manual input needed from you.
Understanding which type you have can help you better assess its performance, but the basic checks we’ll go through are similar for both.

Getting Started: What You’ll Need
Before you start checking your storage heaters, gather a few simple things. You don’t need specialized tools, but having these on hand will make the process smoother.
A soft cloth or duster: For cleaning and a closer look.
A small step stool or sturdy chair (if needed): To safely reach higher parts of the heater.
Your heater’s user manual (if available): This can be invaluable for specific instructions about your model.
A keen eye and common sense: The most important tools!
Step-by-Step Guide: How to Check Your Storage Heaters
Let’s walk through the process of checking your storage heaters. We’ll break it down into simple, manageable steps.
Step 1: Visual Inspection – Look for Anything Unusual
The first and easiest step is a good old-fashioned visual check. Turn off the power to the heater at the main switch or fuse box for safety before you get too close to any electrical components.
Walk around each storage heater in your home and examine it closely. Look for:
- Visible Damage: Check the casing of the heater for any cracks, dents, or signs of discolouration. If the casing is damaged, air could escape, or dust could get inside, affecting performance and safety.
- Loose Parts: Gently press on the casing and any visible controls. Do they feel secure, or do they wobble? Loose parts could indicate internal issues.
- Obstructions: Ensure nothing is blocking the vents or grilles of the heater. Storage heaters need clear airflow to work properly and safely. This is especially important for how heat is released.
- Signs of Leaks or Corrosion: While uncommon, check around the base and sides for any signs of moisture, rust, or corrosion, which could indicate internal problems or water ingress.
- Wiring: If your heater has visible wiring (usually at the back or bottom), ensure it looks neat, secure, and not frayed or damaged. Never touch exposed wiring.
If you spot any significant damage, especially to the casing or wiring, it’s best to switch off the power to that heater and consult a qualified electrician. For minor dust build-up, use your duster to gently clean the vents.
Step 2: Checking the Controls – Are They Working Smoothly?
Storage heaters have controls that manage how they heat up and release warmth. Understanding these is key to efficient use.
Manually Controlled Storage Heaters
If you have an older, manual model, you’ll likely see two main dials:
Input Control (or Charge Control): This dial determines how much heat the heater stores overnight. It’s usually marked with numbers or symbols indicating low, medium, and high heat storage.
Output Control (or Heat Release Control): This dial manages how quickly the stored heat is released into the room during the day. It’s often marked with symbols like a sun (for maximum release) or a snowflake (for minimum release).
How to Check Them:
- Turn the Input Control: Gently turn the input dial. It should move smoothly without feeling stiff or gritty. Listen for any clicking or grinding sounds. Most input controls are set automatically by your timer, but it’s good to know they operate.
- Adjust the Output Control: Similarly, turn the output dial. It should also turn freely. This is the control you’ll adjust daily to manage room temperature. See how it feels when you move it through its range.
A stiff, loose, or noisy control might need a professional look. If they operate smoothly, that’s a good sign!
Automatically Controlled Storage Heaters
Automatic models are simpler. They often have fewer physical dials, or sometimes just a thermostat dial.
How to Check Them:
- Thermostat Dial: If there’s a dial, turn it to different settings. It should feel responsive and not stick. Some automatic heaters turn on and off automatically based on room temperature.
- Indicator Lights: Some automatic heaters have indicator lights that show when they are actively charging or heating. Check your manual to see if your model has these and if they are functioning.
If your automatic heater has a digital display or complex buttons, consult your manual for specific checks. The main goal is to ensure the controls are not physically damaged and feel like they’re working correctly.
Step 3: Testing the Heat – Does It Warm Up and Release Heat?
This is where you really see if your heater is doing its job. You’ll need to consider the storage heater’s cycle – charging at night and releasing heat during the day.
When to Test
Charging Test: This is best done when your off-peak electricity is active (usually overnight). You’re checking if the heater is getting hot.
Heating Test: This is done during the day when you expect heat to be released. You’re checking if the heater is giving off warmth as needed.
How to Test
1. Observe Charging (Overnight):
Ensure your timer is set correctly for your off-peak hours.
When the charging period starts, you should eventually feel the heater getting warm to the touch. It will become quite hot as it stores energy.
Important Safety Note: Storage heaters are designed to get hot during charging. However, the outer casing will usually be cooler than the internal heating elements. Avoid touching the main body excessively while it’s charging unless you’re checking for general warmth. If you feel extreme, uncomfortable heat on the outer casing or smell burning, turn it off immediately and call an electrician.
Some modern heaters have fans to help distribute heat. Ensure the fan isn’t making loud or unusual noises.
2. Observe Heat Release (Daytime):
During the day, especially when the room cools down, the heater should start releasing its stored warmth.
You should feel gentle, radiant heat coming from the vents. The heater itself will gradually cool down as it releases its energy.
Ensure the heat output is consistent and not fluctuating wildly.
If you have an output control, adjust it and see if the release of heat changes accordingly. For example, turning it up should result in more heat entering the room.
Troubleshooting Initial Heat Issues
Heater not getting hot at all during charging: This could be a timer issue, a supply problem, or a fault with the heater. Check your timer settings first.
Heater not releasing heat during the day: This could mean the heat wasn’t stored properly (check input control and timer), or there’s a fault with the release mechanism.
Room is not warm enough: This could be due to the heater size being inadequate for the room, the output control being set too low, or the heater not charging fully. If the heater itself seems to be working correctly, consider if you need a larger heater or better insulation.
Heater is too hot, making the room uncomfortable: The output control might be set too high, or there could be a thermostat issue on an automatic model.
Step 4: Listening for Unusual Noises – What’s That Sound?
Storage heaters are generally quiet appliances, but any unusual sounds can be a sign that something isn’t quite right.
Common Sounds to Listen For (and what they might mean):
- Clicking: Some clicking is normal, especially from thermostats or relays within the heater as it operates. However, loud, frequent, or continuous clicking could indicate a fault.
- Hissing or Popping: Slight sounds might be due to thermal expansion and contraction as the heater heats up or cools down. If these sounds are loud, constant, or accompanied by a burning smell, turn off the heater immediately.
- Buzzing: A faint electrical hum is normal, but a loud or persistent buzzing sound could suggest an electrical issue or a problem with internal components.
- Fan Noise (if applicable): If your heater has a fan, it should produce a steady, quiet whirring sound. Loud grinding, rattling, or squealing from the fan is a clear sign of a problem and will likely require servicing.
If you hear any noises that seem out of the ordinary, don’t ignore them. Make a note of the sound and when it occurs. This information will be helpful if you need to call a professional.
Step 5: Checking the Timer and Thermostat Settings
Proper settings are crucial for efficient heating and cost savings.
Timer Settings
Location: Timers can be built into the heater itself or be a separate unit on your wall.
Function: They control when your storage heater receives its electricity supply, ensuring it charges during your cheaper off-peak hours.
How to Check:
Locate your timer. It might have physical dials or a digital interface.
Consult your user manual to understand how your specific timer works.
Ensure the times are set correctly. Pay attention to daylight saving changes.
If it’s a digital timer, check that the display is on and showing the correct time.
If it’s an older mechanical timer, listen for the ticking sound, which indicates it’s running.
Thermostat Settings
Location: This is usually a dial on the heater itself.
Function: It controls the temperature of the room by regulating how much heat is released.
How to Check:
Ensure the thermostat dial is set to a comfortable level for your needs.
On automatic heaters, ensure the thermostat is functioning to maintain a desired room temperature. Experiment by turning it up and down to see if the heater responds.
Incorrect timer or thermostat settings are one of the most common reasons for storage heaters not performing optimally. A quick check of these can save you a lot of heat and money.
Step 6: Cleaning and Maintenance – Keeping it Tidy
Regular cleaning helps your storage heater work efficiently and safely.
What to Clean
Vents and Grilles: These are essential for airflow. Dust and debris can block them, reducing effectiveness and potentially causing overheating.
Casing: Keep the outer body clean for aesthetics and to spot any potential issues early.
How to Clean (Safely!)
1. Turn off Power: Always switch off the power to the heater at the main fuse box or consumer unit before cleaning.
2. Dust Vents: Use a vacuum cleaner with a nozzle attachment or a long, flexible brush to carefully clean out dust and debris from all the air vents and grilles. Be gentle to avoid damaging the fins.
3. Wipe Casing: Use a soft, damp cloth to wipe down the outer casing. For stubborn marks, you can use a mild detergent, but ensure the cloth is only damp, not wet, and never spray liquid directly onto the heater.
4. Dry Thoroughly: Make sure the heater is completely dry before restoring power.
Avoid using abrasive cleaners, scouring pads, or excessive water, as these can damage the heater’s finish or internal components.
When to Call a Professional Electrician
While many checks can be done yourself, some issues require the expertise of a qualified electrician. Don’t hesitate to call one if you experience any of the following:
Persistent burning smells: This is a serious safety hazard.
Signs of arcing, sparking, or smoke.Significant damage to the casing or wiring.Heater not heating at all, despite correct settings and power supply confirmed.Unusual, loud noises that don’t seem to be related to normal operation.Controls that are stuck, loose, or feel damaged.Any doubt or concern about the heater’s safety or operation.
* If your storage heater is an old model and you are considering upgrading – an electrician can advise on efficient, modern alternatives.**
A qualified electrician can diagnose complex faults, carry out repairs safely, and ensure your heating system complies with safety regulations. You can find registered electricians through resources like NICEIC or Electrical Safety First in the UK, or similar professional bodies in other regions.
Understanding Storage Heater Performance: A Quick Comparison
To help you assess if your storage heater is performing as it should, here’s a table illustrating typical performance characteristics.
| Observation | Normal Operation | Potential Issue | Possible Cause |
|---|---|---|---|
| Heat Output (Daytime) | Gradual release of gentle, radiant heat. Rooms maintain a comfortable temperature. | No heat, weak heat, or heat that dissipates too quickly. Room is cold. | Incorrect output control setting, timer malfunction, insufficient charging, internal fault (e.g., heating element, insulation breakdown). |
| Charging Temperature (Overnight) | Heater feels warm/hot to the touch as it stores energy (outer casing is warm, internal parts very hot). | Heater remains cold or only slightly warm to the touch. | Timer not set correctly, no electricity supply during off-peak, tripped breaker, internal fault. |
| Noise Levels | Occasional soft clicks or gentle hum. Slight expansion/contraction noises as it heats/cools. | Loud clicking, buzzing, grinding, rattling, or popping sounds. | Faulty thermostat, relay issues, fan motor problem (if applicable), loose internal components, damaged insulation. |
| Controls (Manual) | Dials turn smoothly, feel secure. | Dials stiff, loose, gritty, or won’t turn. | Dirt ingress, worn mechanism, internal damage. |
| Casing & Vents | Clean, intact casing. Vents clear of dust. | Cracks, dents, discolouration, blocked vents. | Physical impact, accumulation of dust/debris, age. |
This table is a guide. If you suspect an issue, always err on the side of caution and seek professional advice.
Frequently Asked Questions About Storage Heaters
Here are some common questions homeowners have about checking and maintaining their storage heaters.
Q1: How often should I check my storage heaters?
A: A quick visual check for damage and to ensure vents are clear can be done monthly. A more thorough operational check, testing heat output and listening for noises, is best done at the start of the heating season (autumn) and then again mid-season if needed.