How to Make Homemade Heaters for Quick Warmth
Making homemade heaters is an essential skill for quick warmth when primary systems fail or when looking for cheap, supplemental heat. This guide shows you simple, safe methods using common household items to create basic heat sources effectively, focusing on accessible, emergency solutions.
For vehicle heating questions, Sauna Carbon Vs Ceramic Heaters: Comparison for Efficiency gives readers a related follow-up to check.
Feeling a sudden chill when the furnace sputters out? It’s frustrating when your home feels colder than the outdoors. You don’t always need expensive replacements or complex repairs to find immediate comfort. Many homeowners, renters, and DIY enthusiasts look for ways to generate safe, temporary heat without professional help.
The good news is that with simple supplies and a little care, you can build surprisingly effective, budget-friendly heating solutions right in your kitchen or garage. We will walk through several proven, accessible methods for how to make homemade heaters safely. Get ready to bring cozy warmth back into your space with these easy steps!
When the power goes out or you need a quick boost of warmth in a small room, knowing how to make homemade heaters gives you confidence and control. This guide focuses strictly on non-electric, proven, and relatively safe methods that rely on simple physics and readily available materials. We prioritize practical application over high-tech solutions.
Safety First: The Golden Rules of DIY Heating
Before we dive into building anything, we must talk about safety. Any time you introduce fire or heat into a contained space, safety is paramount. These homemade solutions are for temporary use only and require constant supervision.
- Ventilation is Key: Never use any fuel-burning device (like alcohol or candle heaters) in a completely sealed room. You need fresh air to avoid carbon monoxide buildup. Always crack a window slightly.
- Keep Flammables Away: Ensure your homemade heater is placed far away from curtains, paper, bedding, or anything that can easily catch fire.
- Stable Surfaces Only: Place your creation on a non-flammable, completely level surface (like a concrete floor or ceramic tile).
- Monitor Constantly: Do not leave DIY heating devices unattended for even a moment.

Method 1: The Terra Cotta Pot Heater (The Radiator Effect)
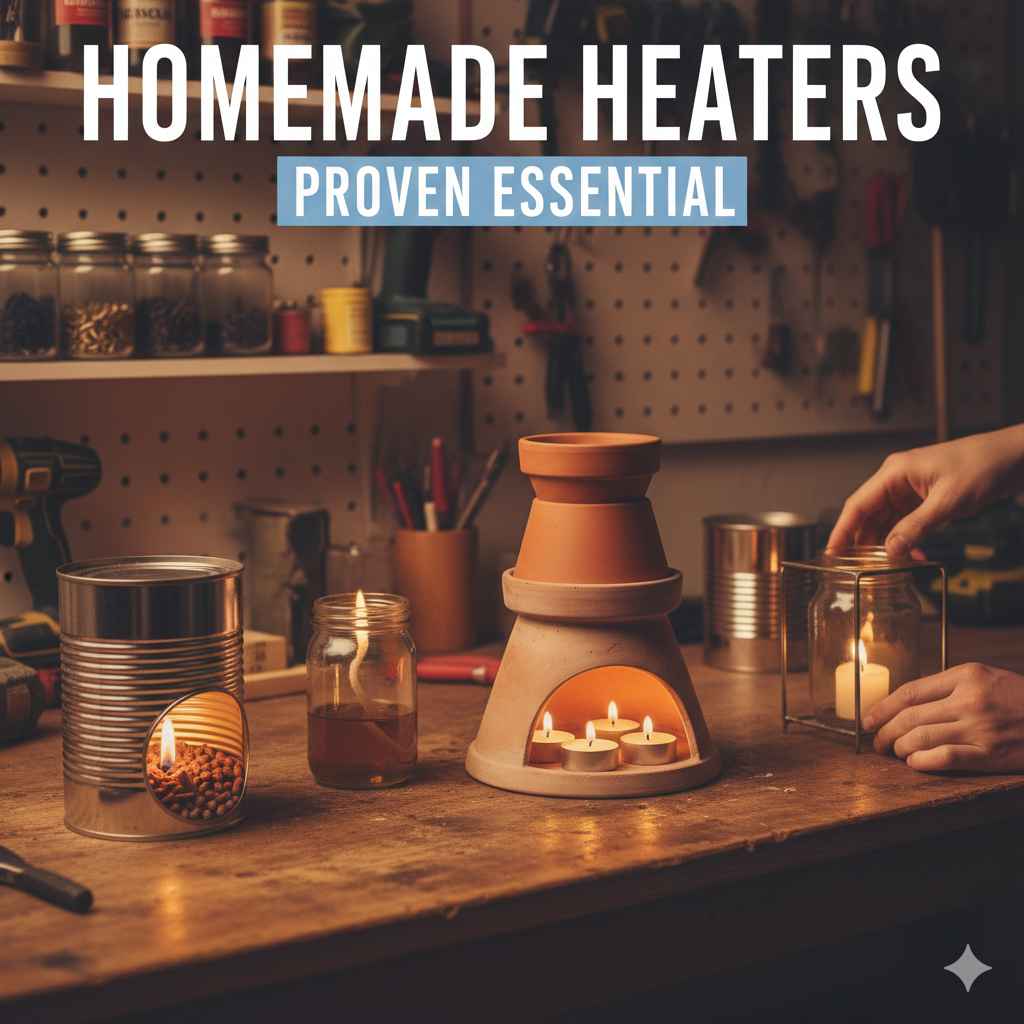
This is one of the most popular and safest non-flame-involved DIY heating methods. It works by using the thermal mass of clay pots to store and slowly radiate heat from tea lights or small candles.
What You Need:
- Two terra cotta (clay) pots of slightly different sizes (one must fit over the other with an air gap).
- A metal bolt, nuts, and washers (long enough to go through the center of both pots).
- Tea light candles (at least 3–4).
- A small metal tray or ceramic trivet to stand the pots on.
Step-by-Step Assembly:
- Prepare the Pots: If your pots have drainage holes, ensure they are clean. These holes will allow air to circulate and heat to escape.
- Create the Stand: Place your metal tray or trivet on your stable surface. This protects the floor underneath from direct heat transfer.
- Assemble the Core: Thread the bolt through the drainage hole of the larger pot first, followed by a washer and a nut to secure it slightly off-center.
- Stack the Pots: Place the smaller pot inside the larger pot. Use spacers (like metal washers or small nuts) between the two pots to maintain an air gap of about half an inch all around. This air gap is crucial for insulation and even heating.
- Secure the Top: Place a final washer and nut on the bolt extending from the top of the smaller pot. You are essentially creating a heat-retaining core.
- Ignite the Heat Source: Place your tea light candles (uncovered) on the metal tray around the base of the large pot.
- Wait for Warmth: Light the candles. As the candles burn, the innermost pot will heat up significantly. The clay material absorbs this heat and slowly radiates it into the room long after the candles might burn out, acting like a miniature radiator.
Pros and Cons of the Clay Pot Heater
| Pros | Cons |
|---|---|
| Very safe; uses low-temperature heat source (tea lights). | Low heat output; only effective for very small, well-insulated areas. |
| Uses common, inexpensive materials. | Takes time (30+ minutes) to fully heat up and radiate warmth. |
| No fumes if standard unscented tea lights are used. | Requires constant supervision of open flames. |
Method 2: The Alcohol Burner Heater (For Quick, Directed Heat)
This method generates more heat than tea lights but involves a liquid fuel source, making safety procedures even more critical. This setup mimics a simple camping stove burner.
What You Will Need:
- A clean, empty metal can (like a large soup can or coffee can).
- Denatured alcohol (also called methylated spirits) – do not use gasoline or lighter fluid!
- A small metal disc or plate to act as a wick holder/burner top.
- Cotton batting or a tightly rolled, non-synthetic rag (the wick).
- A safe metal stand to elevate the burner slightly.
Creating the Alcohol Burner:
- Prepare the Can: Ensure the can is perfectly clean and dry. This will be your fuel reservoir.
- Create the Wick Assembly: Take your small metal disc. Punch or drill a hole precisely in the center, just large enough for the cotton batting to thread through tightly.
- Insert the Wick: Thread the cotton batting through the center hole of the metal disc. You want the wick material to be snug but still absorb the fuel easily.
- Fueling: Carefully pour a small amount of denatured alcohol into the metal can—just enough to saturate the cotton wick and leave a tiny pool at the bottom (about 1/4 inch deep). Do not overfill.
- Assembly: Place the metal disc (wick side up) securely inside the can opening.
- Ignition: Using a long lighter or match, carefully ignite the alcohol-soaked wick. The flame will be blue and relatively clean, providing significant, localized heat.
- Placement: Place the entire assembly on its metal stand, away from all hazards.
For more information on safe fuel handling for temporary heating applications, always consult reliable sources regarding flammable liquids. For professional safety guidelines, resources from organizations like the National Fire Protection Association (NFPA) are invaluable, though their guides focus on commercial standards.
Method 3: The Water-Filled Bottle Radiator (Zero Flame Method)
If you are dealing with an absolute ban on open flames or simply prefer a heat source that retains warmth for hours, heating water is the best approach. This method converts stored hot water into slow-releasing radiant heat.
Tools and Materials:
- Several large, sturdy plastic soda bottles (2-liter size works well).
- Heavy blankets, towels, or sleeping bags.
- A reliable source of very hot water (stovetop or electric kettle).
- Duct tape or strong fabric wrap.
The Process:
- Heat the Water: Boil water on your stovetop or using an electric kettle. You need the water to be very hot but not actively boiling when you fill the bottles.
- Fill Carefully: Fill your sturdy plastic bottles about 90% full with the hot water. Leave a small air gap at the top to allow for expansion. Secure the caps tightly. Test the seal vigorously to ensure no leaks.
- Insulate the Bottles: This step is crucial for heat retention. Wrap each hot bottle completely in a thick, dry towel. Secure the towel tightly with duct tape or strong cordage. This insulation prevents the rapid cooling of the bottle surface.
- Create a Heat Bed: Place the wrapped bottles strategically where you need warmth—for example, near your feet under a desk or along the side of a bed (ensure they are contained so they don’t roll away).
- Maximize Effect: For heating a small area, place the bottles in a cluster, then cover the cluster loosely with an extra blanket. The heat will radiate upward and warm the space slowly and safely over many hours as the water cools down to room temperature.
This method is fantastic for renters because it requires zero modification to the living space and poses almost no fire risk once the bottles are wrapped and secured.
Understanding Heat Transfer in DIY Heaters
Homemade heaters work by leveraging the three main types of heat transfer: conduction, convection, and radiation. Understanding this helps you place your DIY device for maximum benefit.
| Transfer Type | Description | Example in DIY Heating |
|---|---|---|
| Radiation | Heat moves via electromagnetic waves; can travel through empty space. | The glowing heat from the clay pot (Method 1) warming your skin directly. |
| Convection | Heat moves as the heated fluid (air) rises and cooler air sinks. | Air passing over the hot alcohol burner (Method 2) gets heated and circulates. |
| Conduction | Heat moves through direct contact between objects. | The hot water bottle (Method 3) warming the towel it touches. |
Choosing the Right Homemade Heater for Your Situation
Not every emergency calls for the same solution. Consider your environment, available materials, and how long you need the heat to last when deciding how to make homemade heaters.
Factors to Consider:
- Duration Needed: If you need warmth for 1–2 hours, the alcohol burner offers quick intensity. For long-term, slow heat (8+ hours), the water bottle method is superior.
- Ventilation Available: If you are in a basement with poor airflow, stick to the no-flame water bottle or the low-flame tea light pot heater. Avoid the alcohol burner.
- Available Materials: If you have no alcohol or wicks but have an old tile and pots, choose Method 1.
- Space Size: Homemade heaters are best for supplemental heating—warming a small bedroom, office nook, or keeping extremities warm while sleeping. They cannot effectively heat an entire open-plan house.
Essential Tools Checklist for Basic DIY Heating Projects
To be prepared, keep a small “Emergency Heating Kit” stocked with the following items. This makes implementing any of the above methods immediate and easy.
- Long-reach lighter or storm-proof matches.
- Denatured alcohol (stored safely away from heat sources).
- Unscented tea lights (a whole pack).
- Thick, clean cotton rags or batting (for wicks).
- Two appropriately sized, clean metal or clay pots (for Method 1).
- A few empty, sturdy 2-liter plastic bottles (for Method 3).
- Duct tape and old, thick towels.
Advanced Tip: Maximizing Heat with Foil Reflectors
Whether you are using the clay pot heater or the alcohol burner, you are losing a significant amount of heat energy by letting it dissipate backward or sideways into the room structure. You can significantly boost the perceived warmth using a simple reflector.
How to Build a Simple Reflector:
- Get the Material: Find a piece of heavy cardboard slightly larger than the base of your heater setup.
- Apply Foil: Completely cover one side of the cardboard with heavy-duty aluminum foil, shiny side facing out. Tape the edges neatly.
- Position: Place this foil reflector directly behind your heating element, angled slightly toward the area you wish to warm (e.g., your chair or sleeping bag).
- The Result: The radiant heat waves hitting the foil are bounced back toward your target area, increasing immediate comfort without requiring more fuel.
Considering Energy Efficiency in Emergency Heating
While we are discussing homemade options, it’s wise to remember that the best defense against the cold is preparation and insulation, not just creating heat. Before relying on a DIY solution, check these basic areas:
- Window Sealing: Use plastic shrink wrap kits (available at hardware stores) on drafty windows. This insulation barrier is incredibly effective and low-cost.
- Door Sweeps: Ensure all exterior doors have tight sweeps underneath to stop cold air infiltration at floor level.
- Draft Stopping: Roll up a thick towel or use a purchased “draft snake” and place it snugly at the base of any interior door leading to an unheated basement or garage.
Effective insulation reduces the total amount of heat you need, making even these small, homemade solutions feel much more effective.

FAQ: Beginner Questions About Homemade Heaters
Q1: Are homemade heaters completely safe to use overnight?
A: No. Unless you are using the water bottle method (Method 3) and they are securely wrapped and placed far from bedding, you should never leave any device involving open flame or hot fuel unattended, especially while sleeping. Always monitor candle or alcohol-based heaters.
Q2: Can I use gasoline or kerosene in my DIY heater instead of denatured alcohol?
A: Absolutely not. Gasoline, kerosene, paint thinner, and similar fuels are extremely volatile, produce toxic fumes when burned in open containers, and can explode without warning. Only use fuel specifically recommended for low-heat, open-air burning, like 91% isopropyl alcohol or denatured alcohol.
Q3: How much heat can the terra cotta pot heater actually produce?
A: It produces very low, ambient radiant heat. Think of it as a personal space warmer, not a room heater. It is best used to take the chill off a desk area or to provide gentle warmth near your body in a small, well-insulated room.
Q4: Why does my alcohol burner smell bad?
A: If you are using denatured alcohol, the smell should be minimal and slightly sharp, similar to rubbing alcohol evaporating. A strong, acrid, or smoky smell usually means you are burning impurities, or you are using the wrong fuel (like lighter fluid). Ensure your wick material is pure cotton and your fuel is clean.
Q5: How long will the hot water bottles stay warm enough to matter?
A: If you use truly boiling water and insulate them heavily with thick towels, they can provide noticeable warmth for 4 to 6 hours, often significantly longer if they are tucked inside blankets or sleeping bags.
Q6: Is it okay to use a can that previously held food for the alcohol burner?
A: Yes, provided you clean it meticulously. You must wash out all food residue, dry it completely, and ensure there is no lingering grease, as grease can flare up dangerously when heated.
Conclusion: Taking Control of Your Comfort
Knowing how to make homemade heaters isn’t just a fun weekend project; it’s a practical, essential component of home preparedness. Whether you rely on the slow, steady warmth of the terra cotta pot, the focused heat of an alcohol burner, or the long-lasting, safe warmth of wrapped hot water bottles, you now possess clear, actionable steps to increase your comfort level when the temperature drops unexpectedly.
Remember, preparation is the ultimate source of warmth. By keeping a few key, non-perishable supplies on hand and practicing these methods safely now, you ensure that you and your family can maintain a cozy environment regardless of what the weather—or the power grid—throws at you. Stay warm, stay safe, and enjoy the satisfaction of creating your own essential heat source!